Read what is EC2, available types, and its pricing model in our below blog.
https://www.easydeploy.io/blog/?p=1522&preview=true
In this article, we will be doing pure hands-on with respect to EC2 creation, technical aspects to be considered while operating with EC2, different types, and OS supported, few things about AMI (Amazon Machine Image), and Snapshots.
Let’s get started.
An EC2 instance can be launched in multiple ways such as using a console which is a basic method used, another way is using CLI commands, or either using Lambda (API function) and one more way is using an Infrastructure as Code service i.e. Cloudformation.
Your EC2 instance can be of two types one being a Public instance and another is a Private instance.
A Public instance is one which is having public IP and is reachable from outside your network whereas, a Private instance will have only private IP and cannot be reached from outside of your defined network. When you stop and start a public instance its IP address will be changed and in a private instance, its IP remains the same.
Launching an EC2 instance
Below are the steps to launch an Amazon Linux EC2 machine using the console.
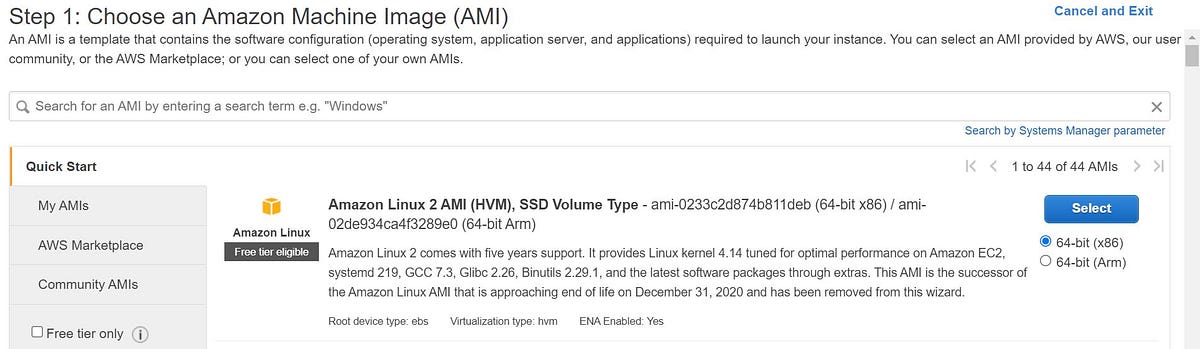
- Login to console and choose EC2 wizard and click on launch instance. Here, we are choosing Amazon Linux 2 AMI.
An AMI is a template that contains the software configuration (operating system, application server, and applications) required to launch your instance. You can select an AMI provided by AWS, user community, or the AWS Marketplace; or you can select one of your own AMIs.
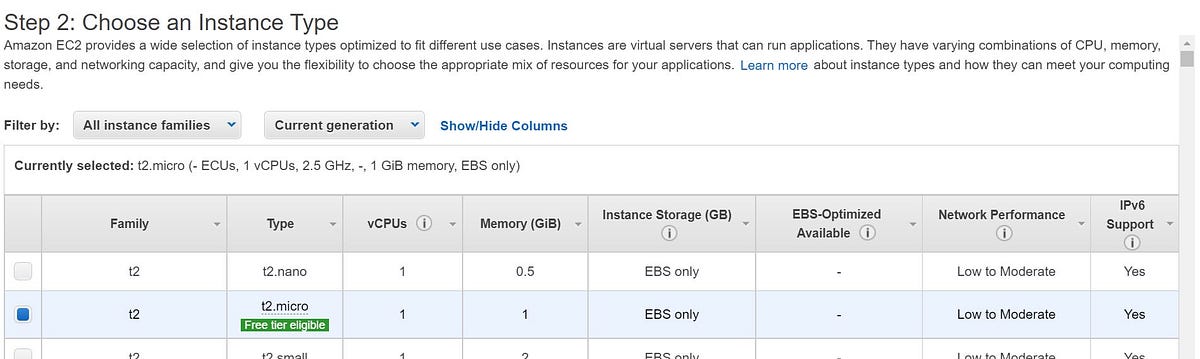
2. Choose the required instance type (instance types are discussed in our other article). Here, we are choosing t2.micro general purpose instance as it is available in the free tier.
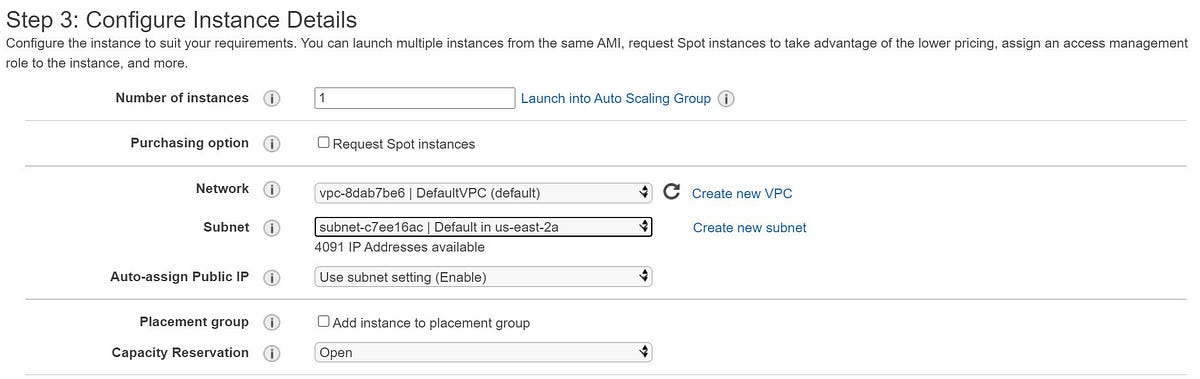
3. This step allows you to configure your instance details such as VPC, Subnet, Public IP, IAM role, and few other pre defined parameters. Here, we are launching 1 t2.micro instance into default VPC and Public Subnet. (We will be discussing in details regarding VPC in our coming blogs).
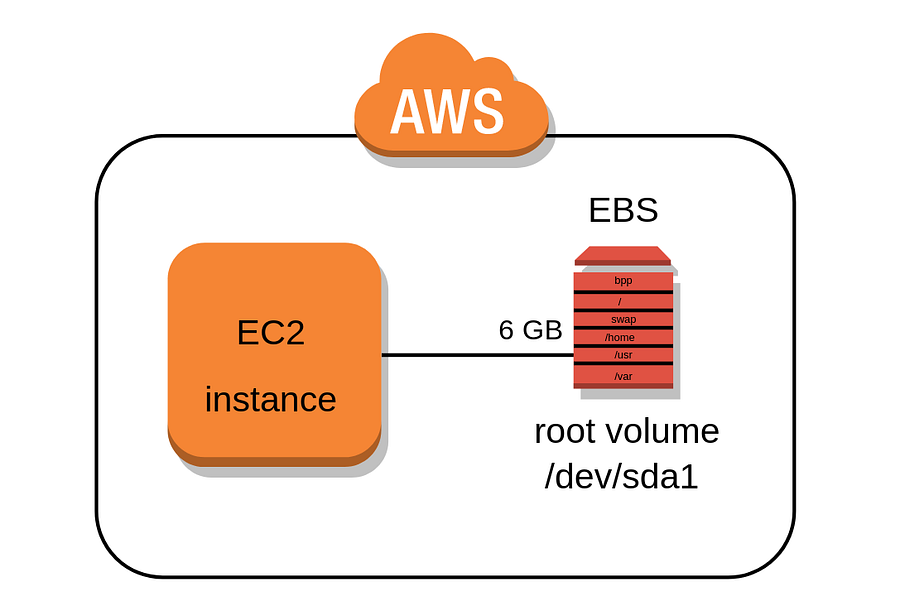
4. In this step we will choose the required storage capacity as well type of volumes. In general Linux machine’s Root volume will be “/dev/xvda” and for Windows, it will be “/dev/sda1”. We can add additional storage if required as well as encryption for the data.

5. Add Tags as per the standards followed. A tag consists of a case-sensitive key-value pair. These are very useful when you are defining any API function based on Tags.

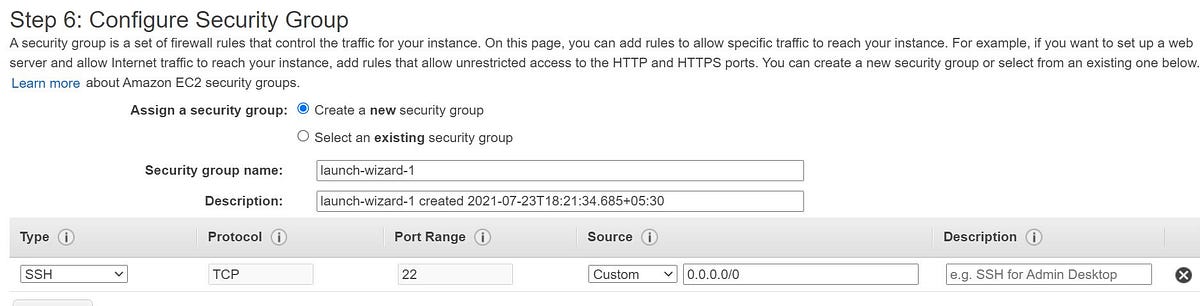
6. A security group is a set of firewall rules that control the traffic for your instance. On this page, you can add rules to allow specific traffic to reach your instance. You can choose existing Security Group or can define your own. We are going with default here as port 22 is allowed from internet and this is sufficient for connecting to this machine via SSH.
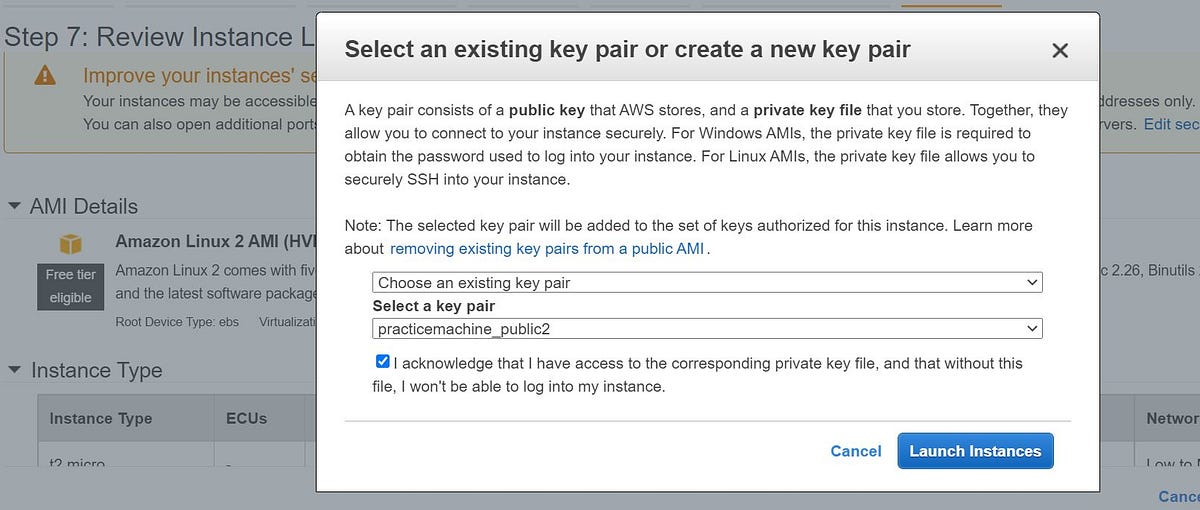
7. In this step we will verify all parameters and choose the key pair to connect to this instance.
A key pair consists of a public key that AWS stores, and a private key file that you store. Together, they allow you to connect to your instance securely. For Windows AMIs, the private key file is required to obtain the password used to log into your instance via RDP. For Linux AMIs, the private key file allows you to securely SSH into your instance.
8. Once clicked on launch, your instance will be launched in less than one minute and ready to connect.
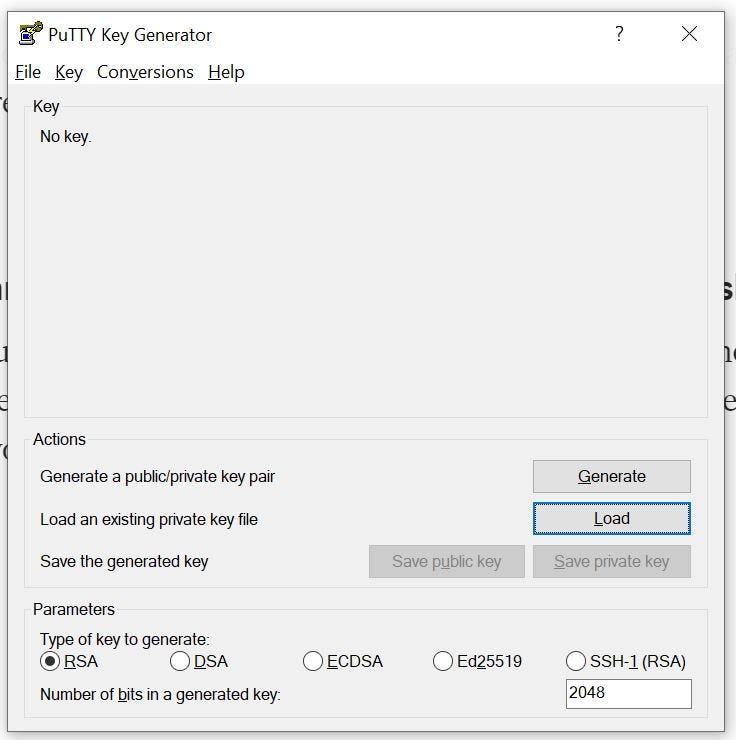
How to convert .pem ssh key to .ppk format?
- When you create a key pair in the final stage of launching instance the key will be created as .pem file and if you are going to connect to the instance from a windows machine, you need to convert it to .ppk file inorder to connect your instance.
- Click on Load and locate your .pem file once you select it key will be imported and click on Save private key which will be now converted to .ppk format which you need to use to connect with instance.
How to connect to an instance using putty and .ppk file?
- Launch a putty session and enter username and public IP of the instance. By default username would be “ec2-user” for example ec2-user@publicip.
- Now select “ssh” > “Auth” and browse for your .ppk file.
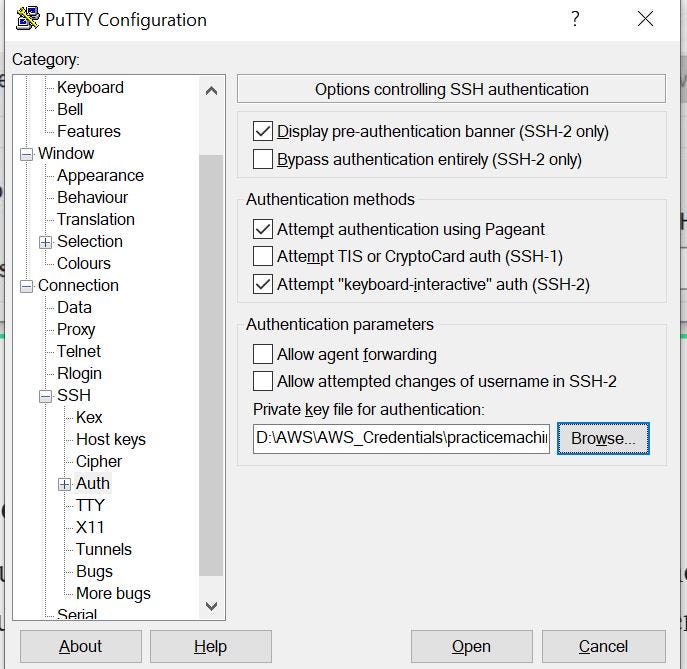
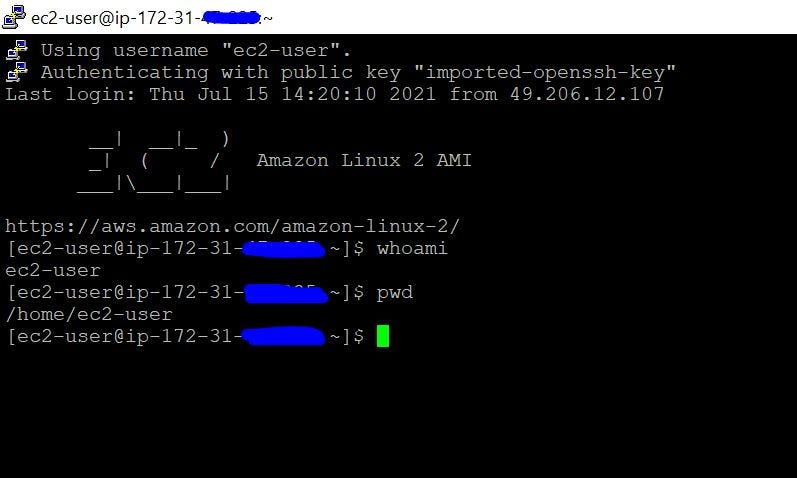
3. Click on open and select yes to connect to your instance.
Run commands on your Linux instance at launch
When you launch an instance in Amazon EC2, you have the option of passing user data to the instance that can be used to perform common automated configuration tasks and even run scripts after the instance starts. You can pass two types of user data to Amazon EC2: shell scripts and cloud-init directives. You can also pass this data into the launch wizard as plain text, as a file (this is useful for launching instances using the command line tools), or as base64-encoded text (for API calls).
It has a prerequisite that your instance should have a public DNS name that is reachable from the internet. You must also configure your security group to allow SSH (port 22), HTTP (port 80), and HTTPS (port 443) connections.
You can specify instance user data when you launch the instance. If the root volume of the instance is an EBS volume, you can also stop the instance and update its user data.
Read more about User data here at AWS official page.
AWS EC2 CLI usage
- Launch an EC2 instance using CLI –
“aws ec2 run-instances –image-id ami-xxxxx –count 1 –instance-type t2.micro — key-name <<MyKeyPair>> –security-group-ids sg-xxxxx –subnet-id subnet-xxxxx”
- Display your AWS EC2 key pair –
“aws ec2 describe-key-pairs –key-name MyKeyPair”
- Delete your keypair –
“aws ec2 delete-key-pair –key-name MyKeyPair”
Conclusion
AWS Elastic Compute Cloud (EC2) offers us the easiest and fastest way to launch a virtual server and host application or website to run our business in the shortest possible time. Its vast variety of instance types and feasible pricing model is best in the industry and can be chosen to meet the requirements of business from small to enterprise level.


