In this article, we are going to cover – How to setup RDS proxy for streamlined database connectivity
Introduction
RDS proxy – Amazon RDS Proxy is a fully managed database proxy for Amazon Relational Database Service (RDS) that improves application scalability, resiliency, and security. It enables applications to pool and share database connections, reducing the overhead of opening and closing connections frequently.RDS Proxy helps handle spikes in traffic by efficiently managing connections, thus improving database performance and availability. It also enhances security by centralizing database credentials and managing IAM authentication.
Prerequisites
AWS Account: Ensure you have an active AWS account with full access.
RDS Database: You should have an existing Amazon RDS database instance (MySQL)
IAM Roles and Policies: Appropriate IAM roles and policies to allow RDS Proxy to access your RDS instances.
VPC: The RDS instance should be in an Amazon VPC.
Security Groups: Ensure security groups are set up to allow communication between your application and the RDS Proxy.
Create security group
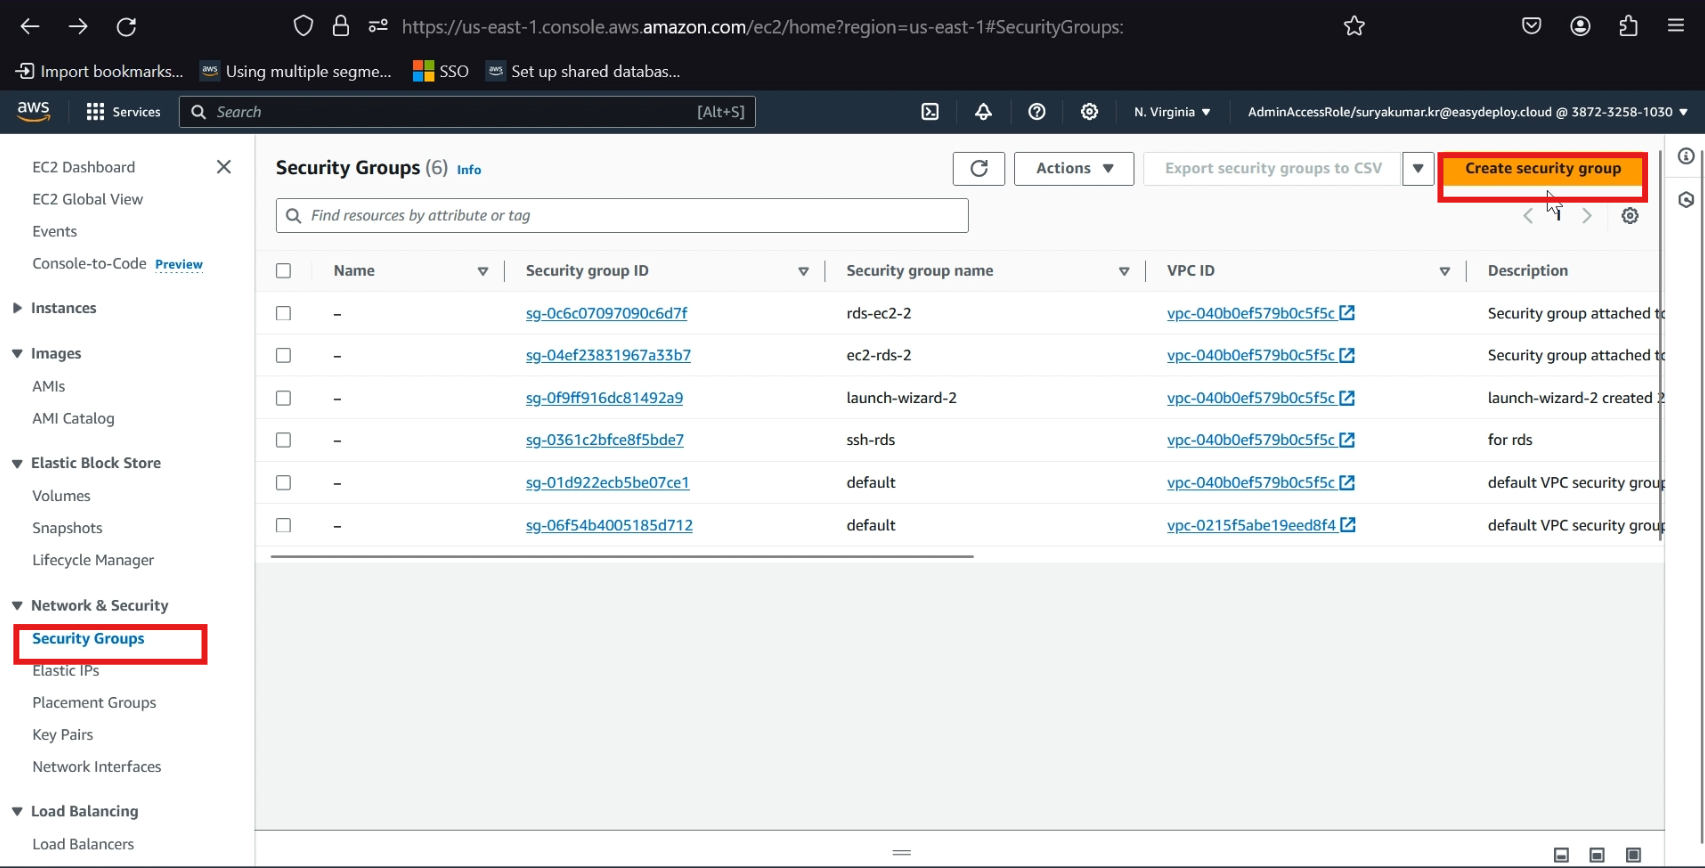
Navigate to EC2 service, select >> security groups, and click >> create security group.
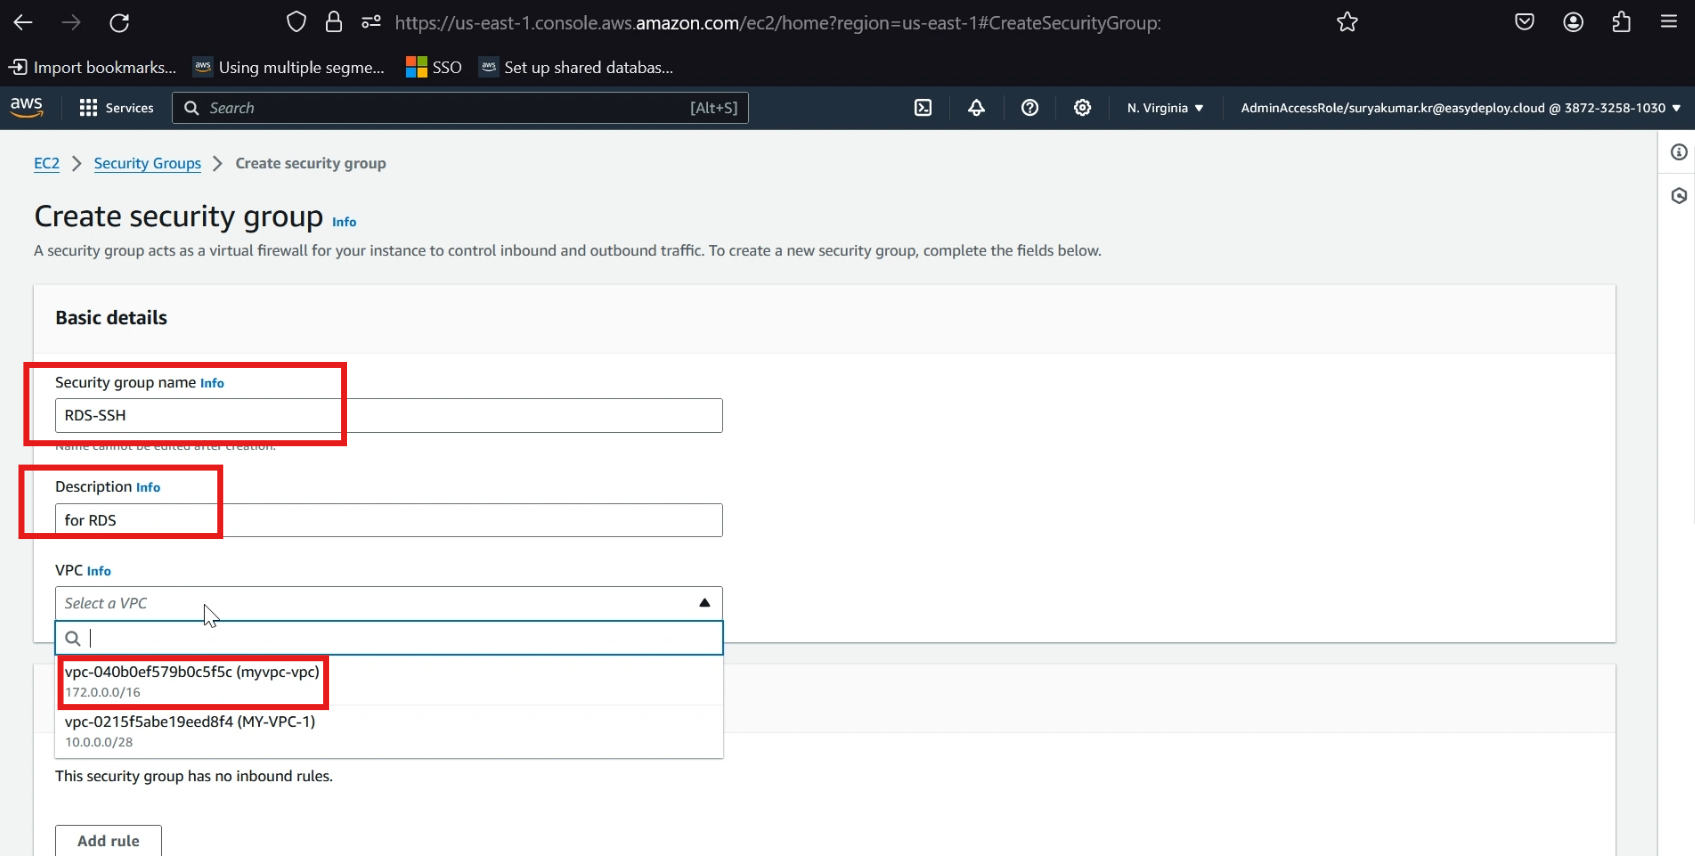
Give a >> security group name, give a >> description, select >> your vpc (iam choosing my existing vpc).
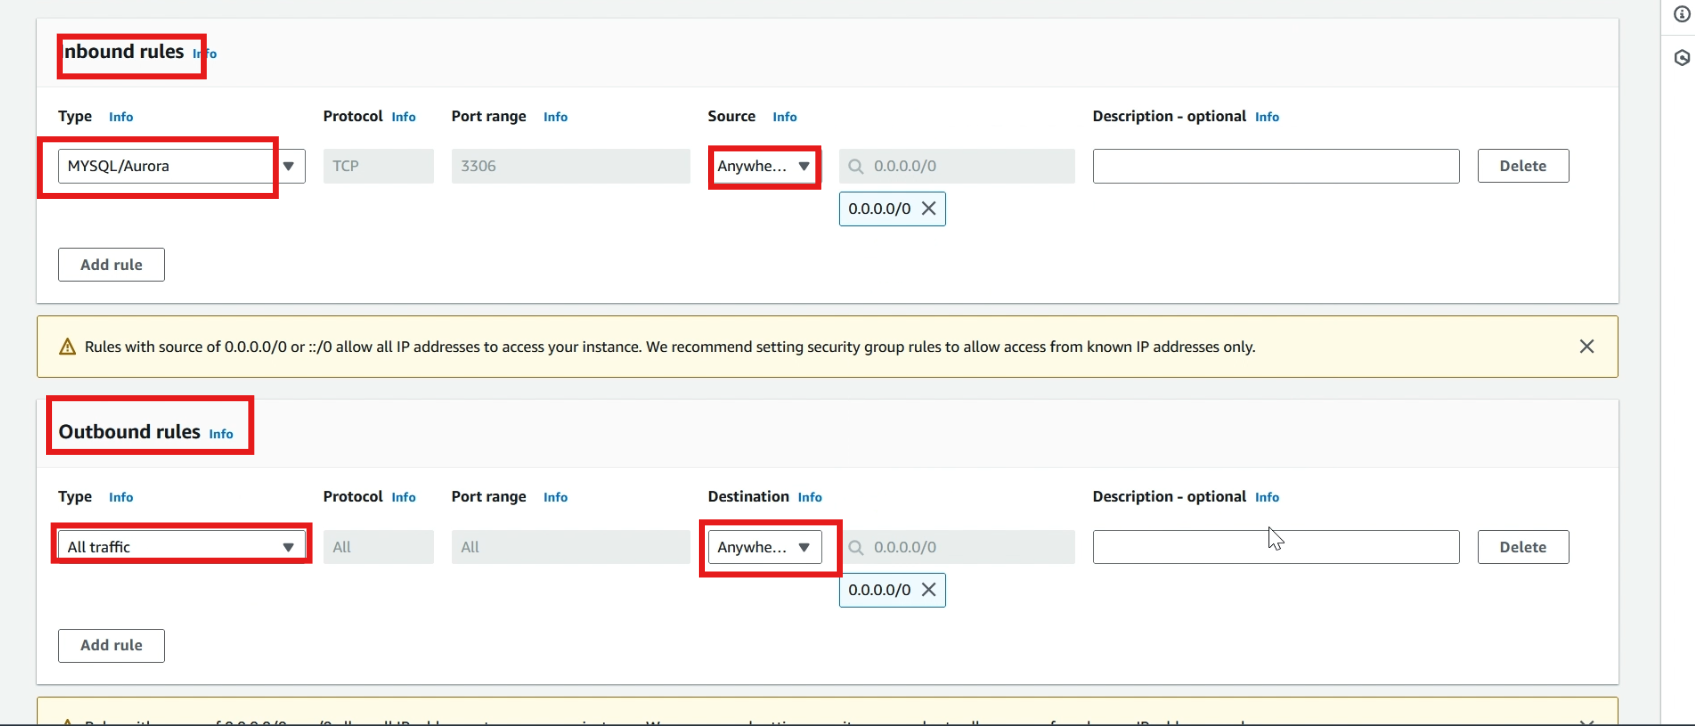
In inbound rules, choose >> mysql/Aurora in type, and source select >> anywhere ipv4.
In outbound rules, choose >> all traffic in type, and source select >> anywhere ipv4.
Click >> create security group.
Now our security group is created, click >> Edit inbound rules.

Click >> add rule, select >> all traffic in type, and select >> created security group, click >> save rules
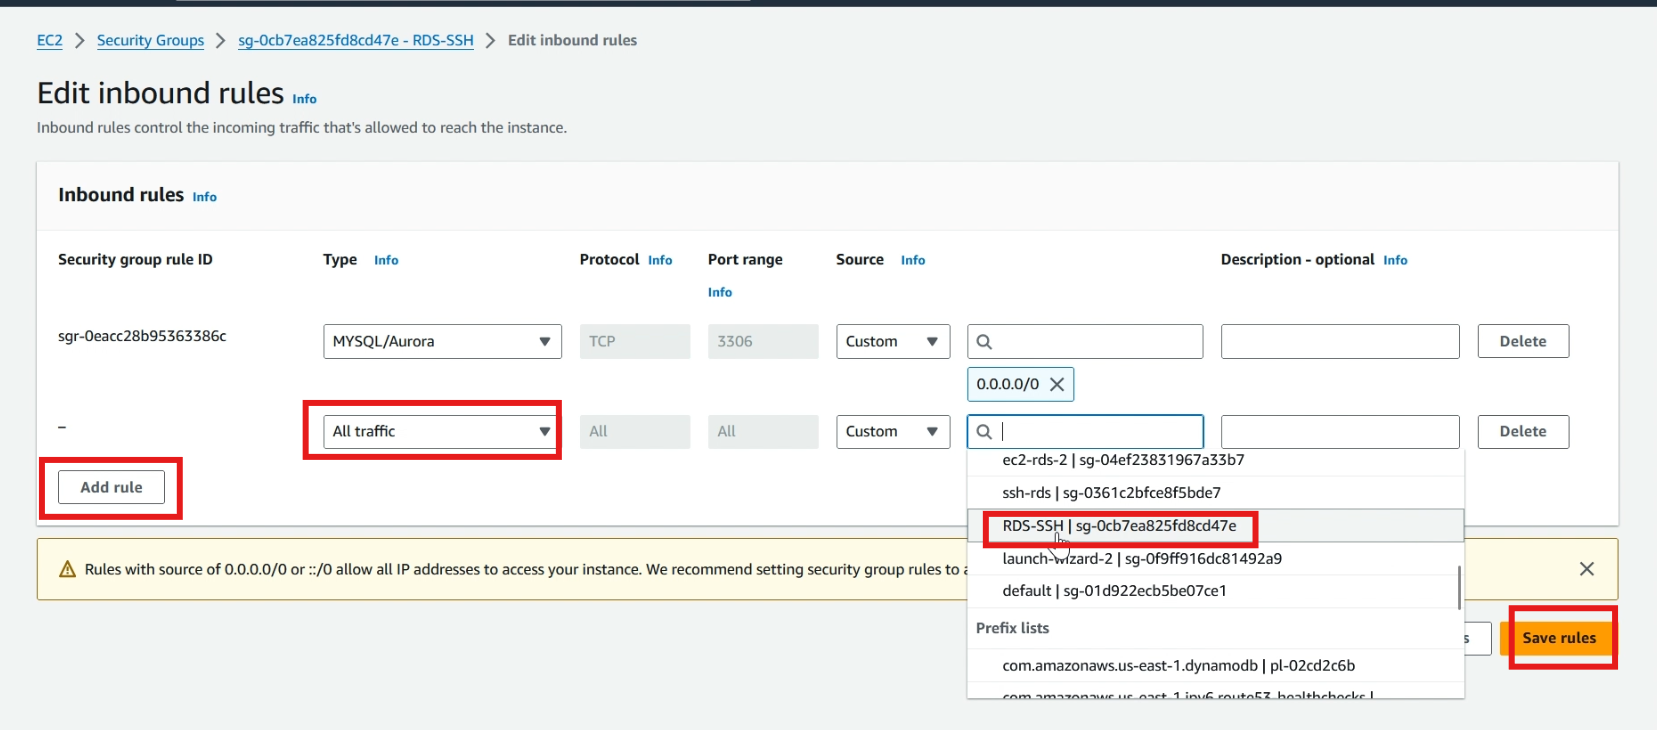
Now we successfully created a security group.
Create database
Navigate to RDS service, select >> databases, and click >> create database.
Select >> standard create.
Choose >> your engine type (I am choosing Mysql).
In templates >> choose free tier.
Give a name for the db instance and select >> self–managed.
Type >> username and type >> password to access the database.
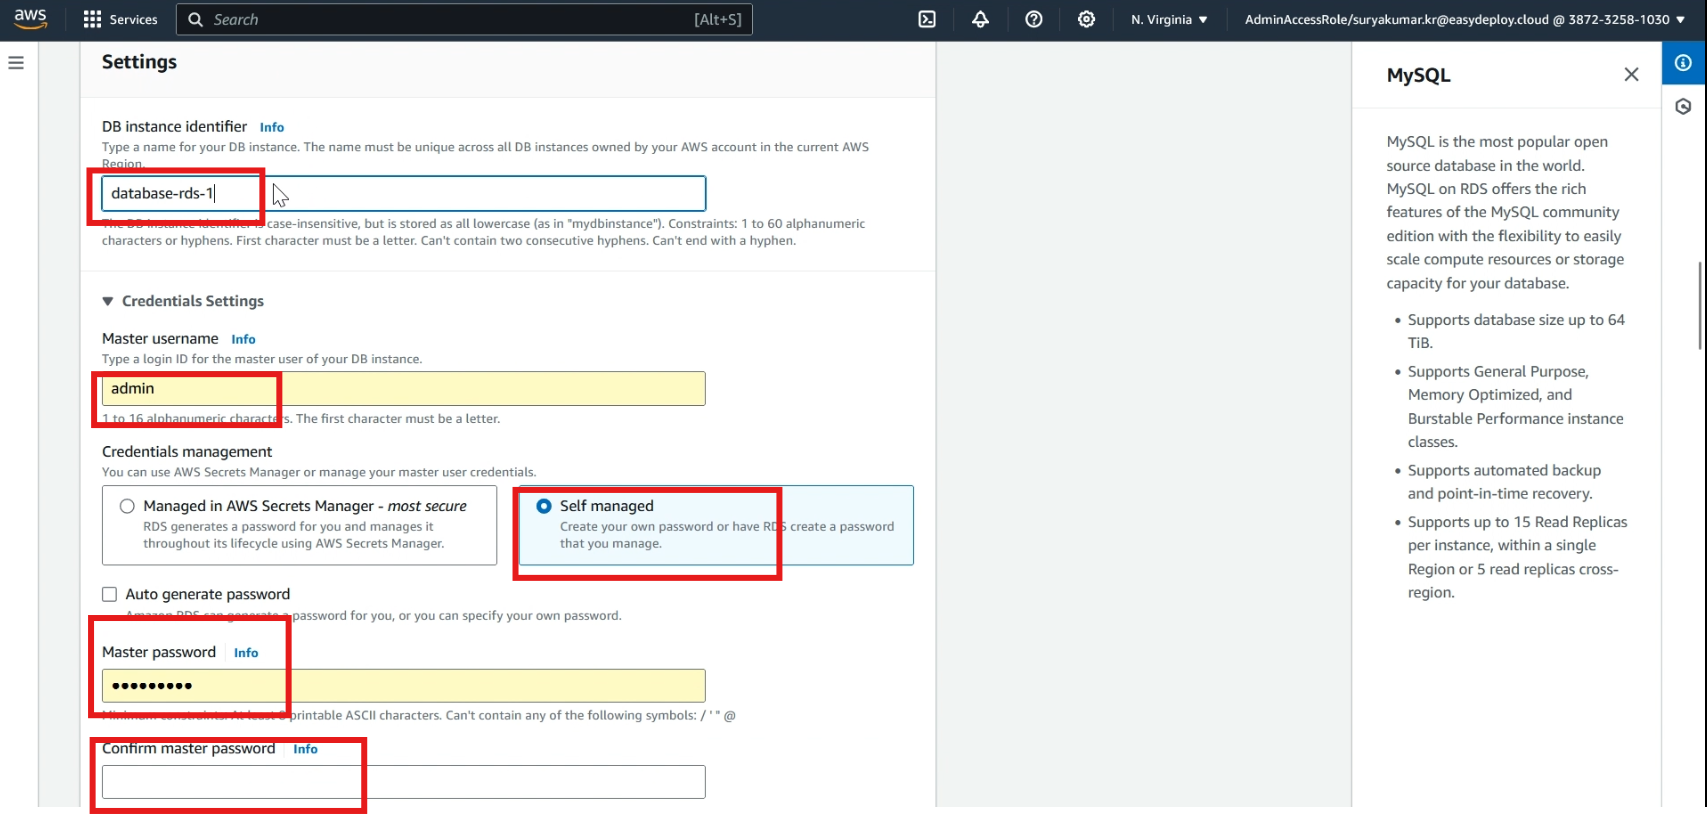
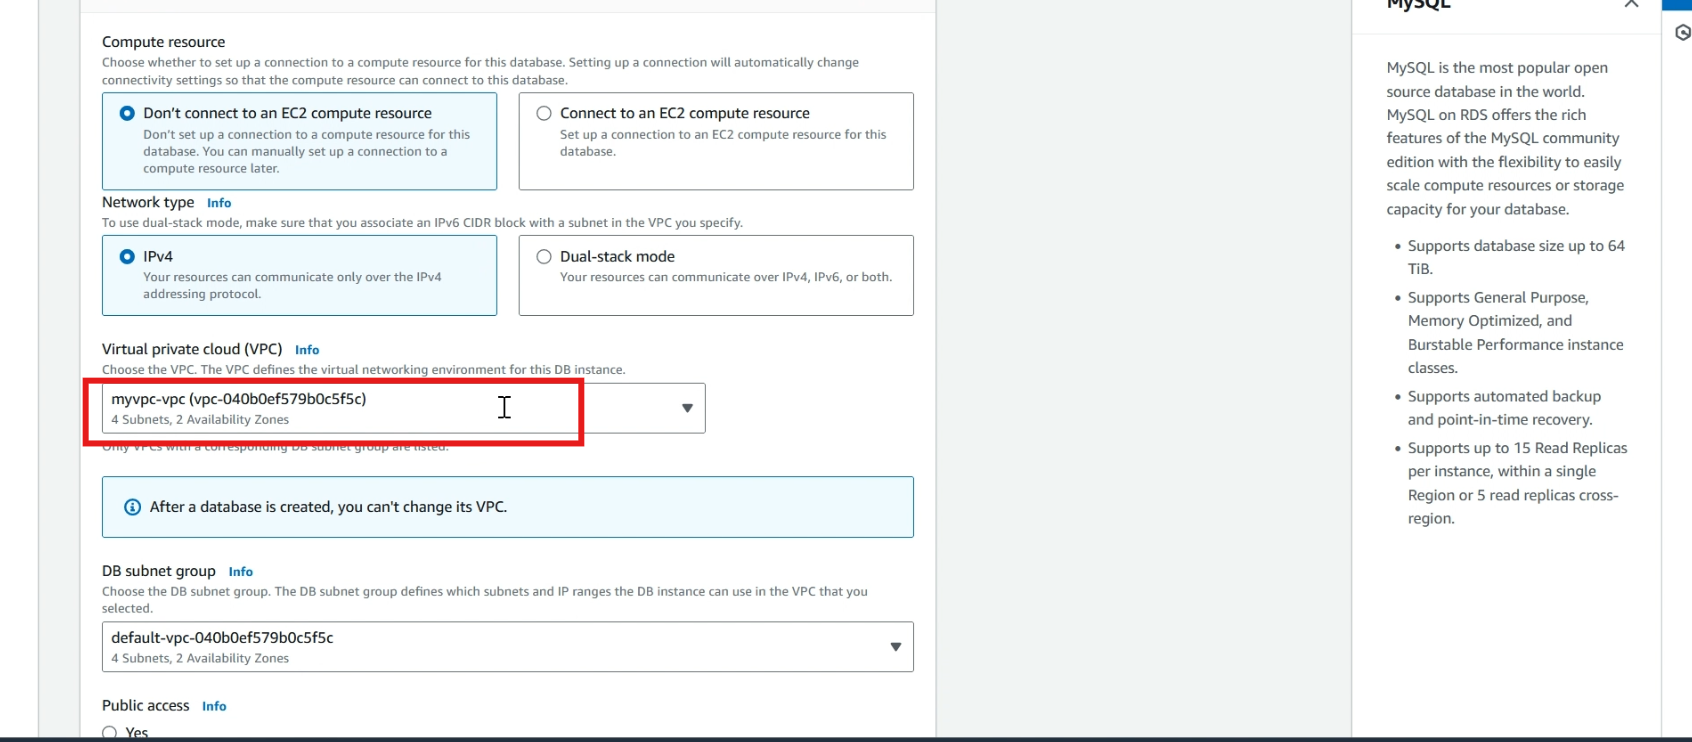
Select >> your vpc (iam choosing my existing vpc).
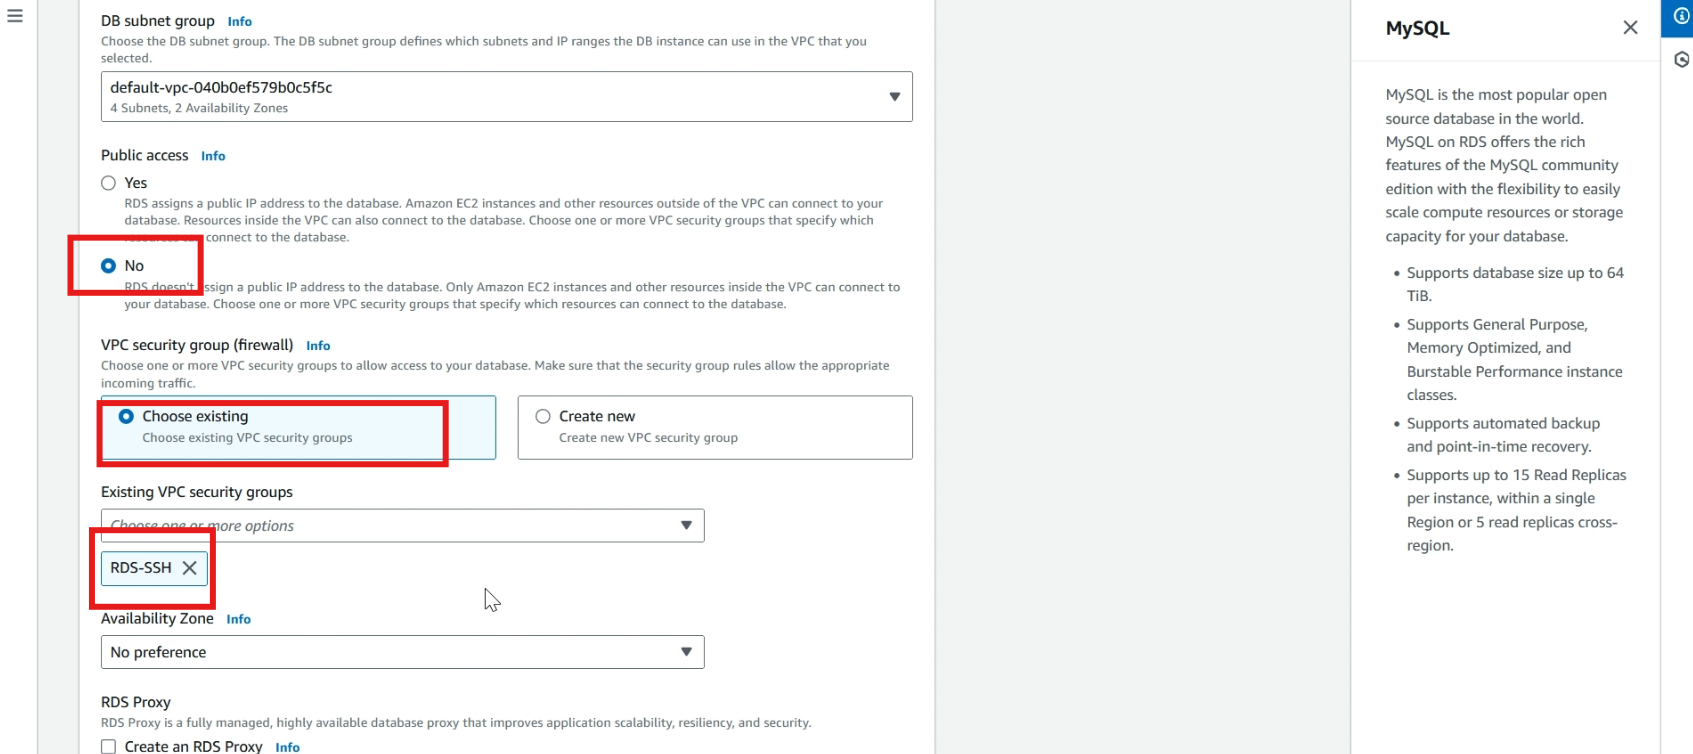
In public access, select >> no.
In vpc security group , select >> choose existing and select >> your security group that we created in the first step
Now click >> create database and it takes time to create a database.
Now the database is created successfully.
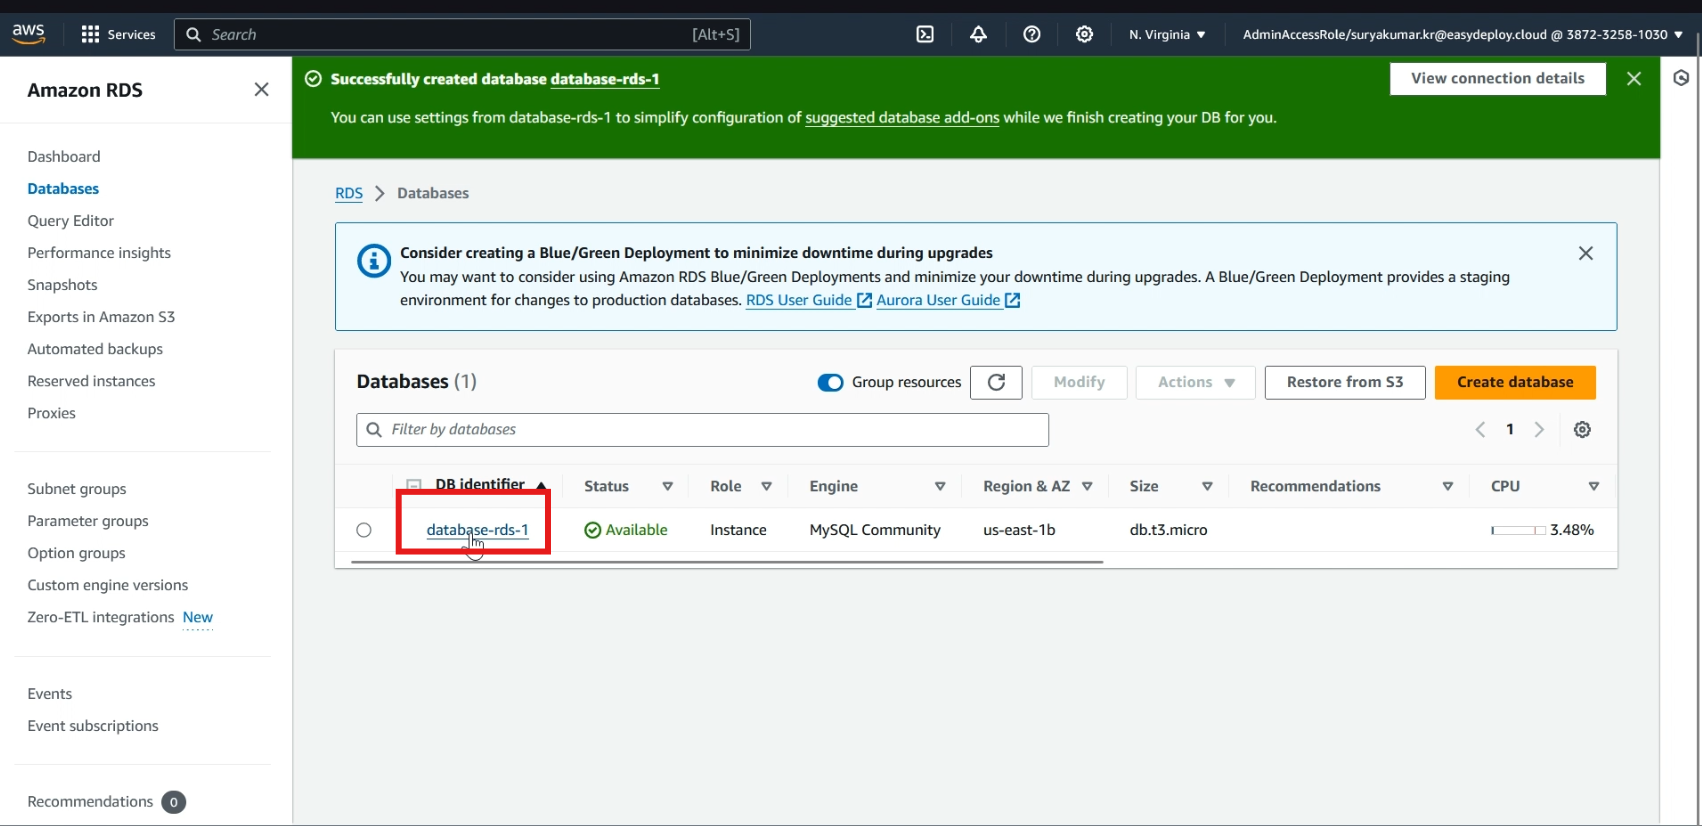
Connect database to EC2 instance
Now click and go inside your database.
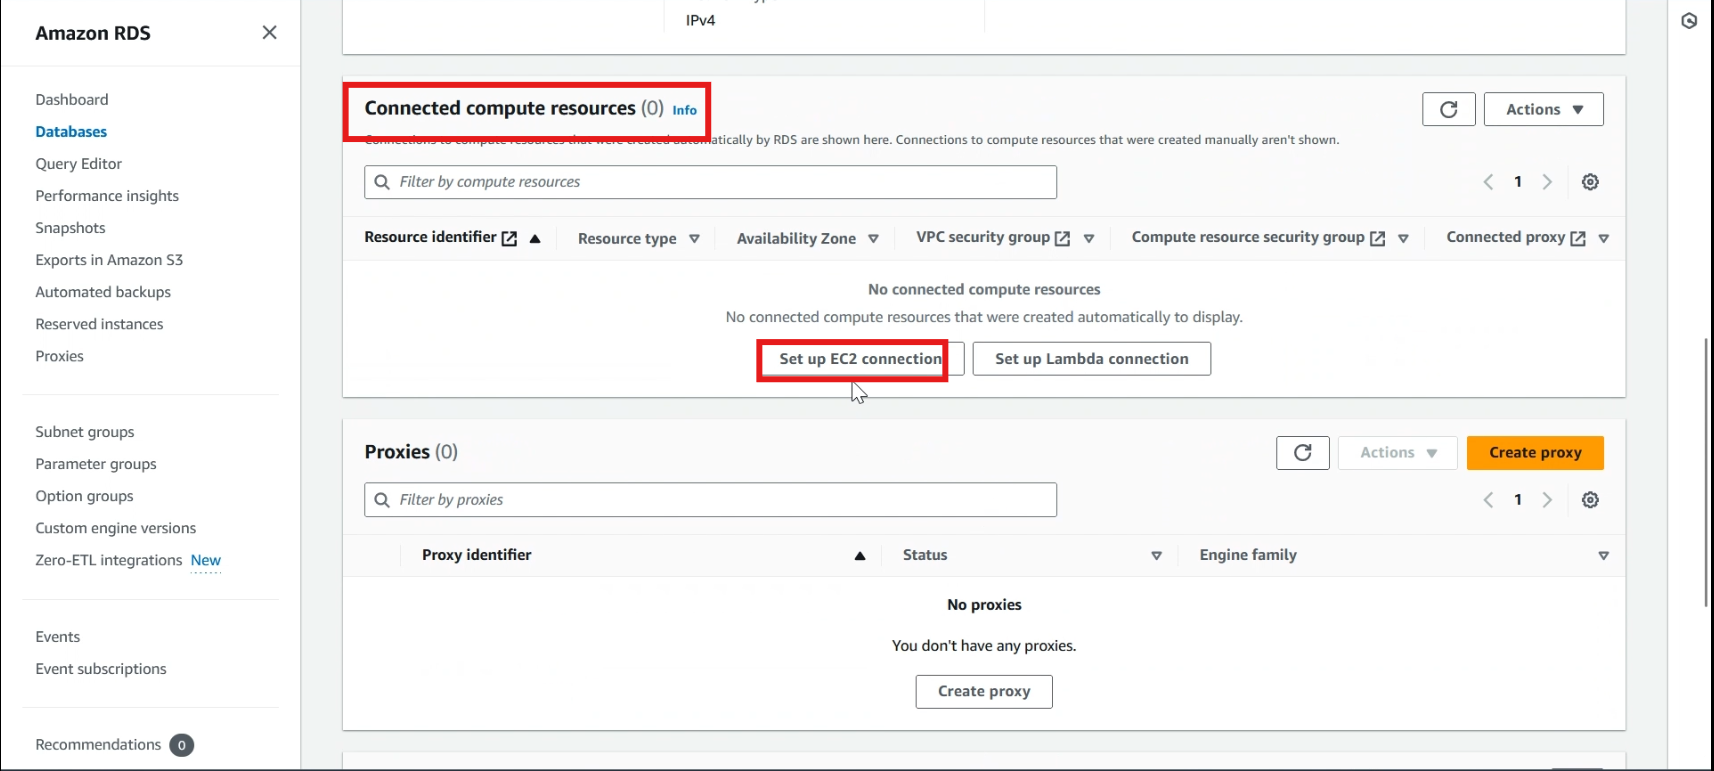
Swipe down.
In compute resources, click >> set up EC2 connection
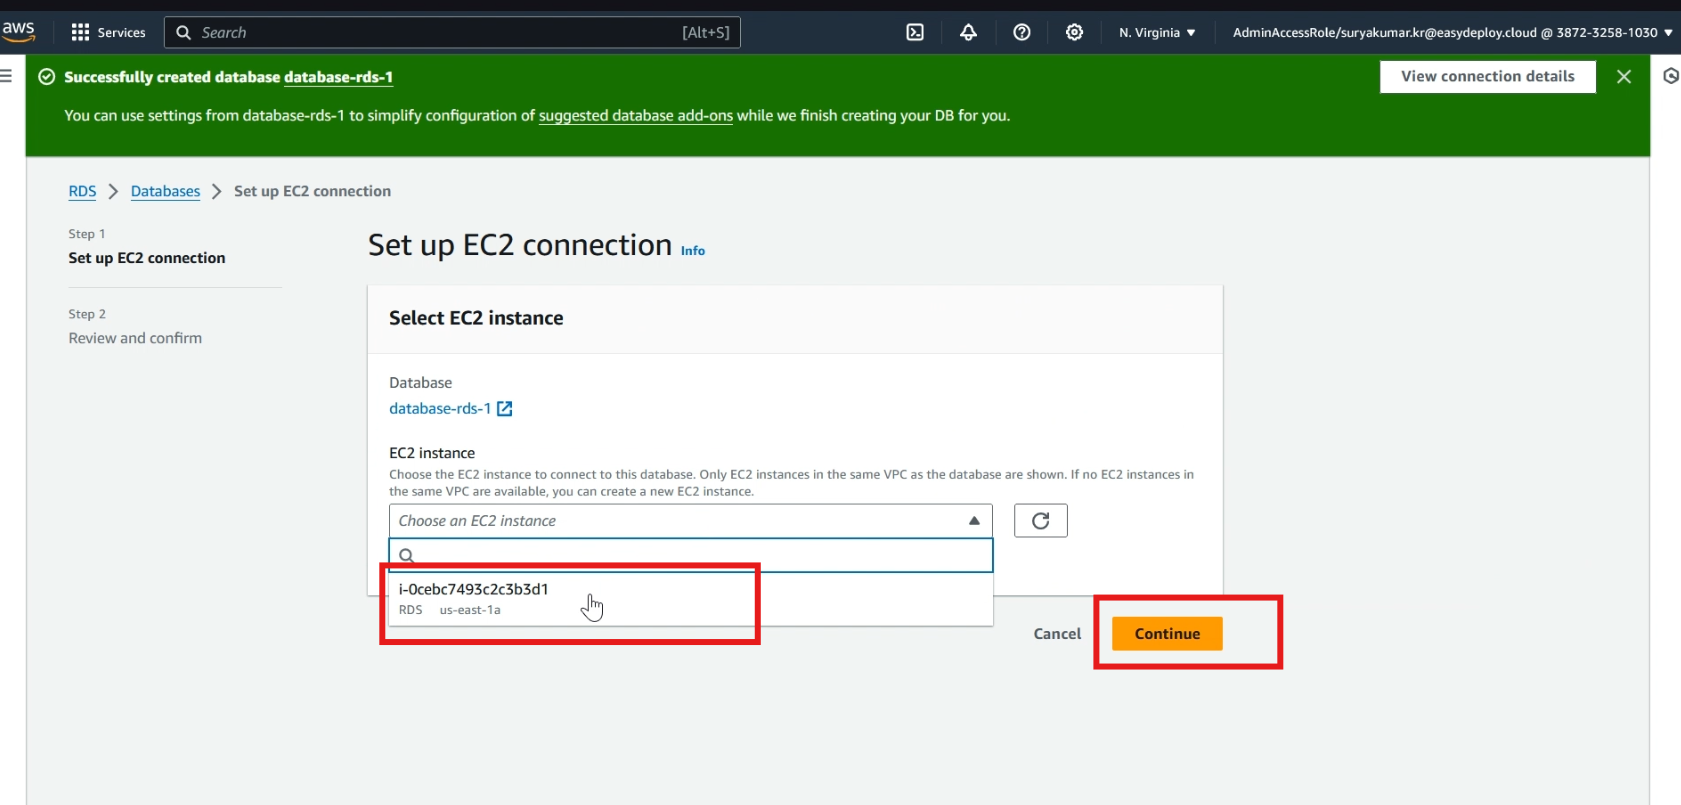
Select >> your ec2 instance and click >> continue
Click >> set up, Now our database is successfully connected with EC2 instance.
Create secret
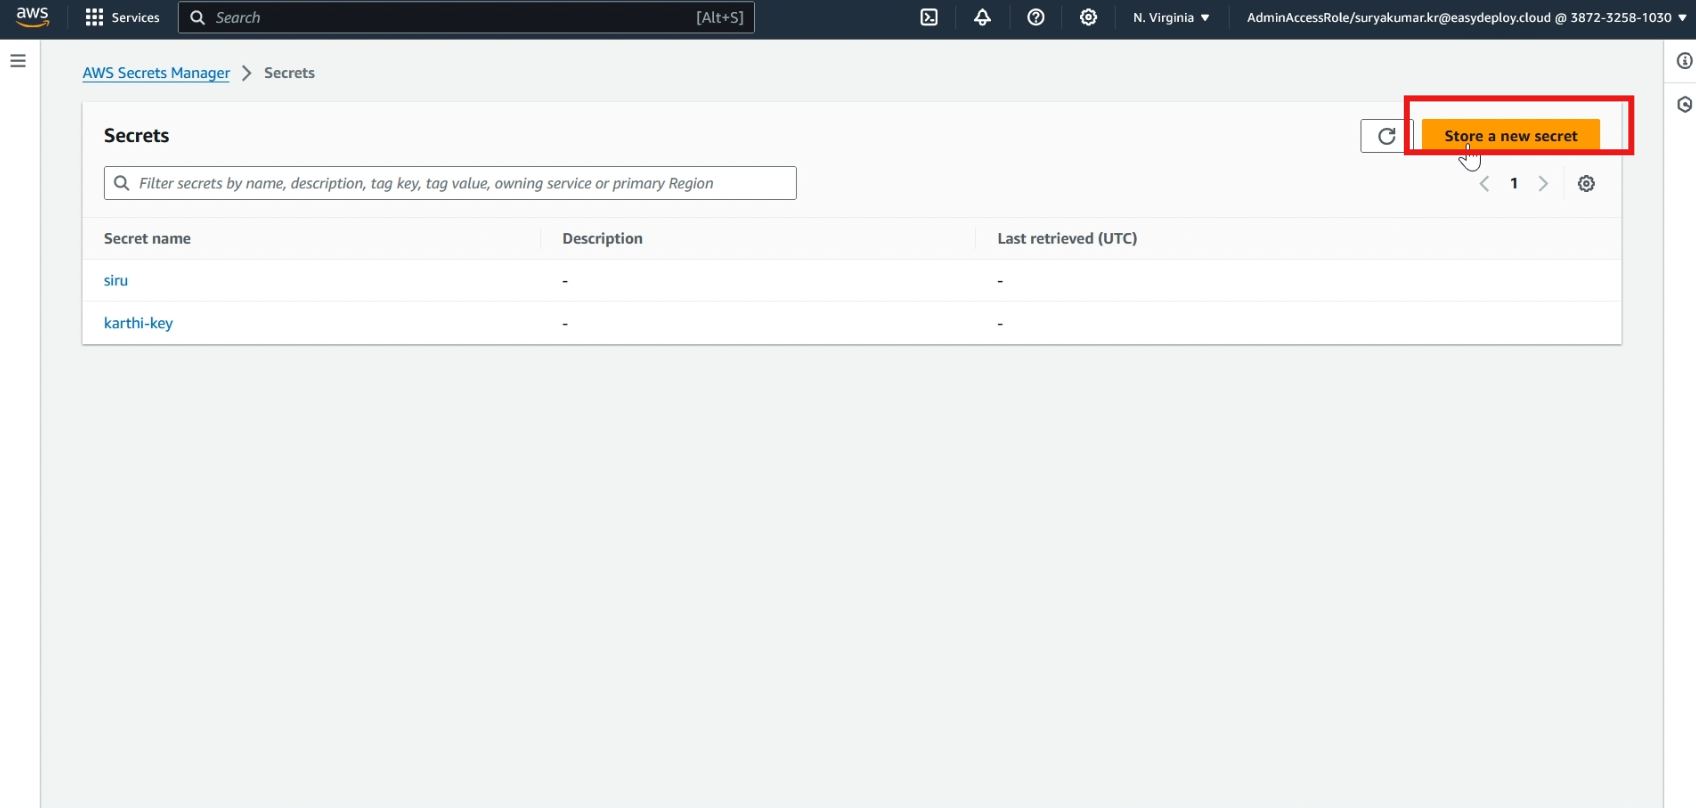
Navigate to the Secrets Manager section of your AWS Management Console and choose >> Store a new secret.
In the Select secret type, choose >> Credentials for RDS database. Then, type >> user name and password that you used when creating your database.
Select >> your database, and click >> next.
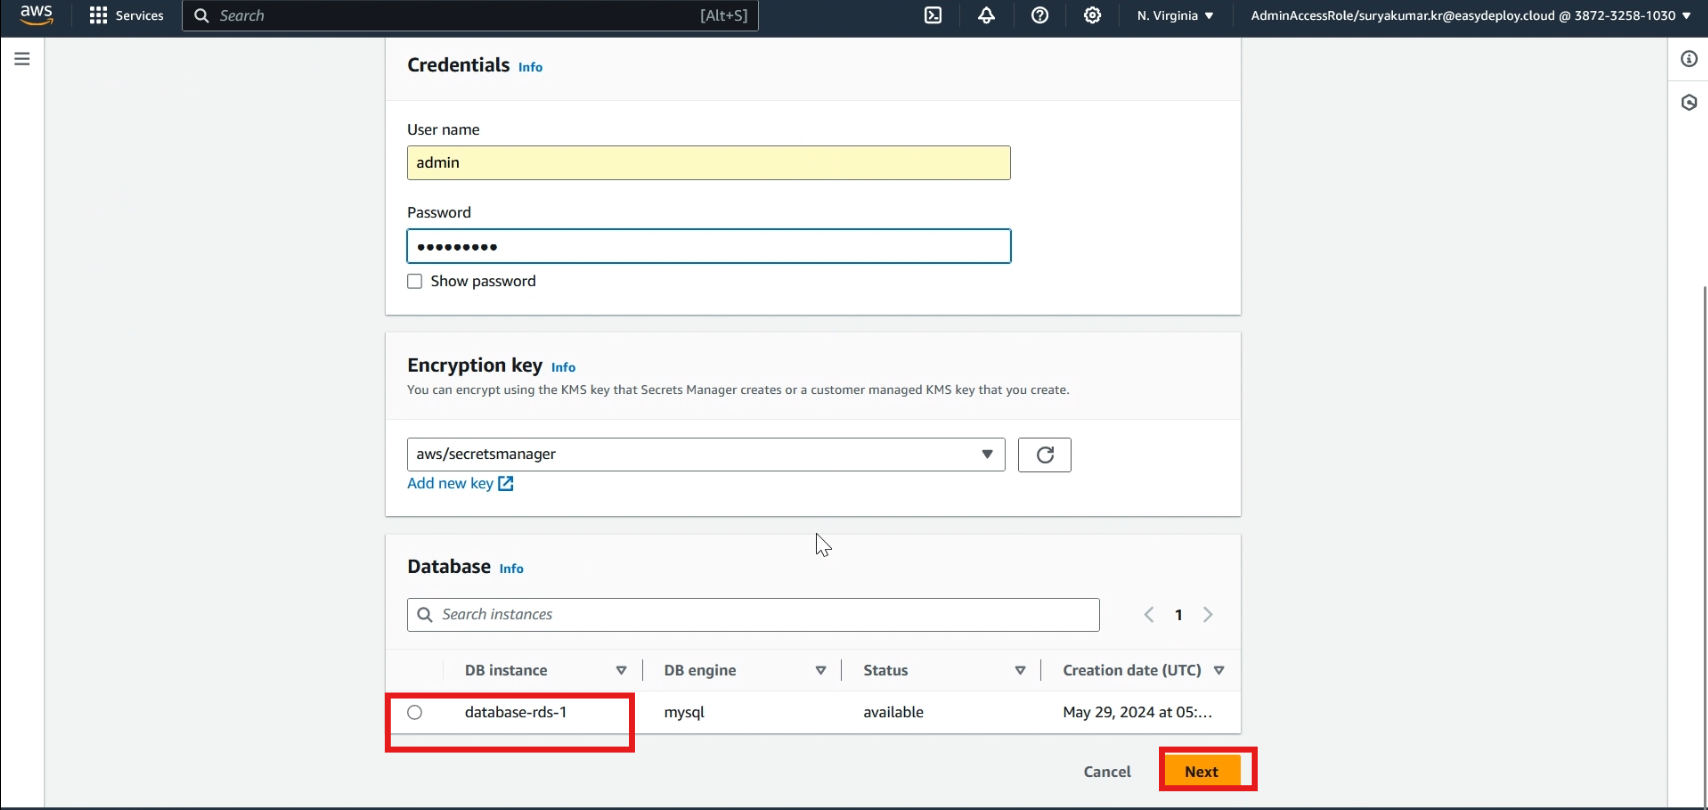
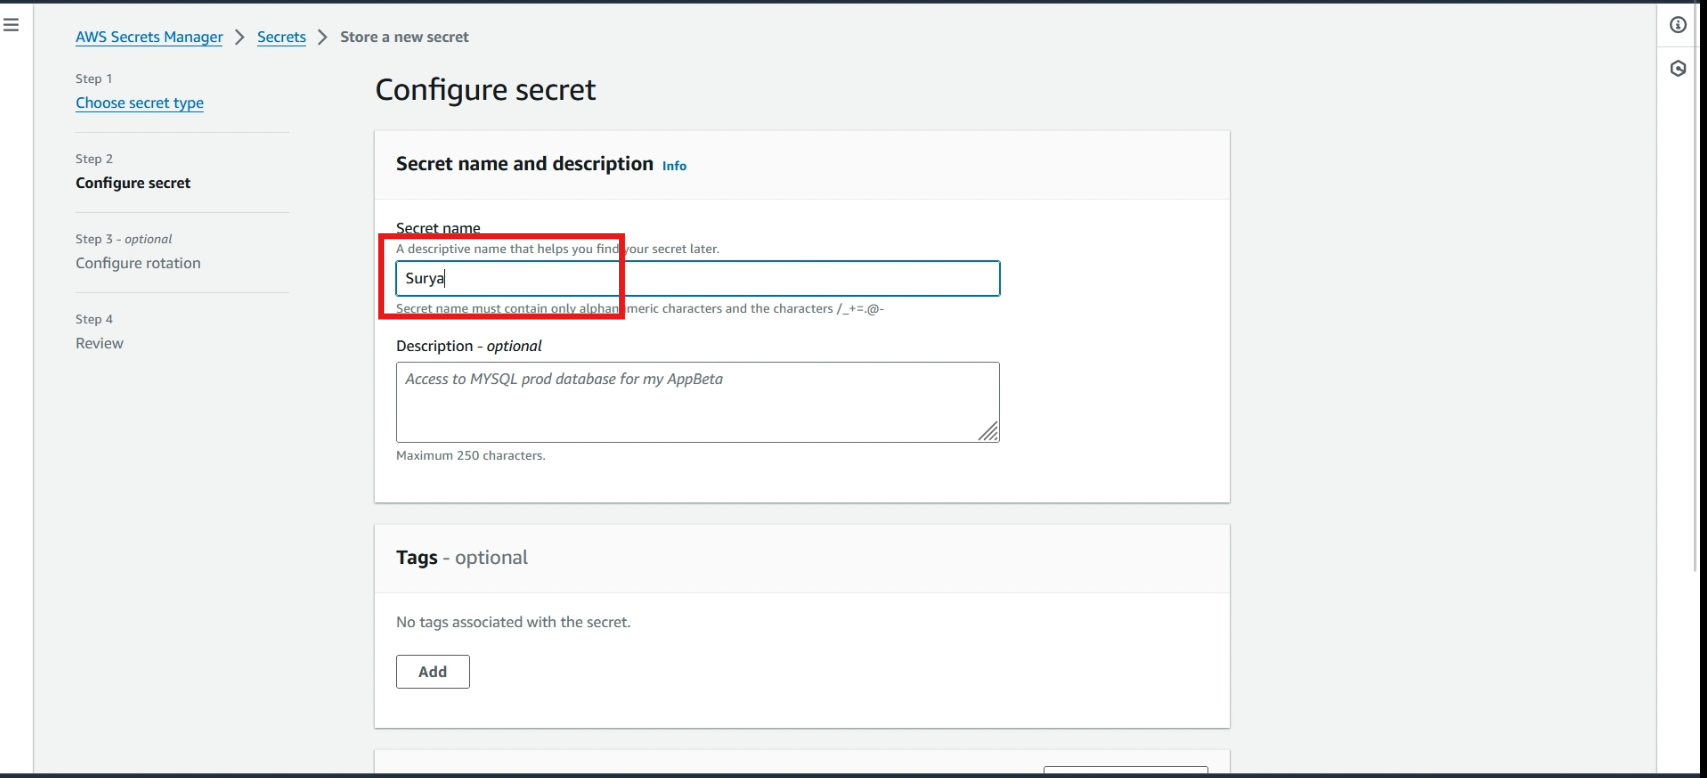
Give a >> name to the secret and click >> next, and click again >> next
Now the secret was created.
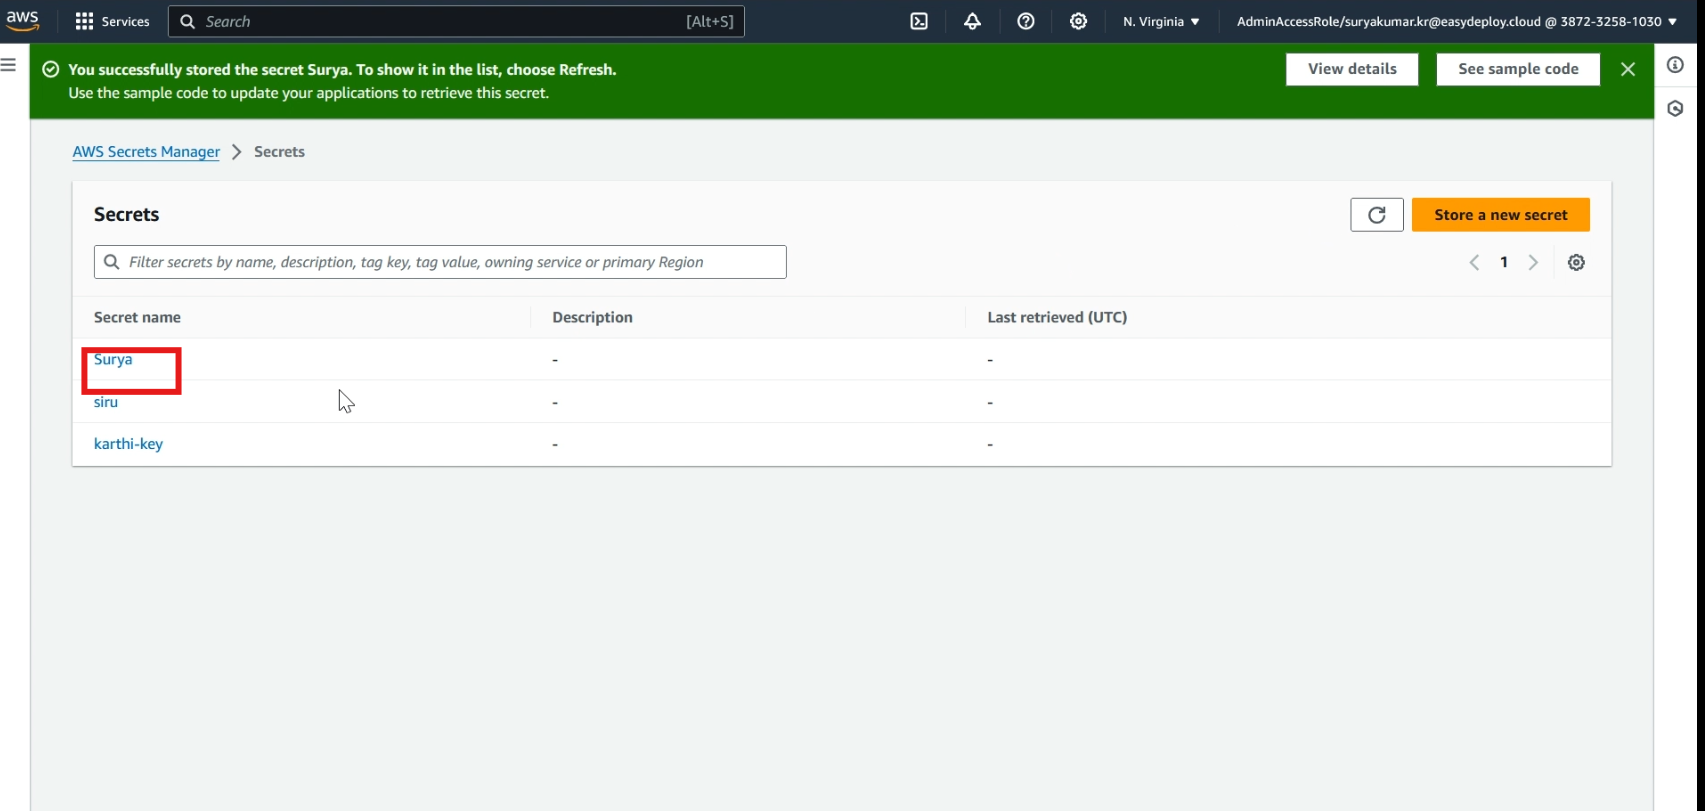
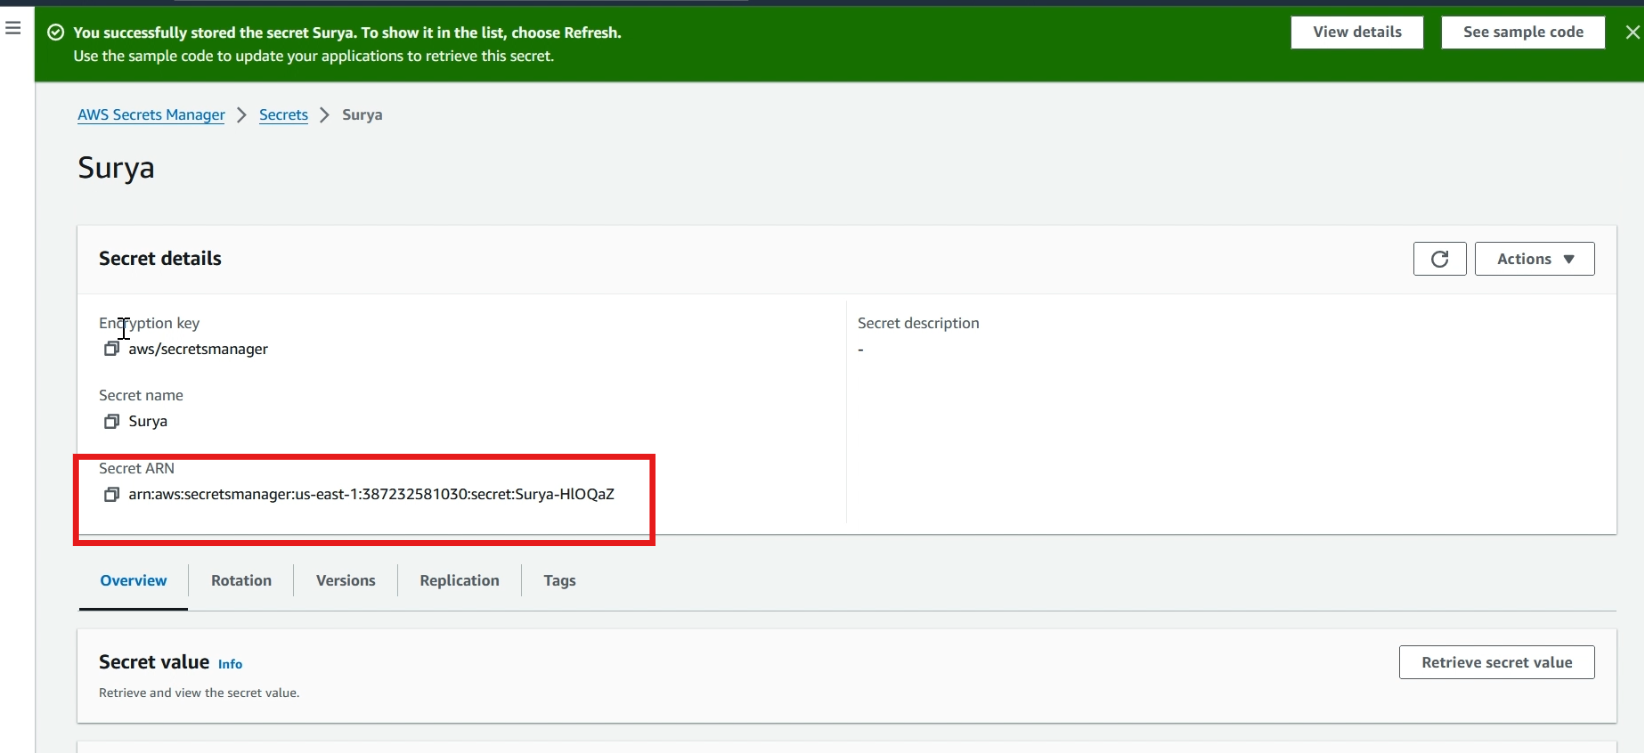
Click >> your secret, and copy your secret ARN.
Create policy and role
Navigate to IAM service, click >> policies and click >> create policy.
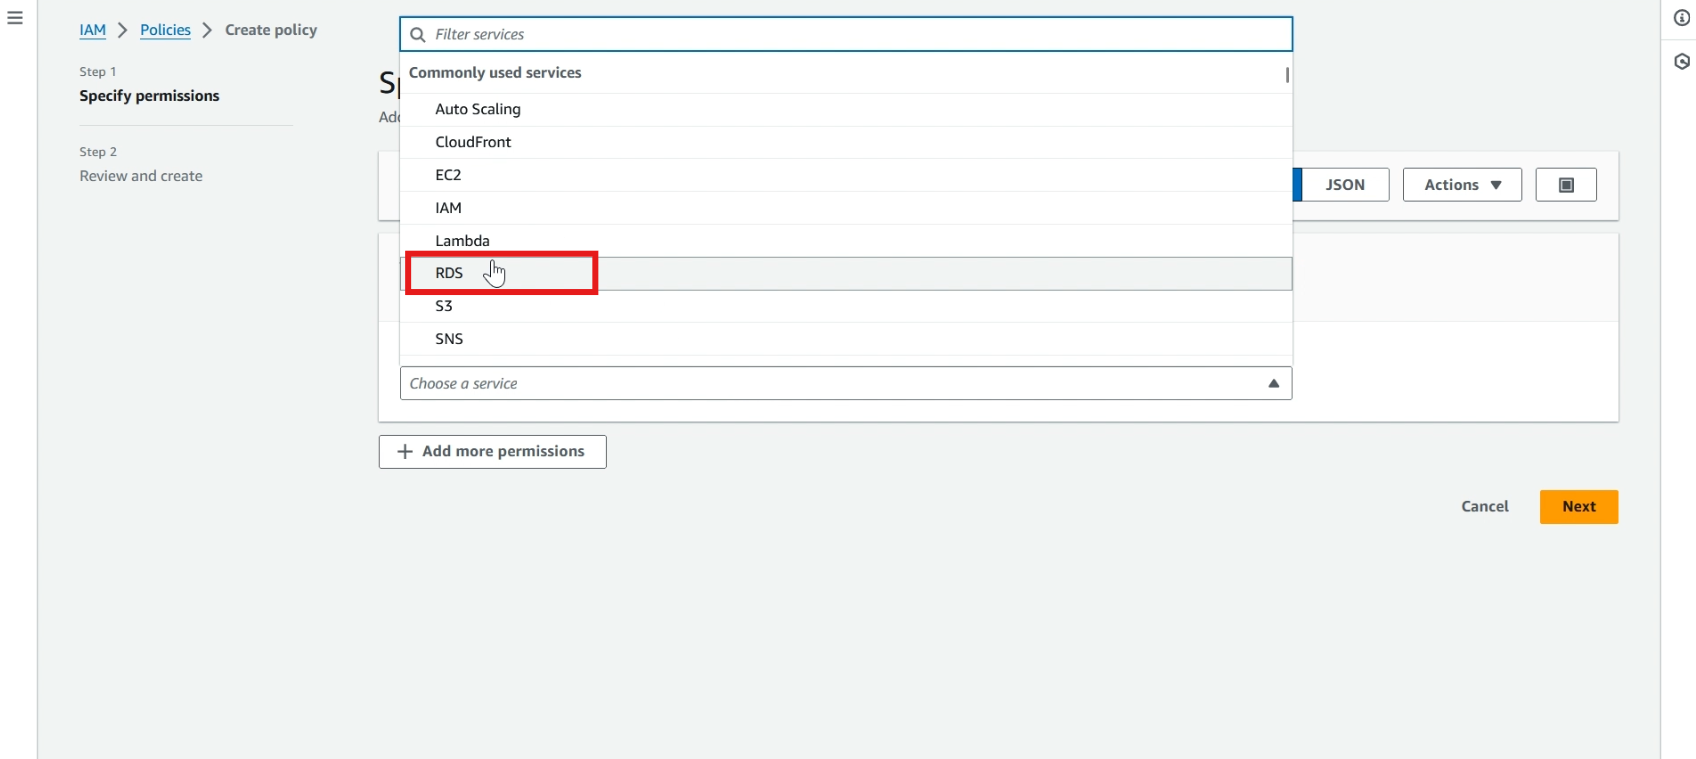
In service, select >> RDS, select >> RDS-add role to database.
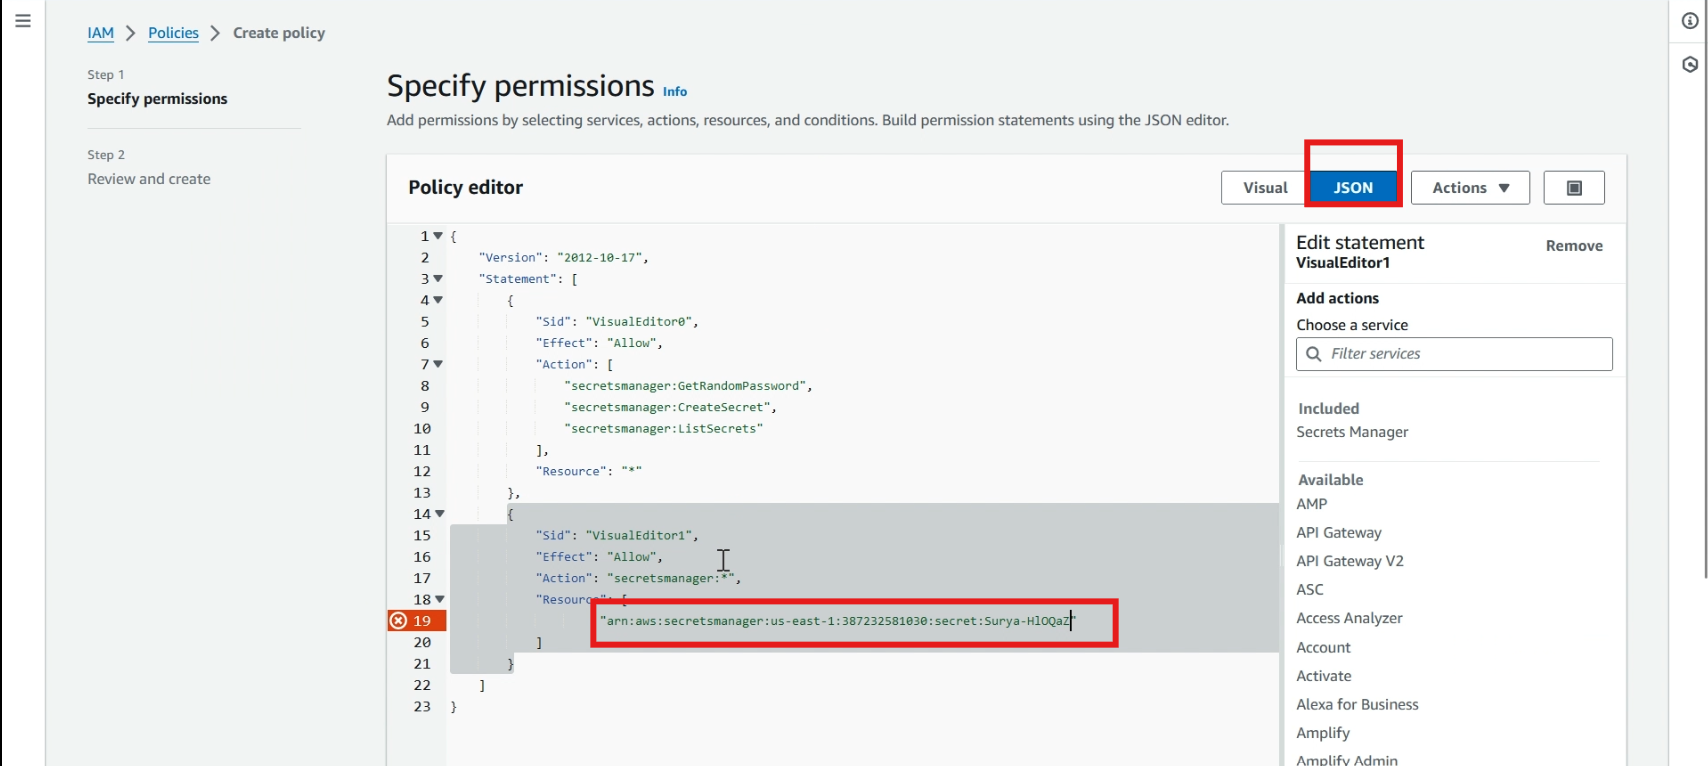
Click >> JSON, Replace the current script with the new one. This is my repository, and you can find the new script at https://github.com/easydeploy-cloud/RDS_proxy-RDS_database_connection.
Paste your >> secret ARN here, and click >> next.
Give a >> policy name, click >> create policy.
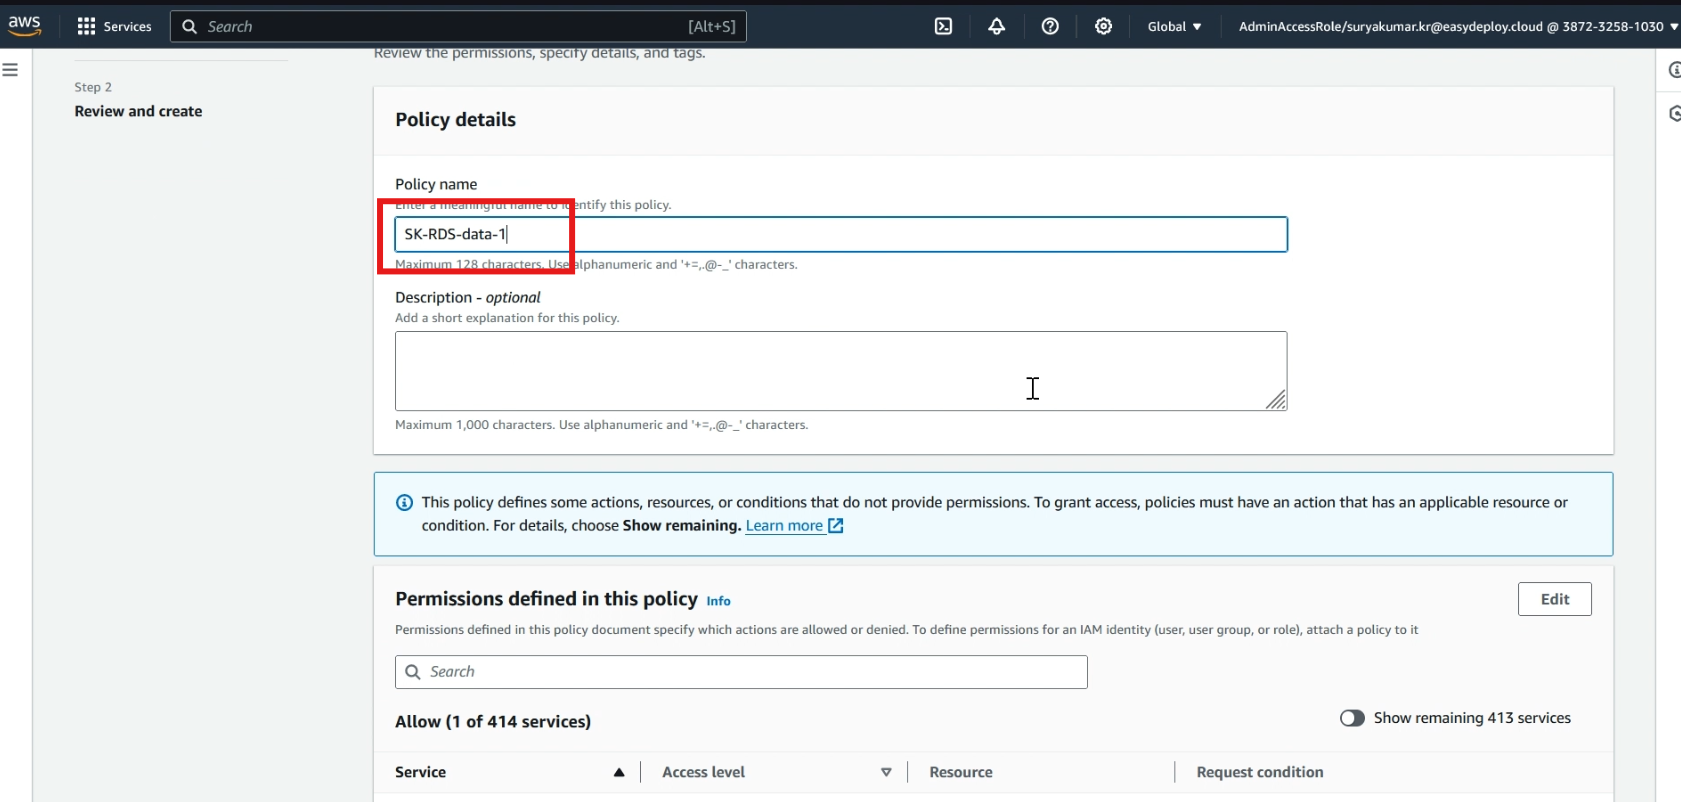
Now we successfully created a policy, we want to attach the policy to a new role
Click >> roles, and click >> create role.
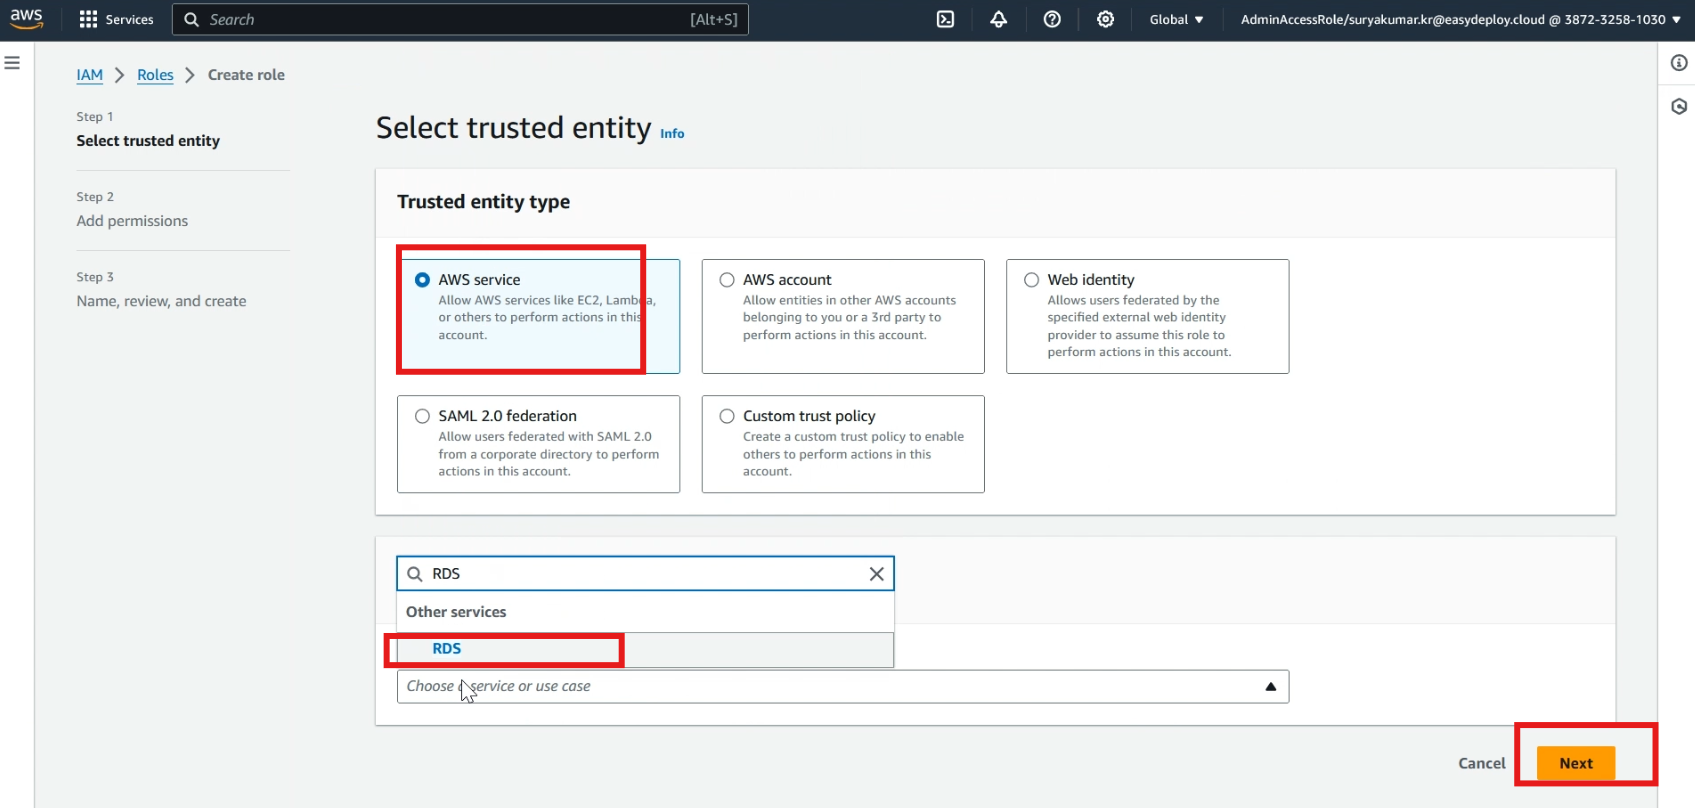
Select >> AWS service in trusted entity type, click >> choose a service, and select >> RDS, now click >> next.
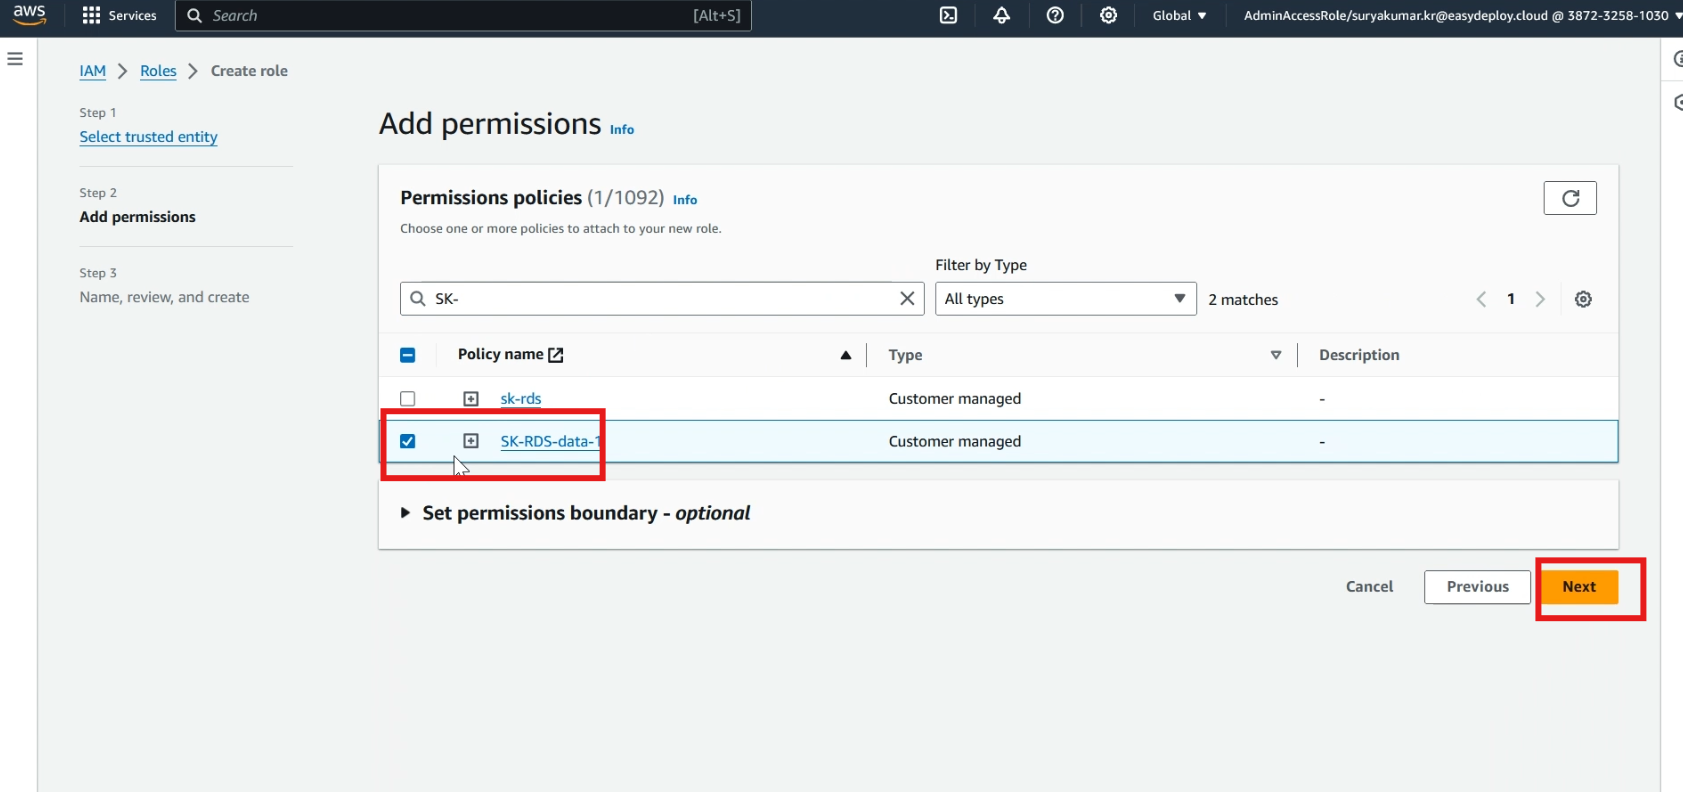
Select your >> created policy, and click >> next.
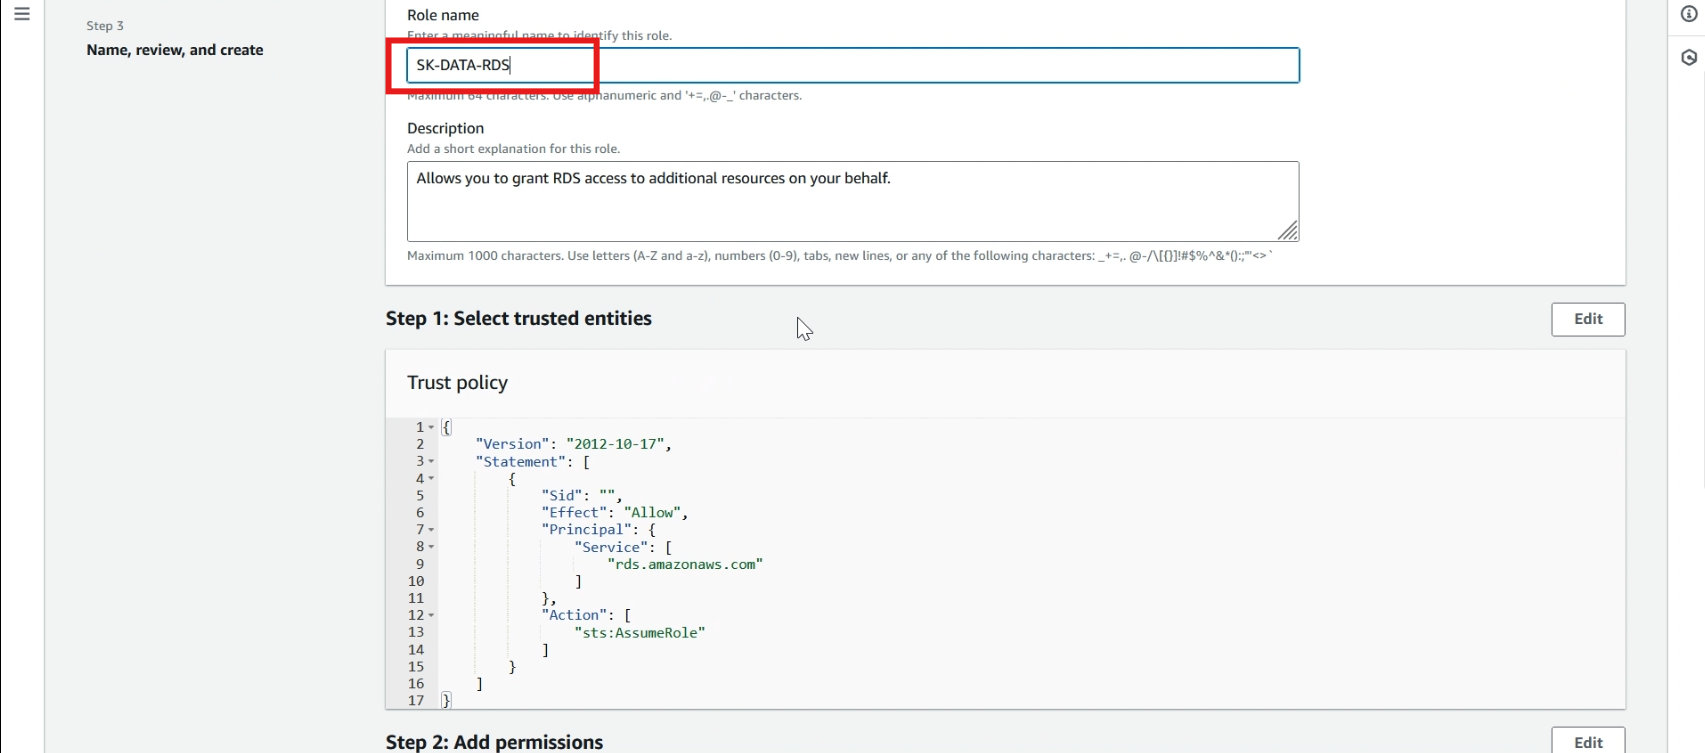
Give a >> role name, and click >> create role.
Create RDS Proxy
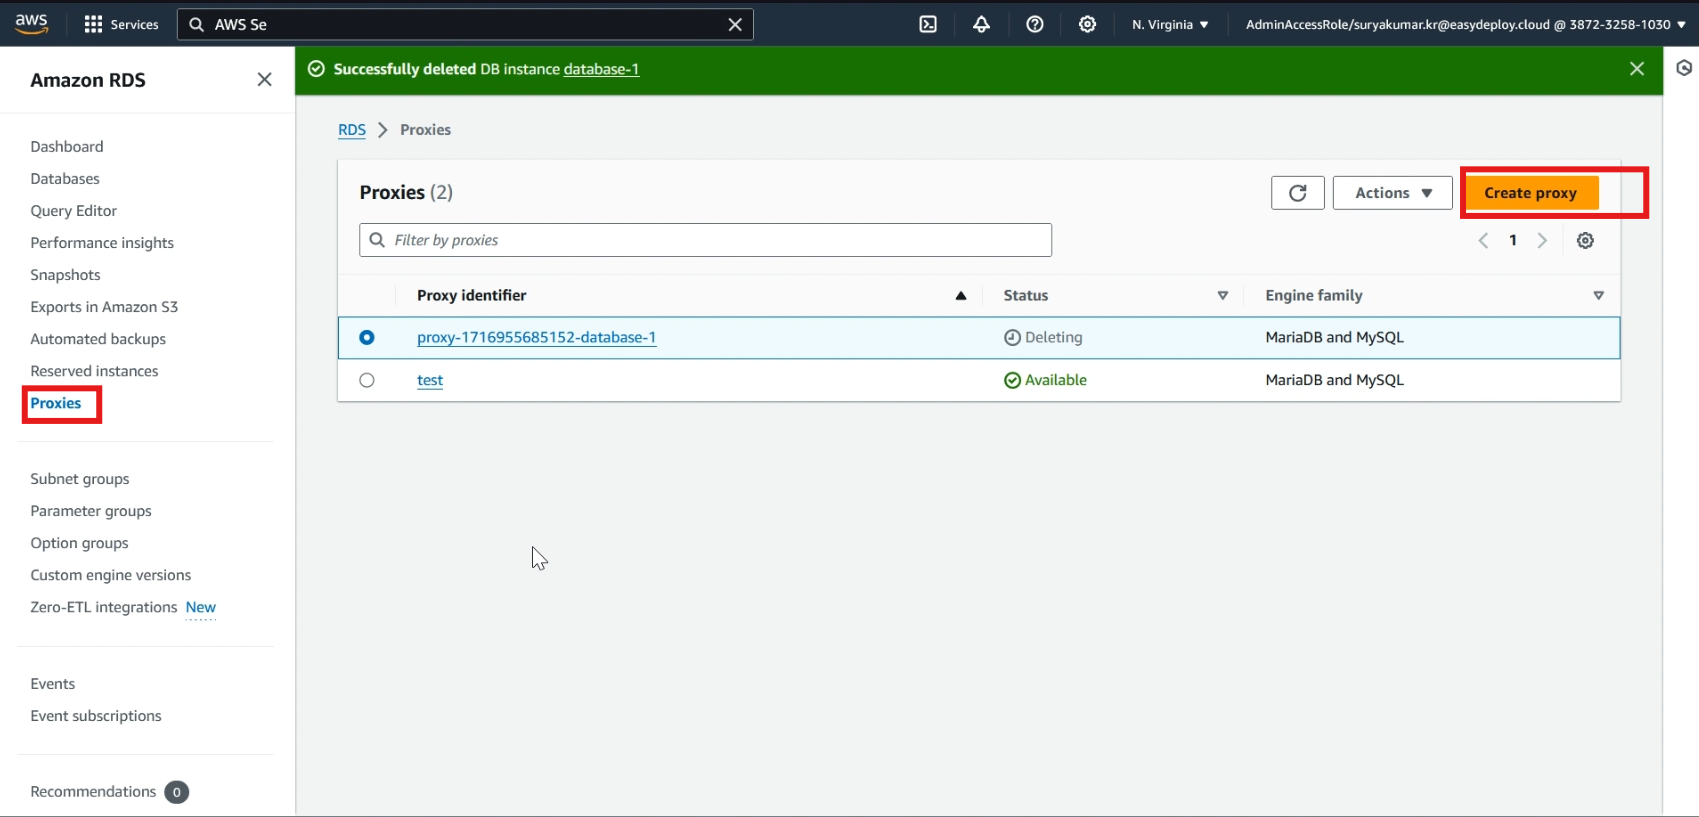
Navigate to the RDS service, choose >> Proxies, then Create proxy.
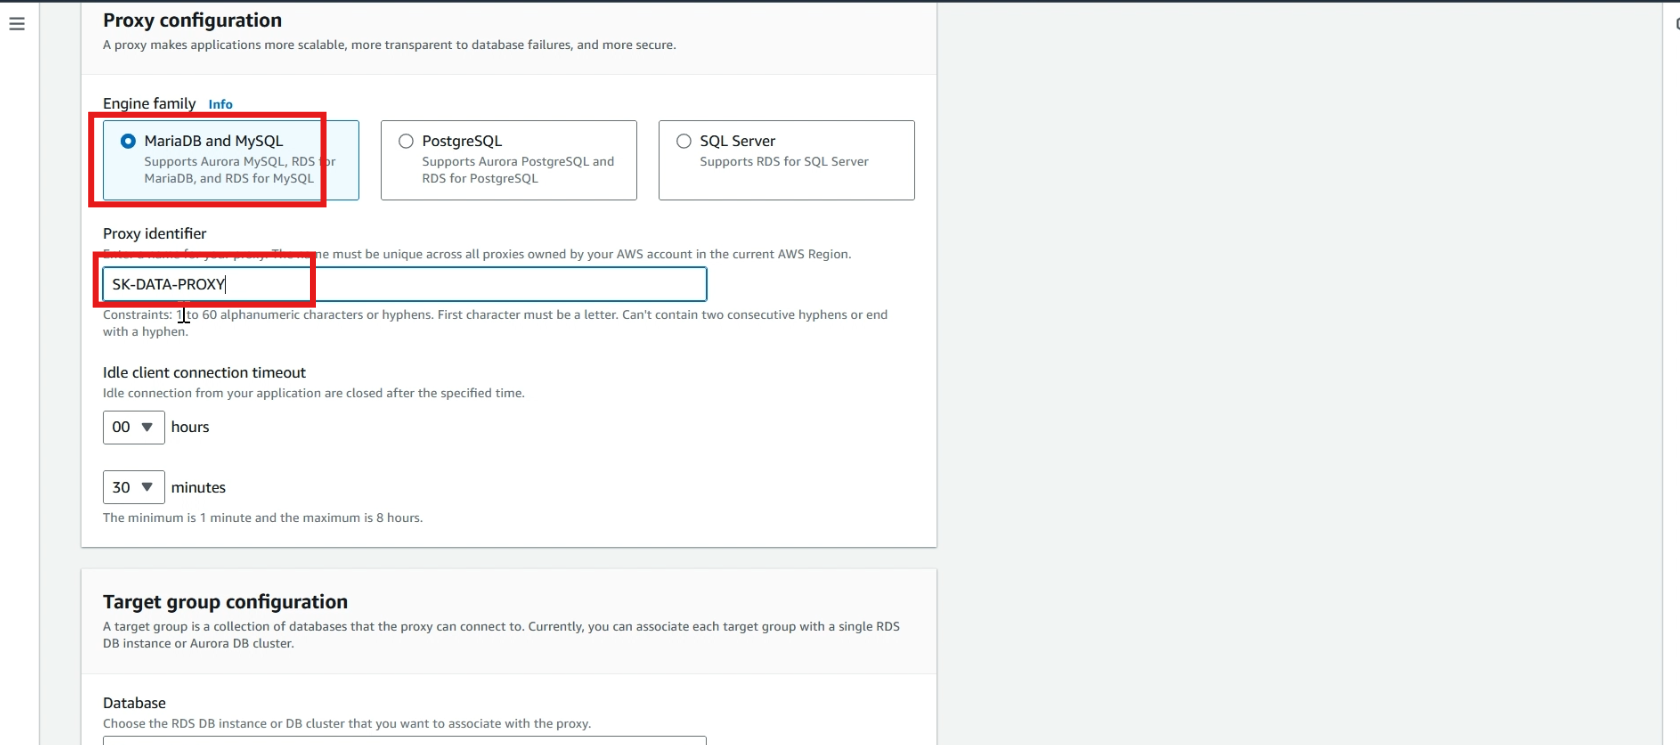
Choose >> Engine type, give a >> name to proxy, and leave other default option.
In database, select >> your database.
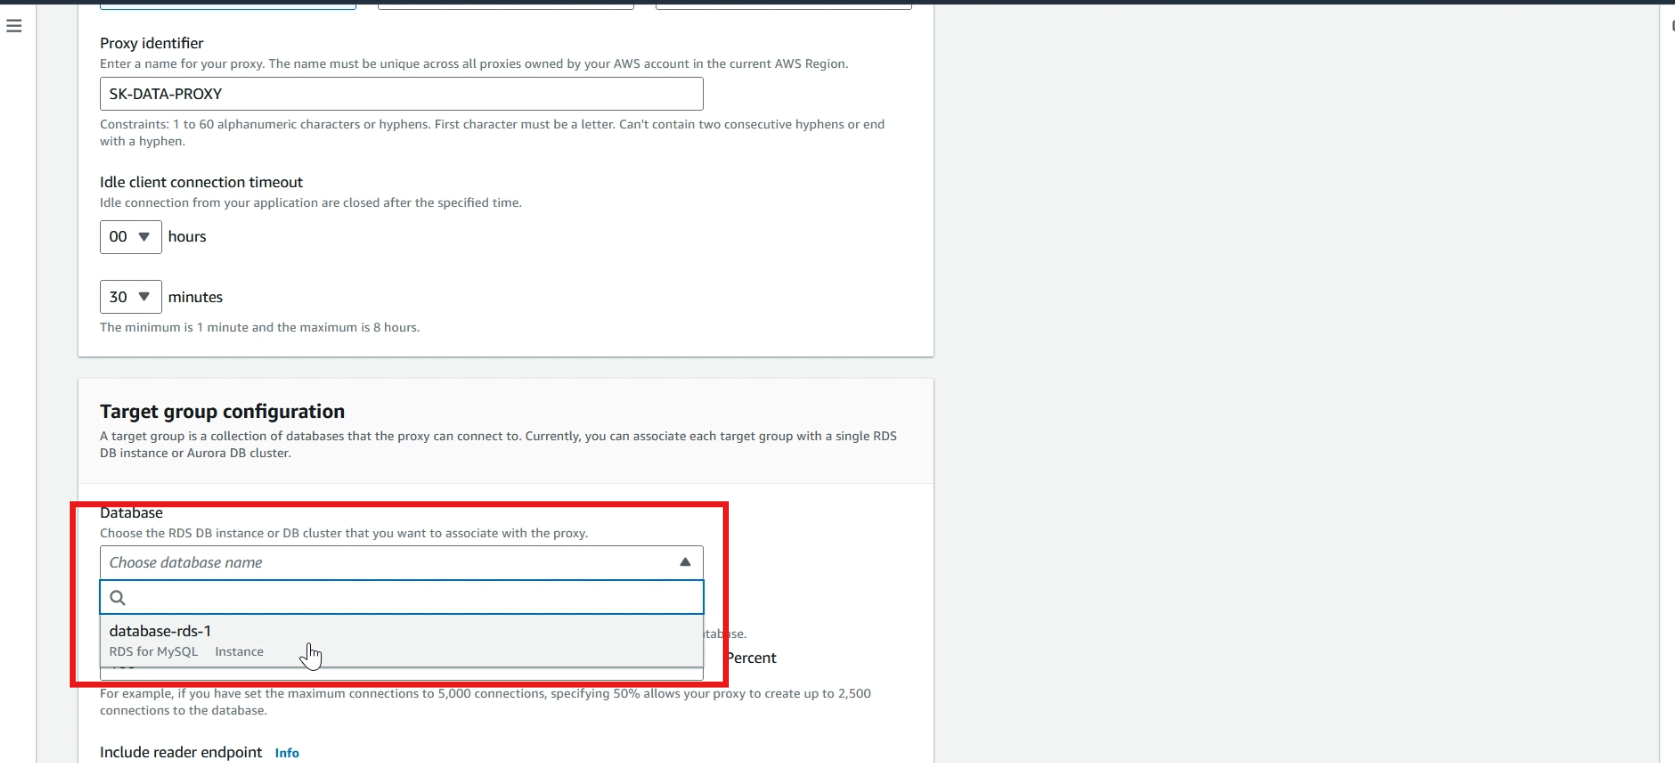
In authentication section, select >> your created IAM role.
In secrets manager, select >> your created secrets.
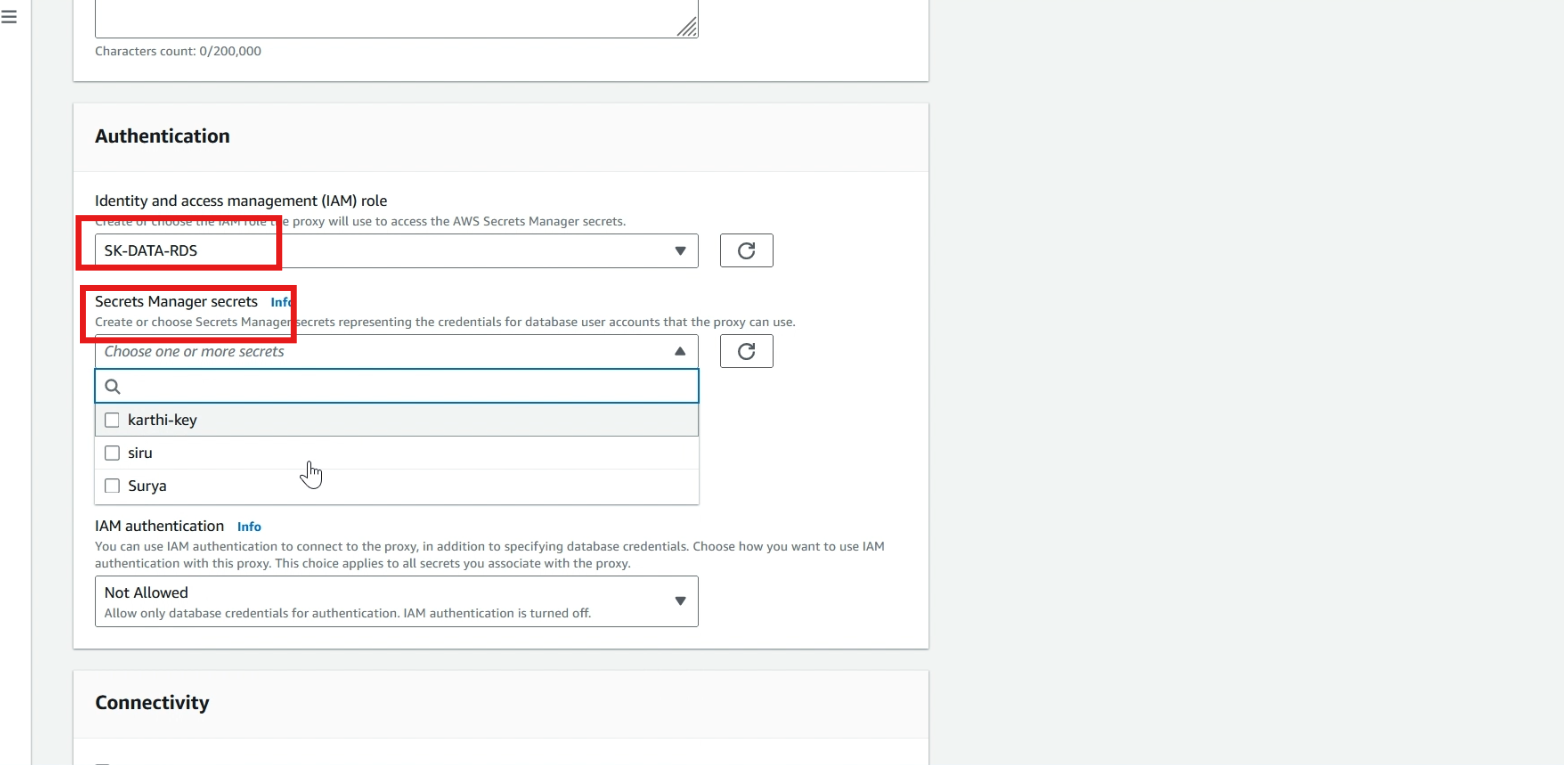
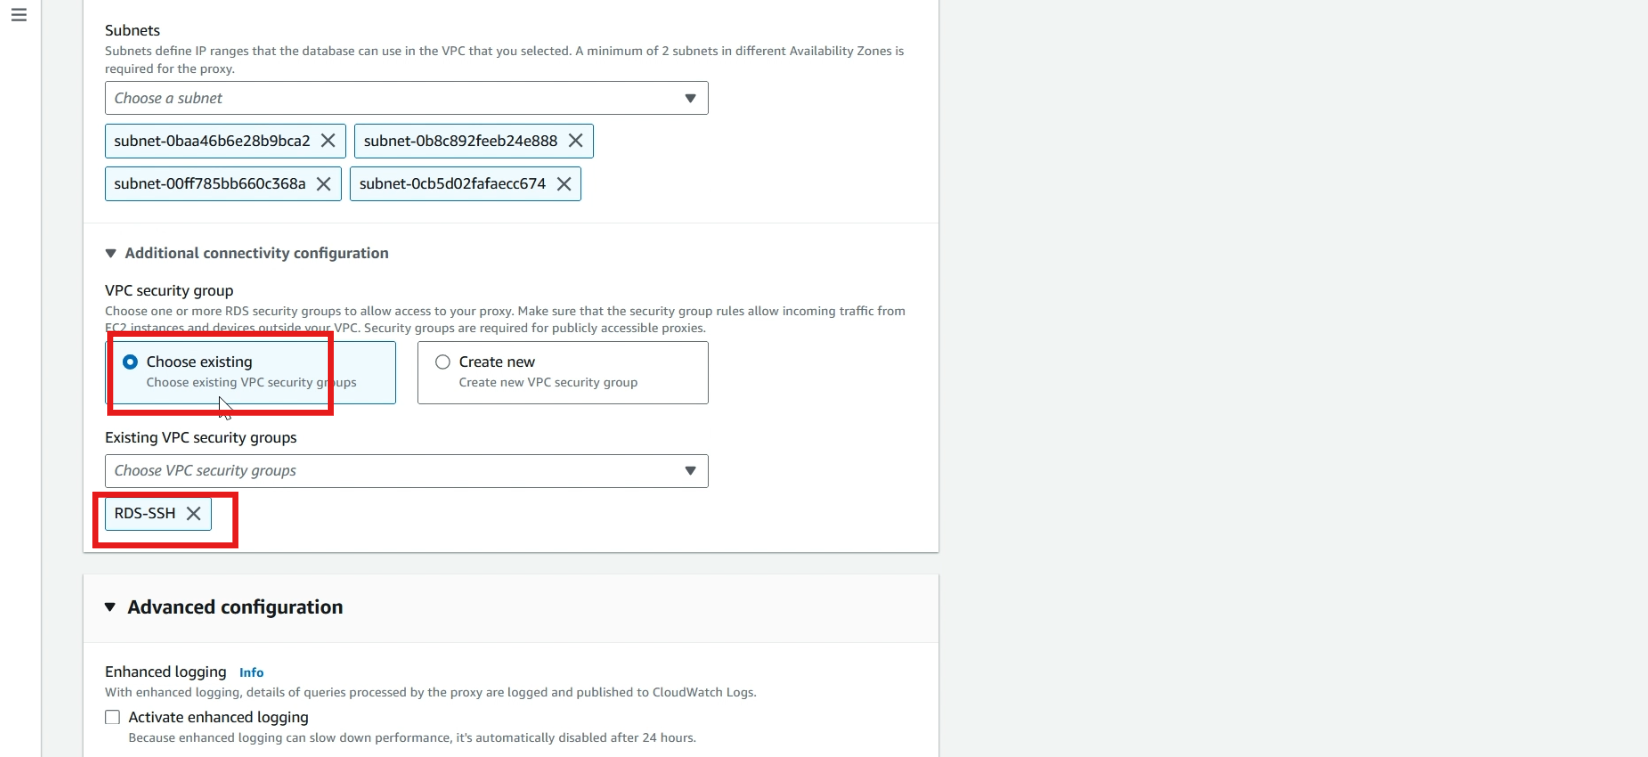
Select >> choose existing, select >> your created security group.
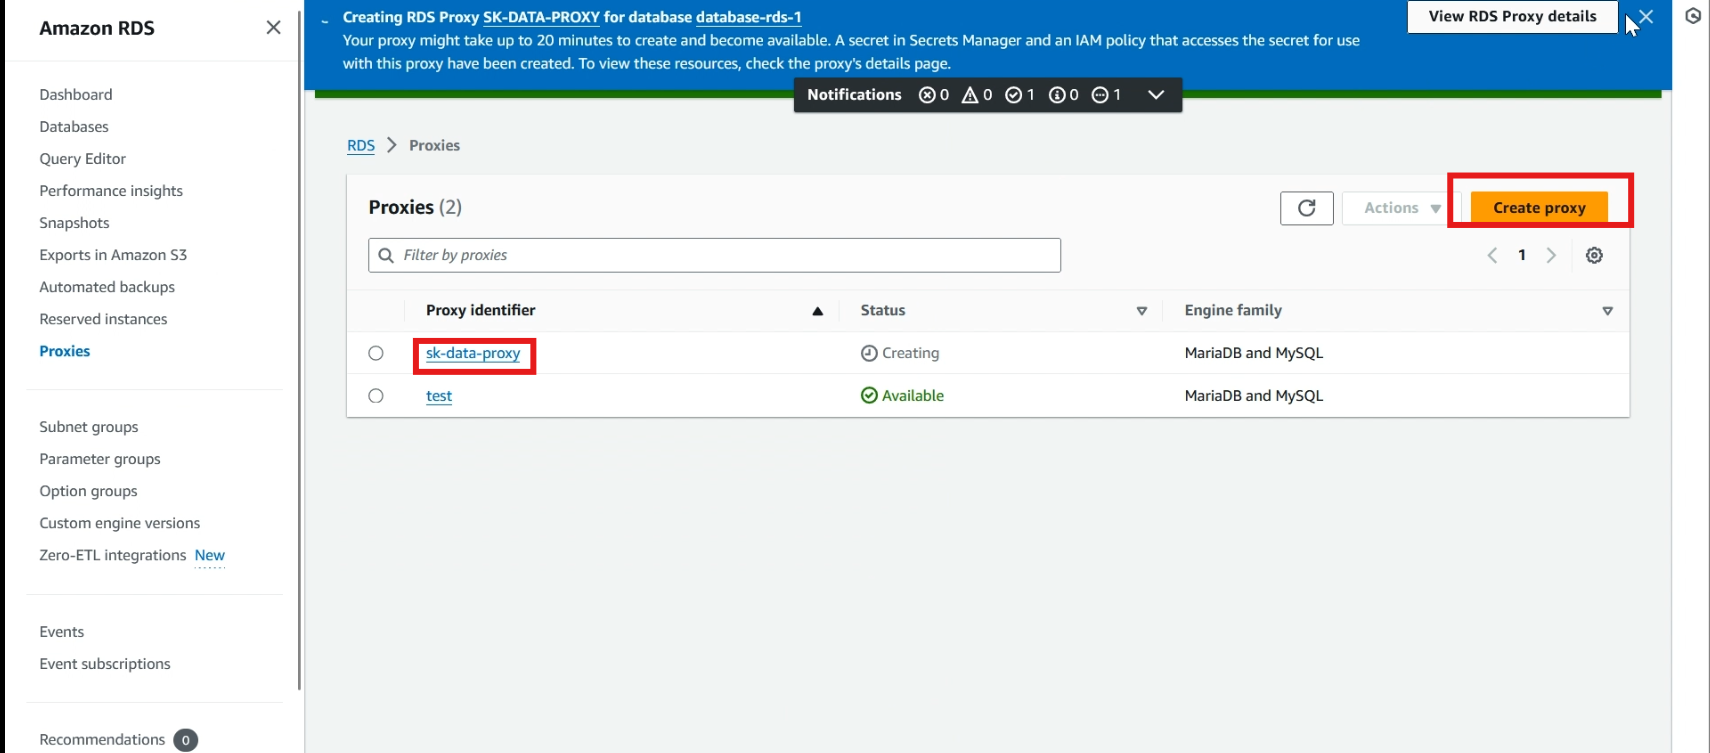
Click >> create proxy.
The proxy is creating it takes time to process.
Check connection
Click >> databases, and click >> your created database, copy your database endpoint
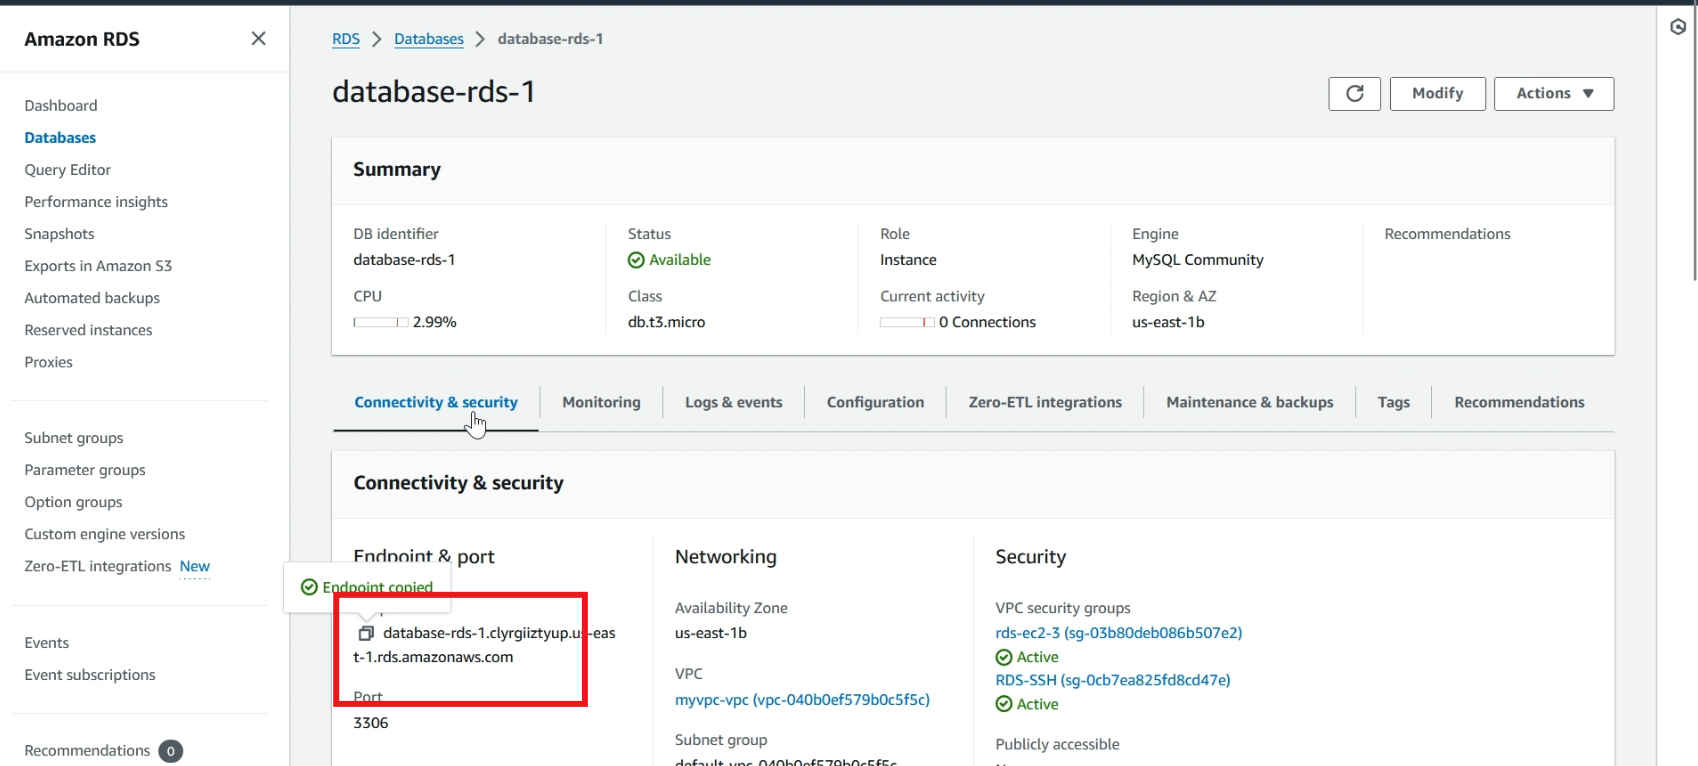
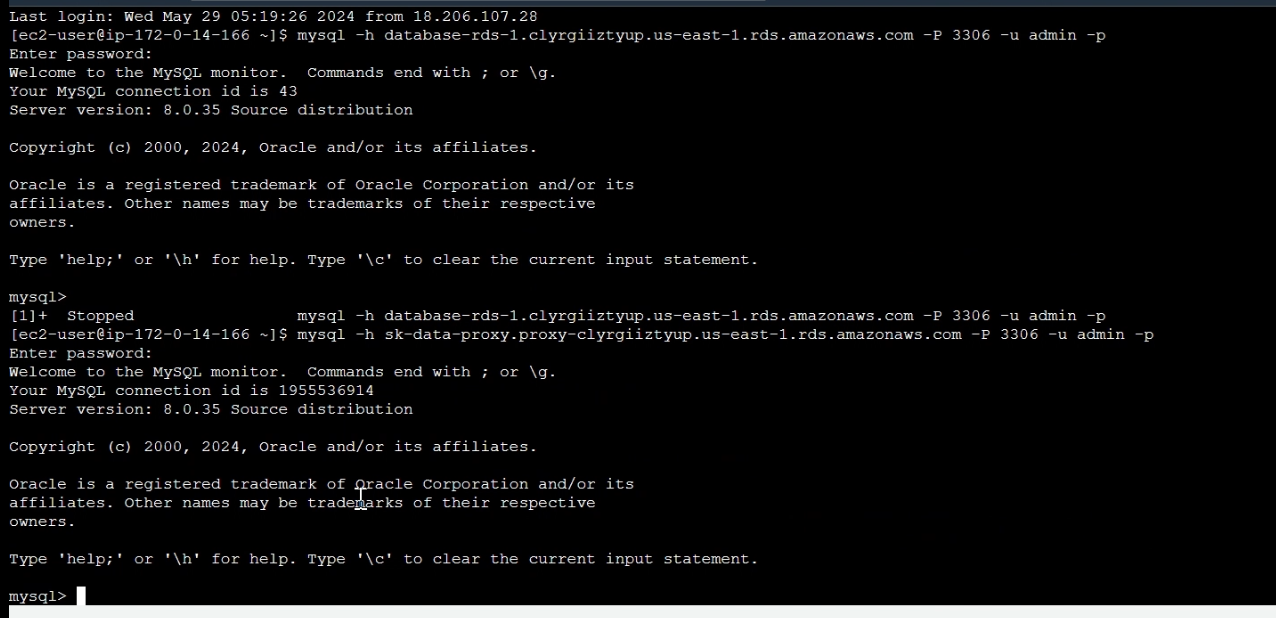
Navigate to your EC2 instance CLI, and test the connectivity to the RDS DB instance using the following command:
mysql -h <RDS DB endpoint> -P 3306 -u <username> -pWhen prompted, type >> your password and press Enter.
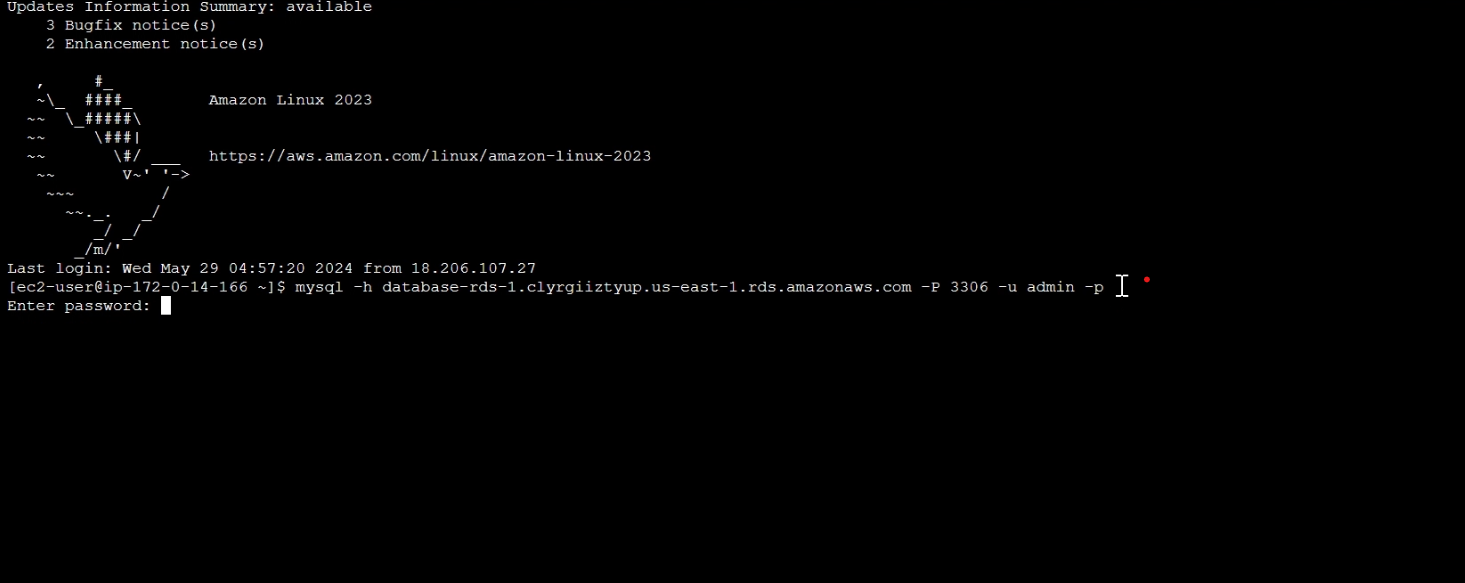
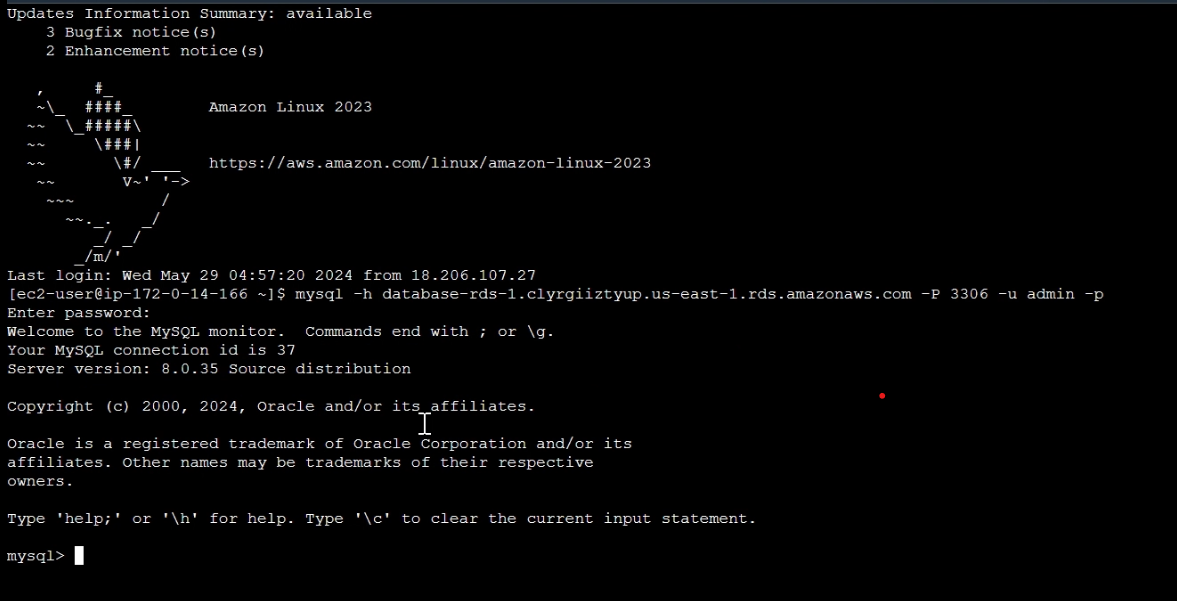
Now we successfully connected to the RDS DB instance.
Now go back to RDS service, select >> proxies, click >> your created proxy.
Copy the endpoint.
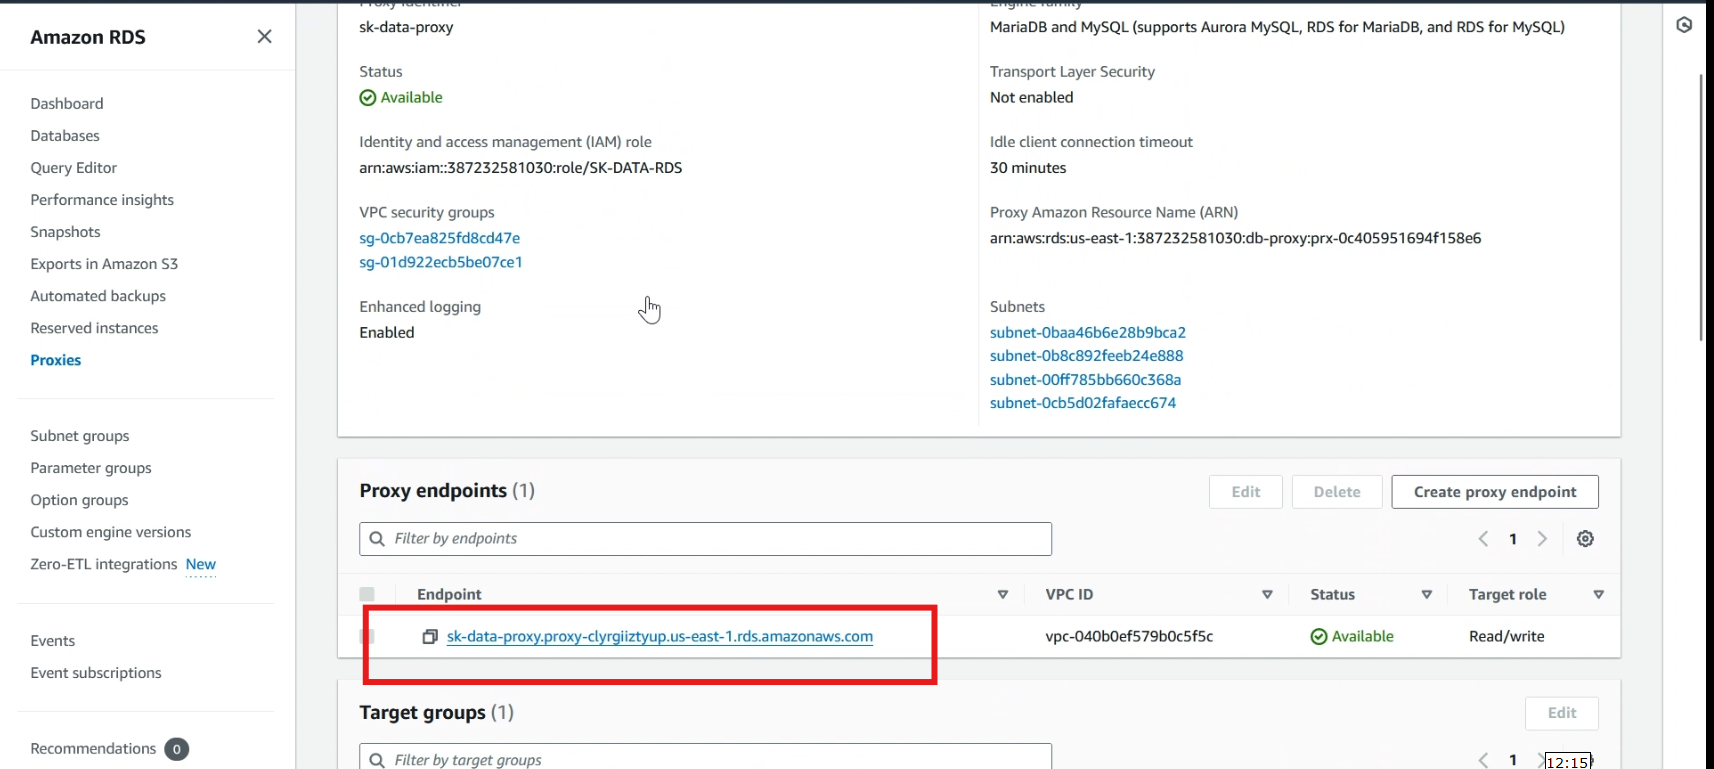
Go back to EC2 instance CLI, use the following command to connect to the RDS instance through the RDS Proxy endpoint:
mysql -h <proxy endpoint> -P 3306 -u <username> -p
When prompted, type >> your password and press Enter.
Now we successfully connected to the RDS DB instance via the RDS Proxy endpoint.
Conclusion
Setting up an RDS Proxy streamlines database connectivity by managing connections more efficiently, improving performance, scalability, and security. It reduces connection overhead, ensuring consistent and reliable database access, especially under high load.
The setup process is straightforward, involving proxy creation, credential configuration, and application integration. Overall, using RDS Proxy optimizes resource utilization and enhances application responsiveness, making it a valuable tool for maintaining high availability and seamless database interactions.


