In this article, we are explaining how to automate Droplet snapshot in your DigitalOcean servers. Snapshot is the exact copy of the server at any given point of time. If you have lost your server, you can easily restore the entire server files from snapshot backup. This is most recommended to configure snapshot for your servers.
Let’s look at step by step how to automate the snapshot in digitalocean servers.
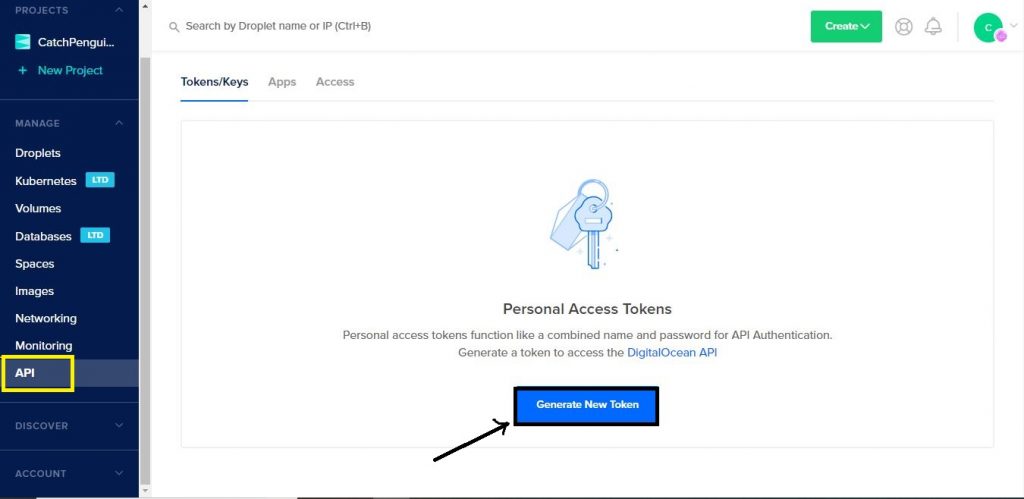
Step 1: Login to DigitalOcean
Login to the Digital ocean console and go to the digitalocean admin panel where you can find the API in the right side and click on the Generate new token as shown in the screenshot.
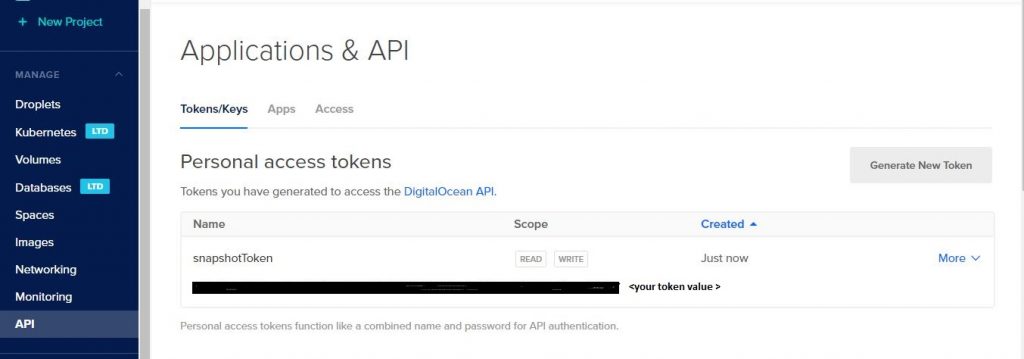
Step 2: Applications and API
You will prompt to enter the name of the token and once you enter your desired name for the token.it will create new API token. Copy the token value to the safe place once lost can’t be retrieved. In case of losing token values we have to delete the token pair and create the new one.
Step 3: Run Script
The script is built on Ruby language hence we need Ruby compiler to run the script, install the required ruby packages using below set of commands.
| yum -y install git-core zlib zlib-devel gcc-c++ patch readline readline-devel libyaml-devel libffi-devel openssl-devel make bzip2 autoconf automake libtool bison curl sqlite-devel curl -sSL https://rvm.io/mpapis.asc | gpg2 –import – curl -sSL https://rvm.io/pkuczynski.asc | gpg2 –import – |
Step 4: Download Ruby
Now download the latest stable ruby rails script using the below mentioned command
| curl -L get.rvm.io | bash -s stable |
Step 5: RVM Command
To use RVM we need to run given command to use in all shells
| source /etc/profile.d/rvm.sh |
After executing the above command execute the below set of commands to update the rvm command in your shell
| rvm reload rvm requirements run rvm list known |
Step 6: Run Ruby
Now you can install ruby 2.6 version using rvm command as shown below
| rvm install 2.6 rvm use 2.6 –default |
You can check the installed ruby version using “ruby –version”
Step 7: Install rbenv Packages
Now we have to install rbenv packages. You can install the package using the following commands
| yum install wget -y cd ~ rm -rf .rbenv/ git clone git://github.com/sstephenson/rbenv.git .rbenv echo ‘export PATH=”$HOME/.rbenv/bin:$PATH”‘ >> ~/.bashrc echo ‘eval “$(rbenv init -)”‘ >> ~/.bashrc git clone git://github.com/sstephenson/ruby-build.git ~/.rbenv/plugins/ruby-build source ~/.bashrc |
Step 8: Download Snapshot File
Now download the snapshot.tar.gz file and untar with the help of commands
| wget https://assets.merqlove.ru.s3.amazonaws.com/do_snapshot/do_snapshot.tgz –no-check-certificate tar -xzf do_snapshot.tgz cp -apr do_snapshot /usr/local/ ln -s /usr/local/do_snapshot/bin/do_snapshot /usr/local/bin/do_snapshot |
Step 9: Install Ruby Rails Packages
Finally install the required ruby rails packages and export your token created in the first step using the commands given below
| gpg –keyserver hkp://keys.gnupg.net –recv-keys 409B6B1796C275462A1703113804BB82D39DC0E3 \curl -sSL https://get.rvm.io | bash -s stable –rails ls -l /usr/local/rvm/scripts/rvm source /usr/local/rvm/scripts/rvm export DIGITAL_OCEAN_ACCESS_TOKEN=”<your API token that you have created in step 2>” |
After executing the above command it will start to take snapshots of all the droplets running in your digital ocean account.
Step 10: Setup Crontab
We can automate the droplet snapshot creation using crontab. To do so we have to install some packages as shown below
| gem install rest-client echo “export PATH=”$GEM_HOME/bin:$PATH” ” >> /root/.bash_profile source /root/.bash_profile rvm cron setup |
Step 11: Test It
You can test that everything works fine by executing the below command
| do_snapshot –digital-ocean-access-token <your api token> –only <your droplet id > |
NOTE: To find your droplet ID execute this command
| curl -s http://169.254.169.254/metadata/v1/id Let us consider my droplet ID as 6598215476 |
Step 12: Setup Cronjob to Automate Snapshot
Finally you can setup cron job to automate to take droplet snapshot.If we need to take snapshot of my droplet at everyday 2 AM we need to add the following entries in your cronjob.
In my case I only want to take snapshot of one droplet and keeping latest 7 days snapshot.For which we have to add the below cron job
| 30 20 * * * do_snapshot –digital-ocean-access-token <your API token> –only 6598215476 -k 7 -c -v |
I hope this article has helped your to automate the snapshot backup in your DigitalOcean droplets. If you have any questions, please write it in our comments section.