As we know, one of the greatest advantage on using DigitalOcean server is it’s simplicity. Anyone who has very minimal knowledge on server can get started hosting their websites in DigitalOcean server. In this article, I am going to explain you how to install LAMP in your DigitalOcean using just a single click.
If you have any questions or help on managing your DigitalOcean server, please post your comments. I will respond to your queries.
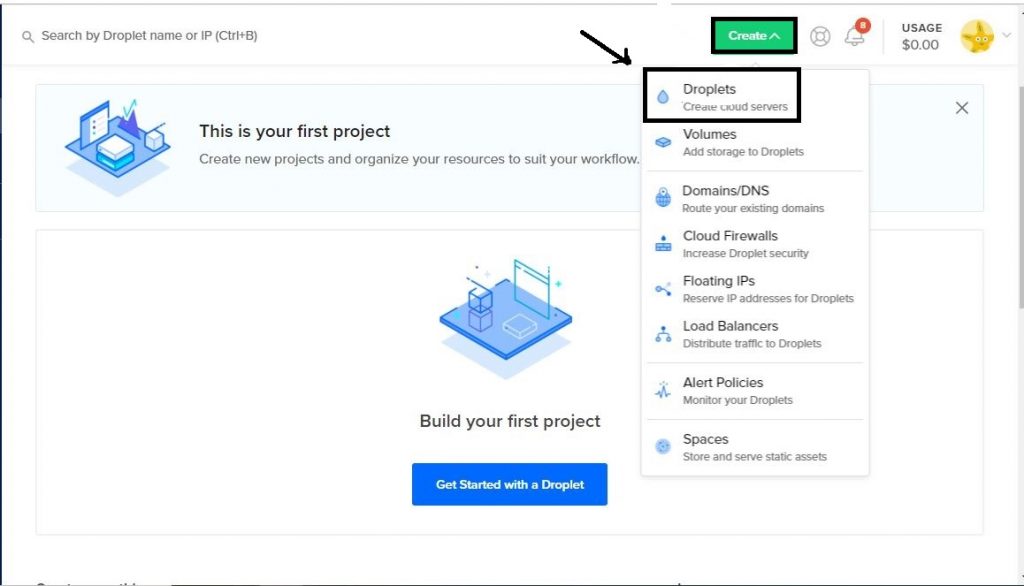
Step 1: Create Droplets
In this step you will login to DigitalOcean and how to create a Droplets. Once login to the DigitalOcean console, click on the create button and then click Droplets as shown in the screenshot.
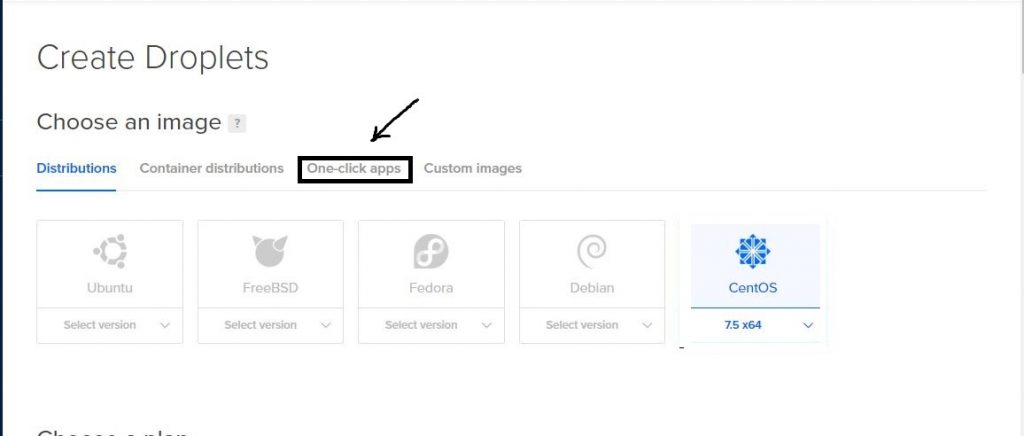
Step 2: Choose One-Click Apps
Once you have clicked on the creating “Droplets” option, you will be taken to the next screen which is option to choose like Operating System, Containers and One-Click apps to configure your Droplets.
Click on the One-Click apps tab.
Step 3: Choose LAMP
You will be shown list of one-click apps that are supported by DigitalOcean. In the list, you will be seeing a LAMP option. Choose the LAMP on 18.04 as shown below. The version may be different in the future, but the steps are same.
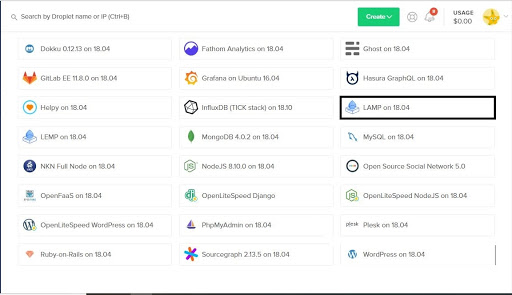
Note: Here we are installing LAMP on ubuntu 18.04 server as base OS
Step 4: Choose a Plan
By default we can chose Standard for hosting small sites. In case we are going to host medium size site you can chose General purpose. If we need high performance we can go for CPU optimized. The cost may vary according to the plan we choose.
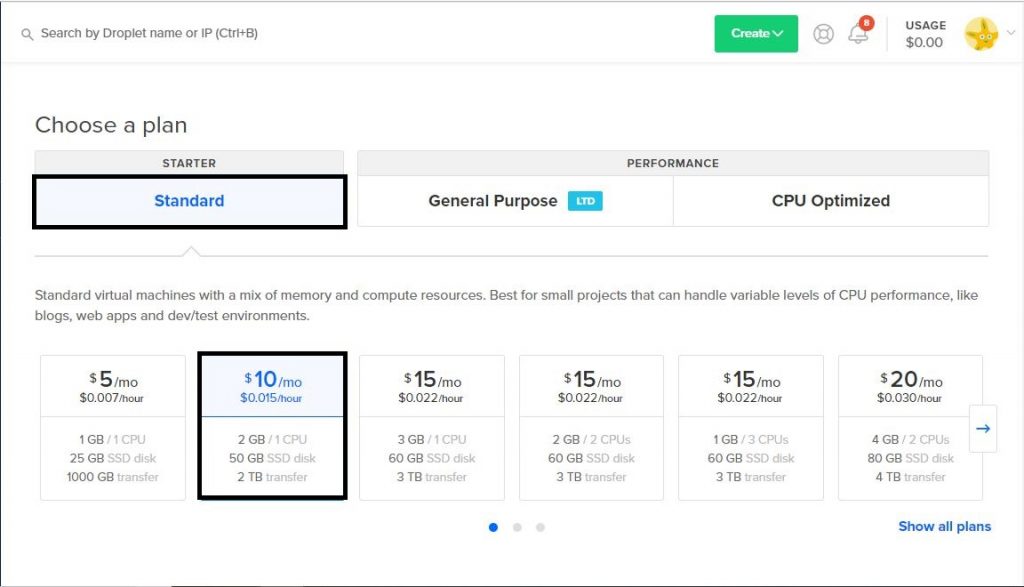
Here we are choosing Standard type with $10 per month.
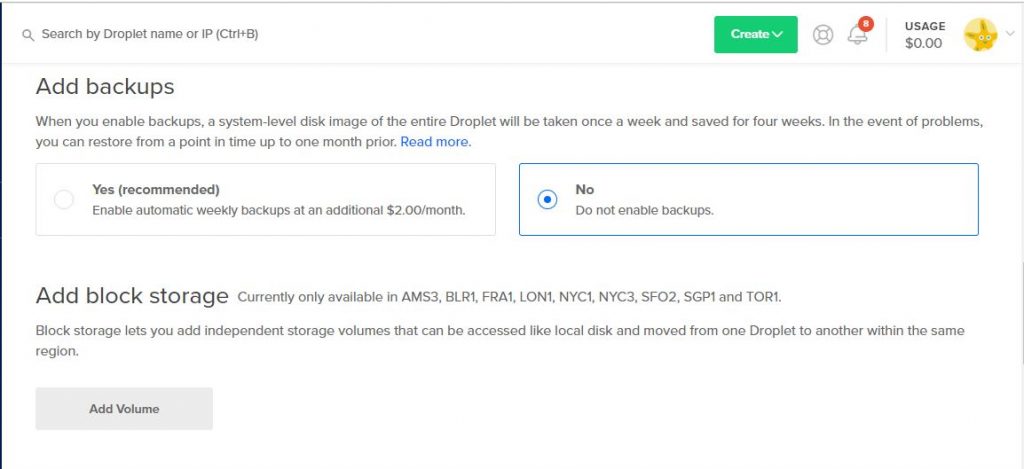
Step 5: Automatic Backups Option
We can also include automatic backups of our droplet while creating the droplet itself for this additional charges will be included. Additional Volumes can be added to the droplet by clicking the Add Volume key under Add block storage section.
Step 6: Choose DataCenter Region
Chose the datacenter region where you are going to host your site according to our requirements but it’s advisable to create the droplet where our end users are residing because it will reduce the latency and performance of the server will be good.
Refer the screenshot below for the Digital ocean regions currently Digital Ocean’s datacenter regions are available only in 8 regions
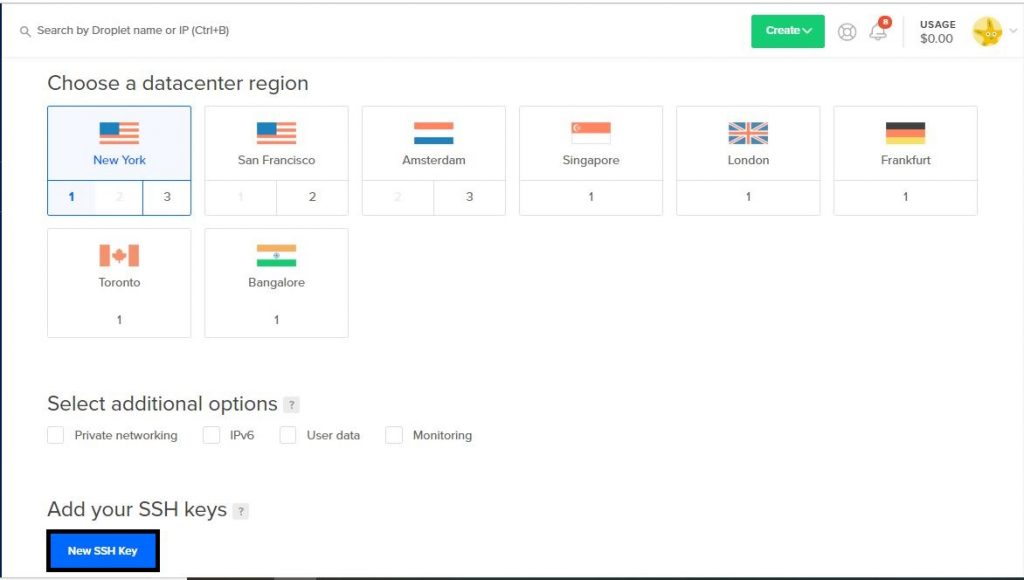
We can add also add the SSH keys while launching the server this can be done by clicking on New SSH key and then we need to add our public key so that we can login to the server with ease using our corresponding private key.
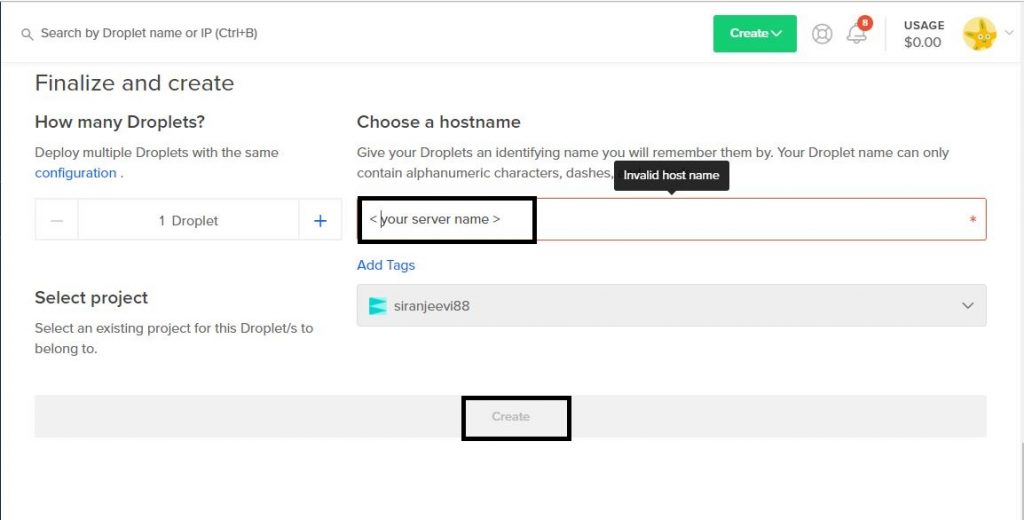
Step 7: Choose a HostName
We need to choose a host name ie server name. Ex.server.example.com and then click on the Create button. Now our server will be launched in the region where we select and we can login to the server and then test it everything works fine.
In this article, I have explained how to install LMAP setup in your digital ocean server. If you have any further questions, please post us a comments.
Hope you have liked this article!
Reference:


The guide seems to be outdated – there are no more “one-click apps” under “choose an image” but rather the images are in the marketplace: https://marketplace.digitalocean.com/apps/lamp