In our previous article, we have explained how to create and execute a simple terraform script using the CLI command. In this blog post, we are going to teach you how to create a Terraform Cloud account and link it with the Bitbucket code. Why do we have to do this?. In an ideal scenario, we store our terraform script in the cloud and execute them in the remote, that’s easier to manage.
Hashicorp provides Terraform Cloud, an online cloud account management for storing all the terraform scripts and scheduling their invocation. If you are working on terraform automation, learning how to set up terraform clouds is more important.
Here is the definition of Terraform Cloud from their official documentation:
“Terraform Cloud is HashiCorp’s managed service offering. It eliminates the need for unnecessary tooling and documentation for practitioners, teams, and organizations to use Terraform in production.”
Let’s deep dive into this article on setting up terraform cloud accounts and run our first sample terraform script from the cloud account.
How to Setup Terraform Cloud?
Step 1: Create an Account in Terraform Cloud
The first step is to create an online Terraform Cloud account. Go to the link below for creating a new account in terraform cloud:
- https://cloud.hashicorp.com/products/terraform

Click the “Try Terraform Cloud” Button to create an account.

Here Provide a username, your email id and password. Then click the “Create account” Button.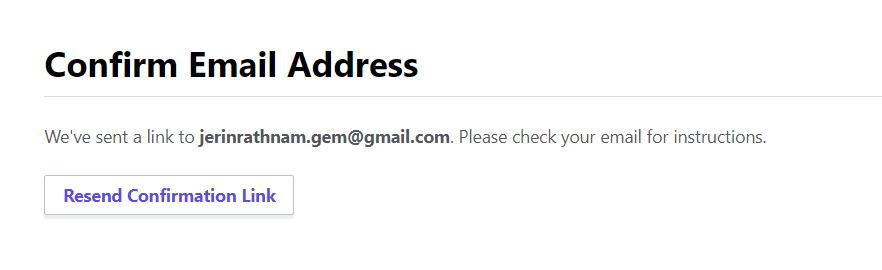
It will send a confirmation link to your registered email. So go and check your email.

In your email there is a mail like in this image, and there will be a link.
Please click the link, and you will be redirected to your new terraform cloud account. Now you have created a new Terraform Cloud account.
Step 2: Create an Organization in Terraform Cloud
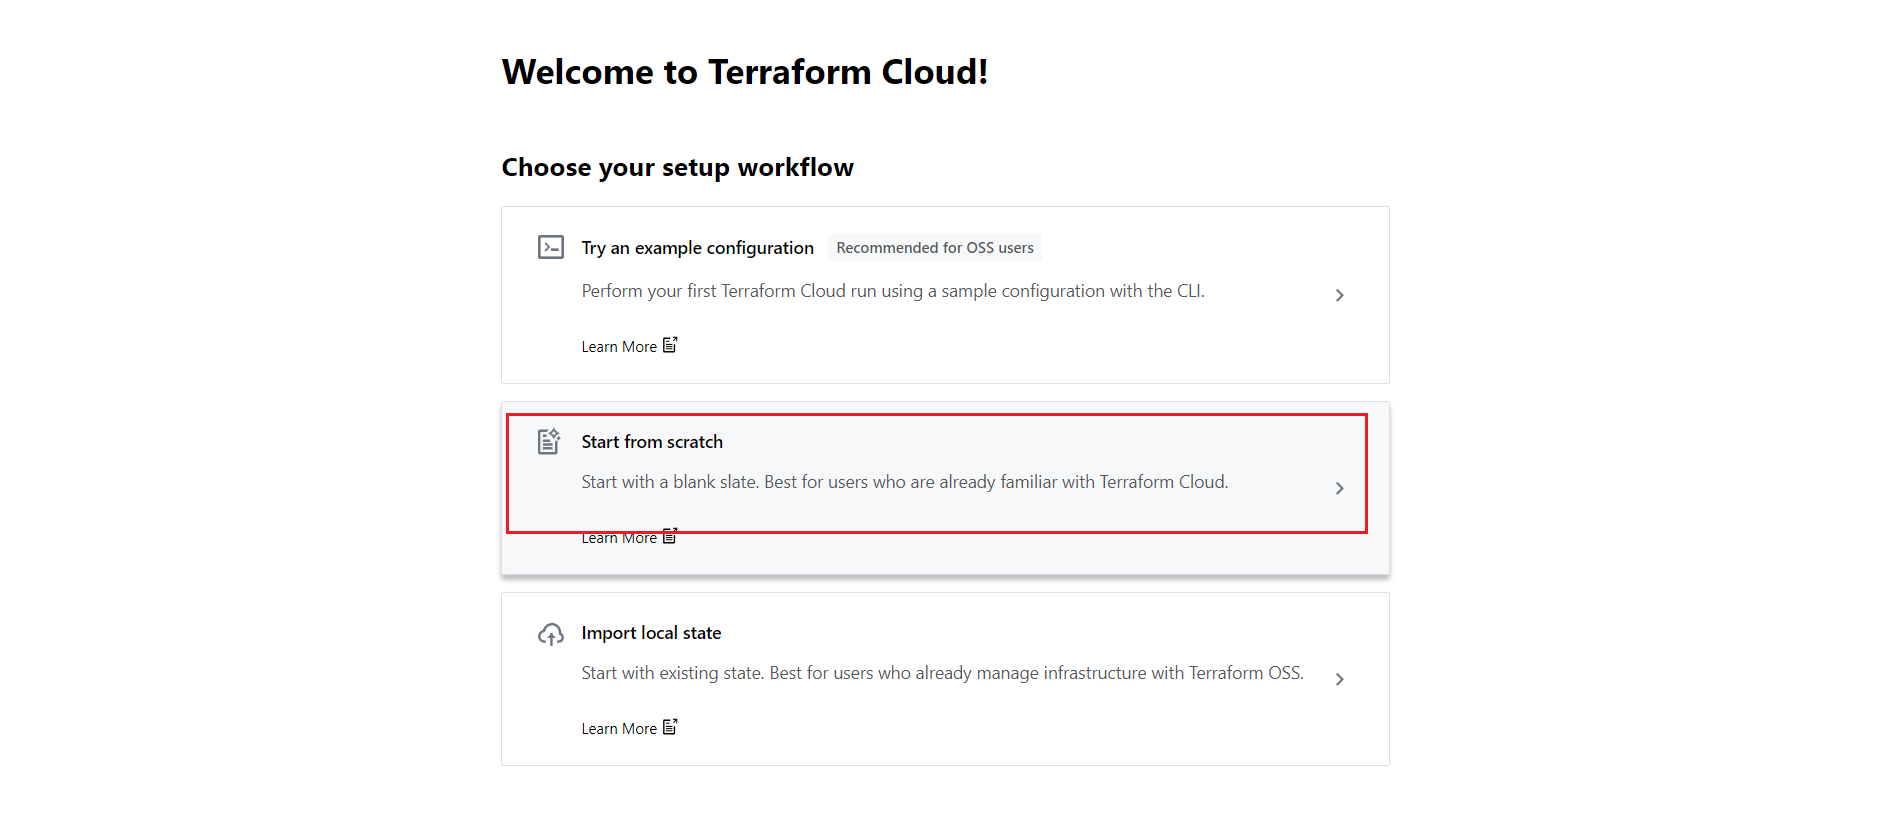
Here You can see the second link “Start from scratch“. Click the link.
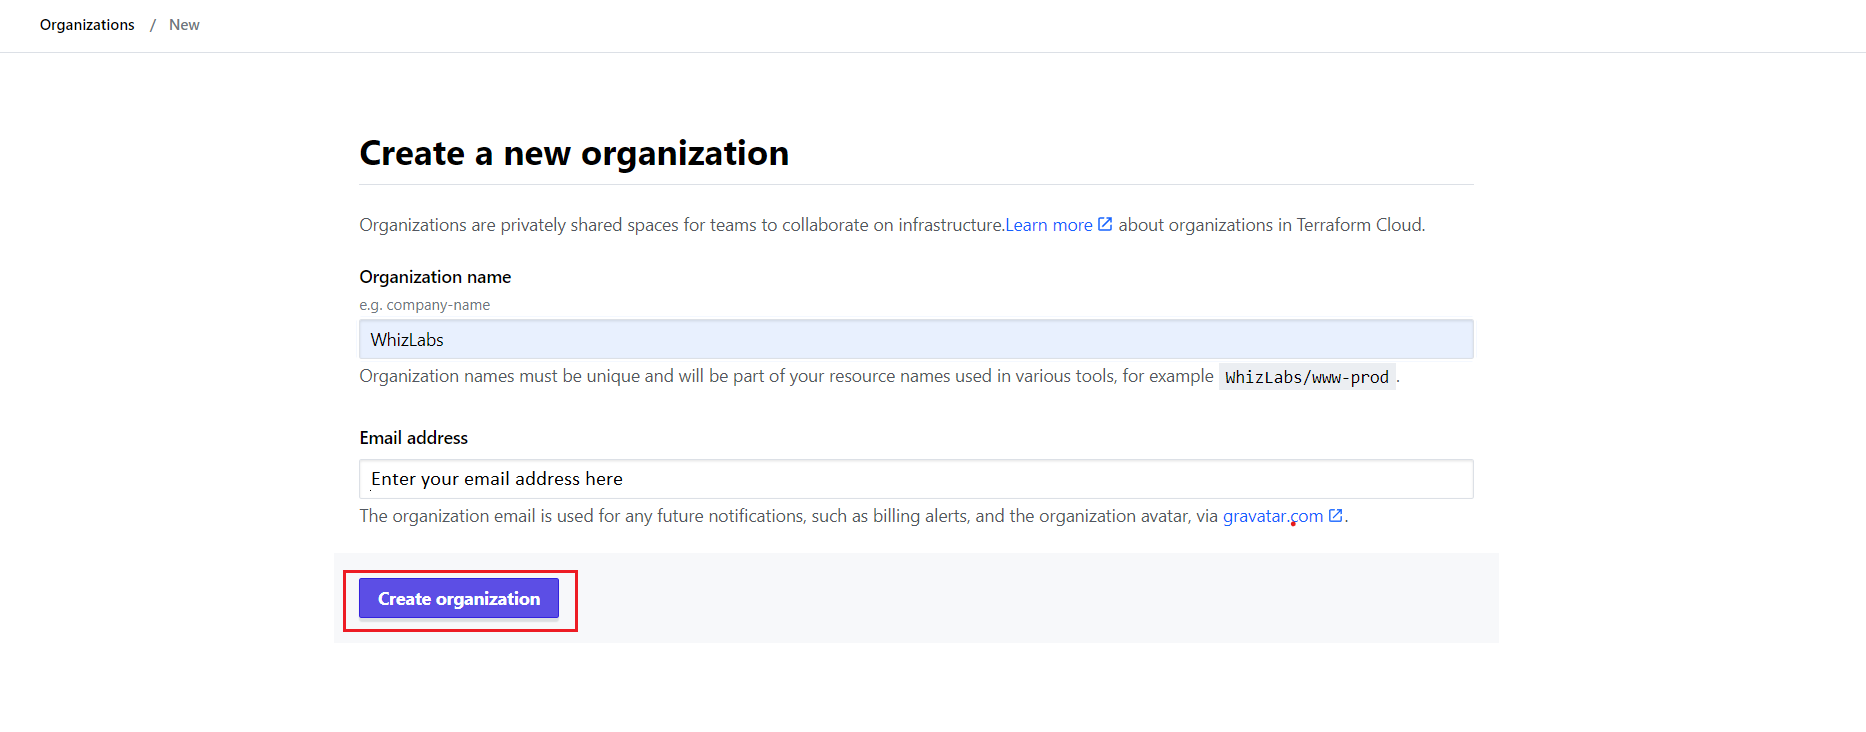
You have to create an organization for your projects. Enter a name for your organization, and click “Create Organization”
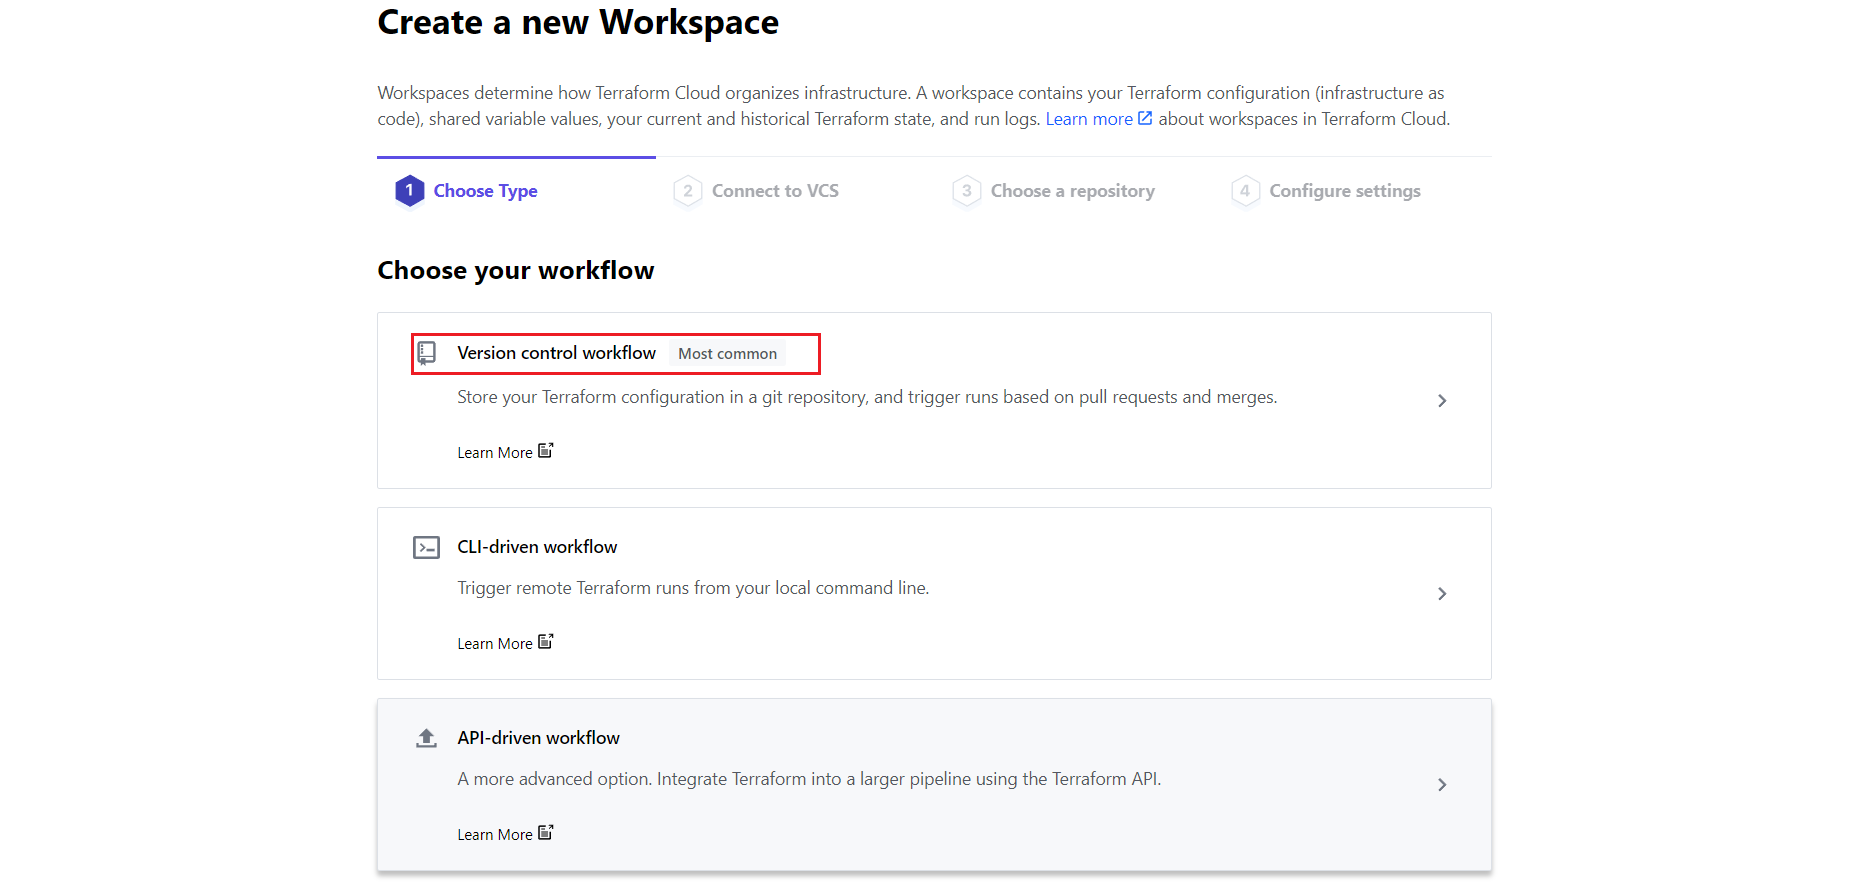
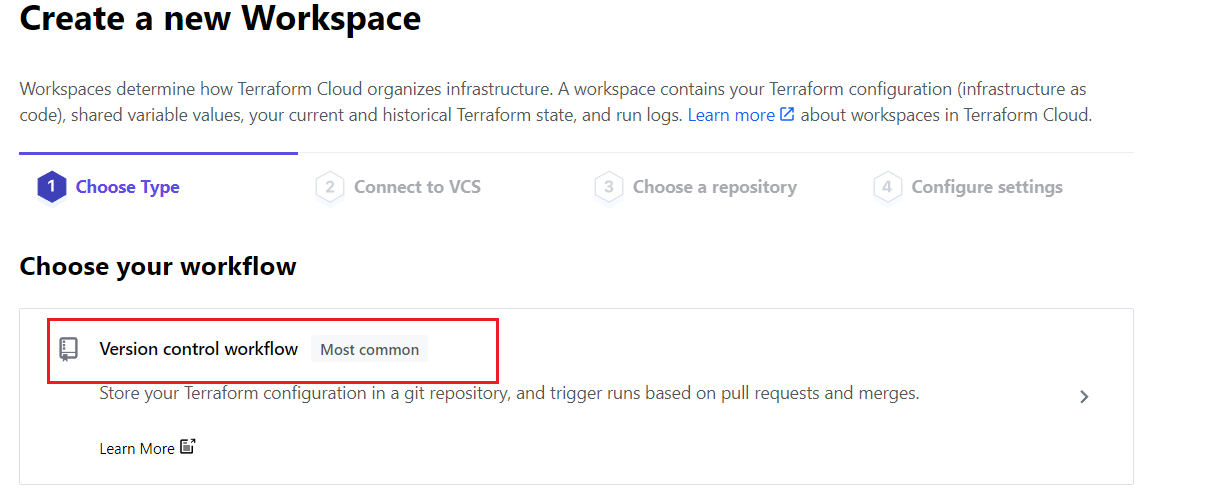
Step 3: Create a New Workflow from Bitbucket
As you saw in the below image you can choose your workflow.
For now you can select the first one “Version Control Workflow”, which you can use for your Bitbucket.
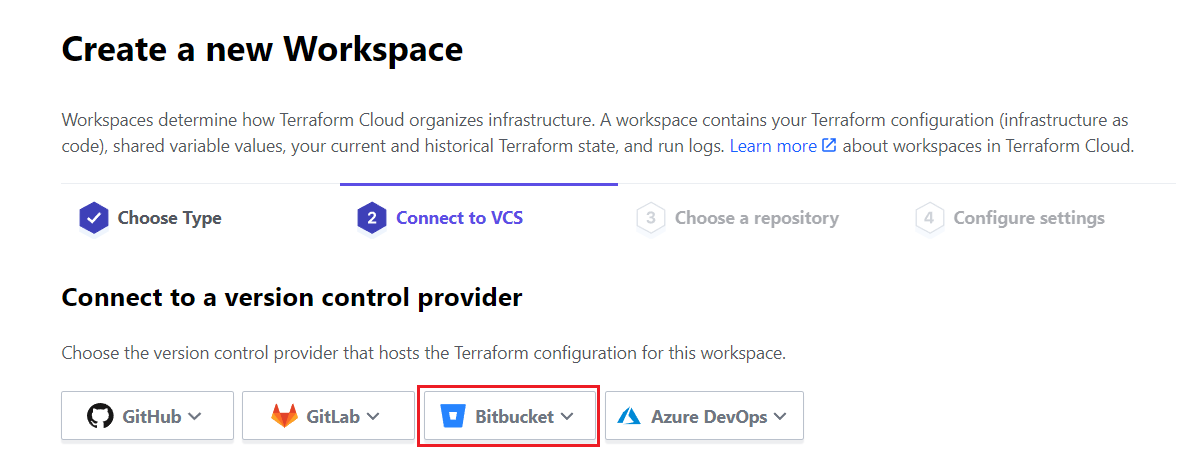
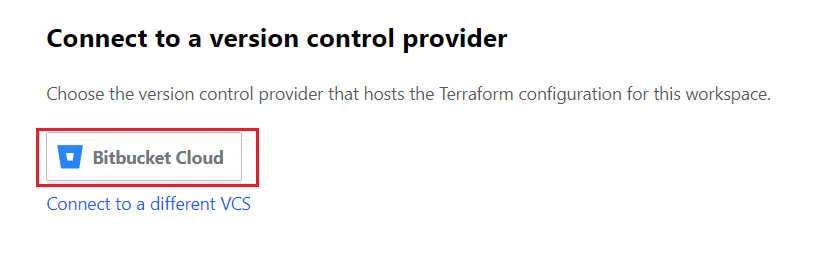
Connect to the version control source, choose “Bitbucket”, then click “Bitbucket Cloud”. In this example we are going to use Bitbucket because we are currently using Bitbucket for our projects. We will try to come up with blog post for other repositories in the near future.

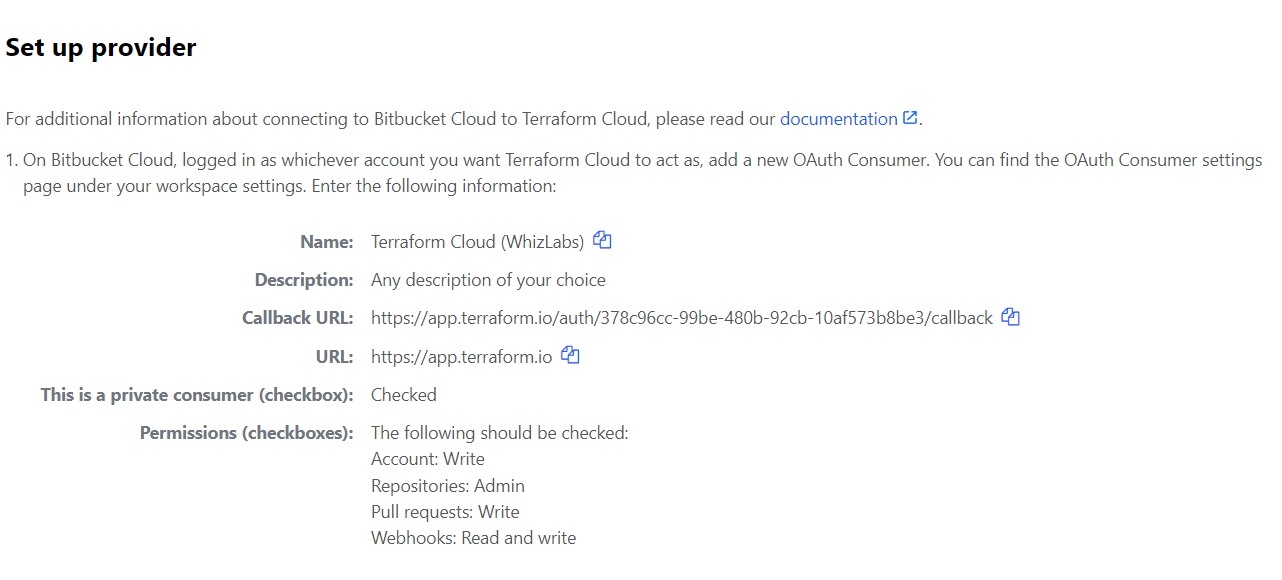
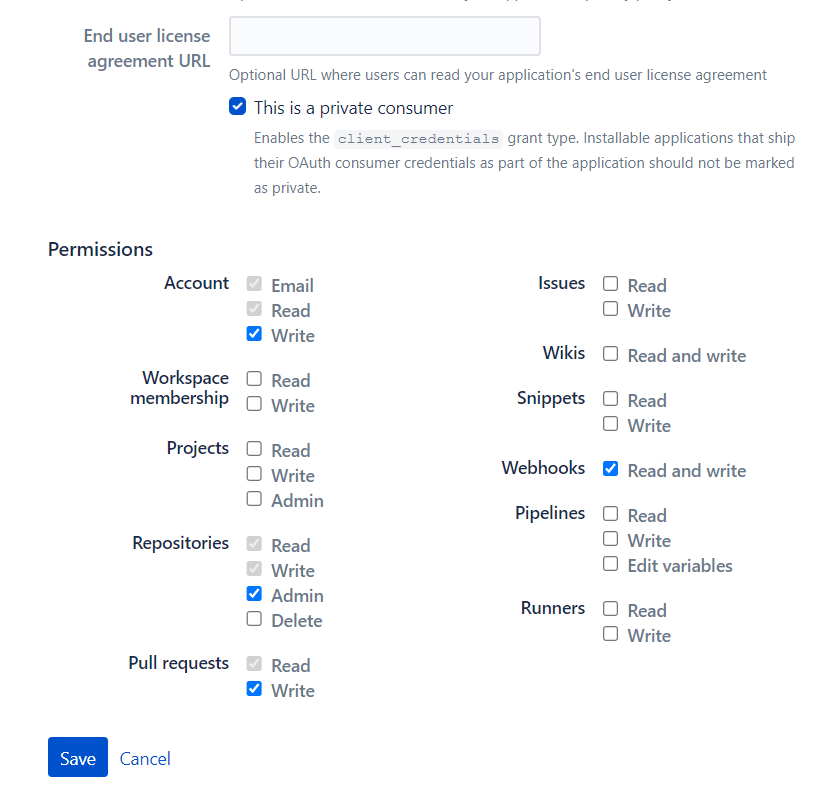
Then You have to open your Bitbucket account. Open the “Add OAuth Consumer” page. We assume that you already have the Bitbucket account.
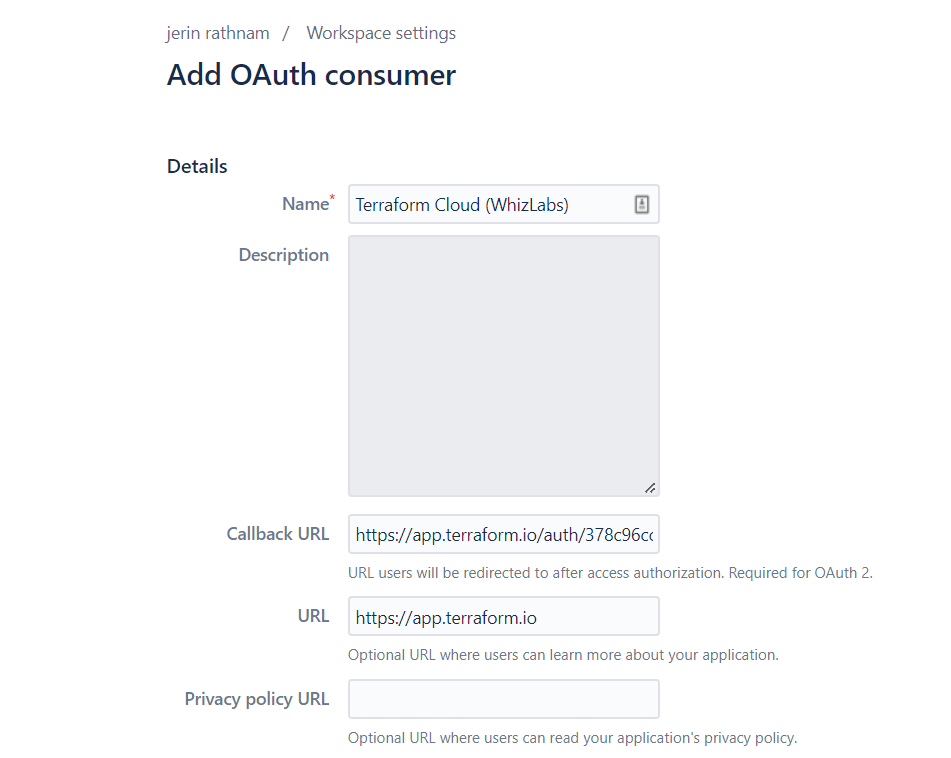
This page is located at “https://bitbucket.org/<YOUR_WORKSPACE_NAME>/workspace/settings/oauth-consumers/new”
Fill out details in the OAuth-consumers page, and click the “save” button.
Details for “Name”, “Callback URL”, “URL” are values from your “Terraform Cloud” page like the below image.
After the click save button, you will redirect to the OAuth settings page in the Bitbucket account.
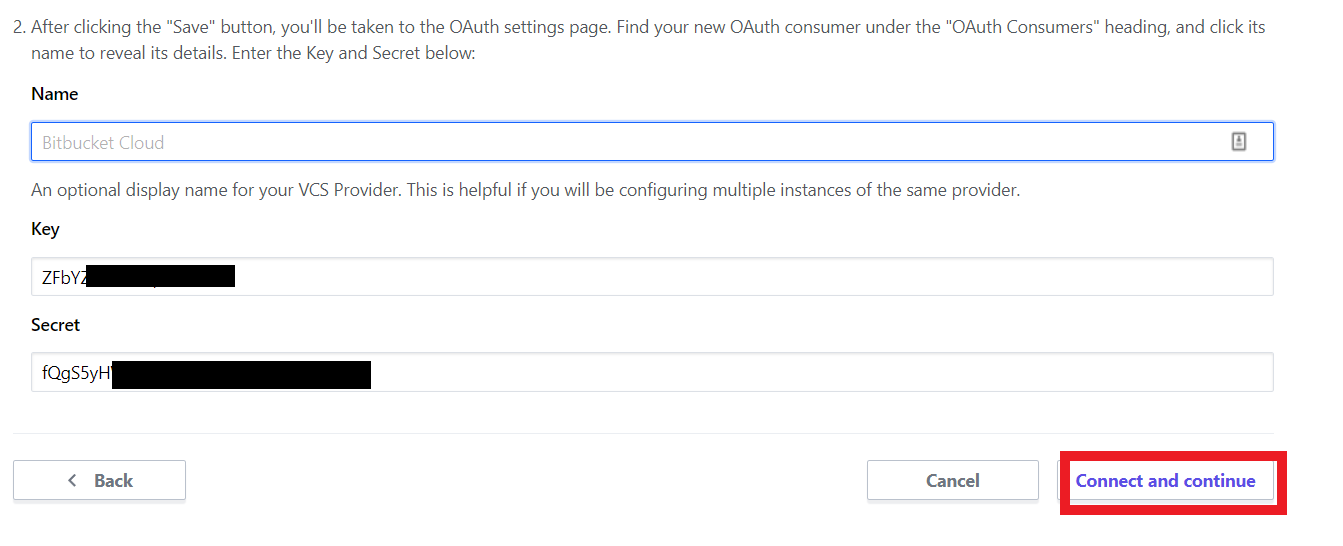
Find your new OAuth consumer under the “OAuth Consumers” heading, and click its name to reveal its details.
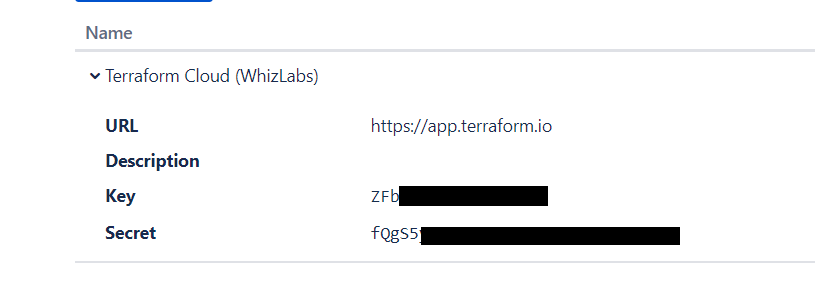
Going to your terraform cloud page and as I mentioned in the above image, Enter the “Key” and “Secret” from the OAuth Consumers details. And Click button “Connect and Continue”.
Then there will be a blue button shown for access. Click the blue “Grant access” button to proceed.
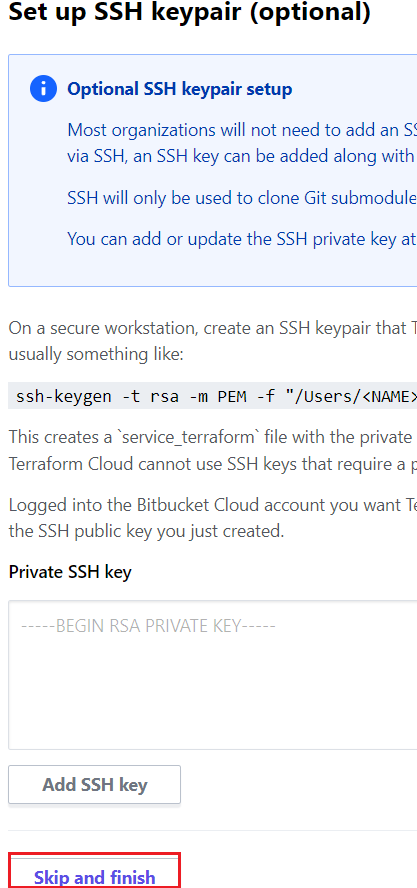
For now we don’t need an SSH connection. So just click the button “Skip and Finish”. This returns you to Terraform Cloud’s VCS Providers page, which now includes your new Bitbucket Cloud client. You successfully connect your Bitbucket to terraform cloud for workflow.
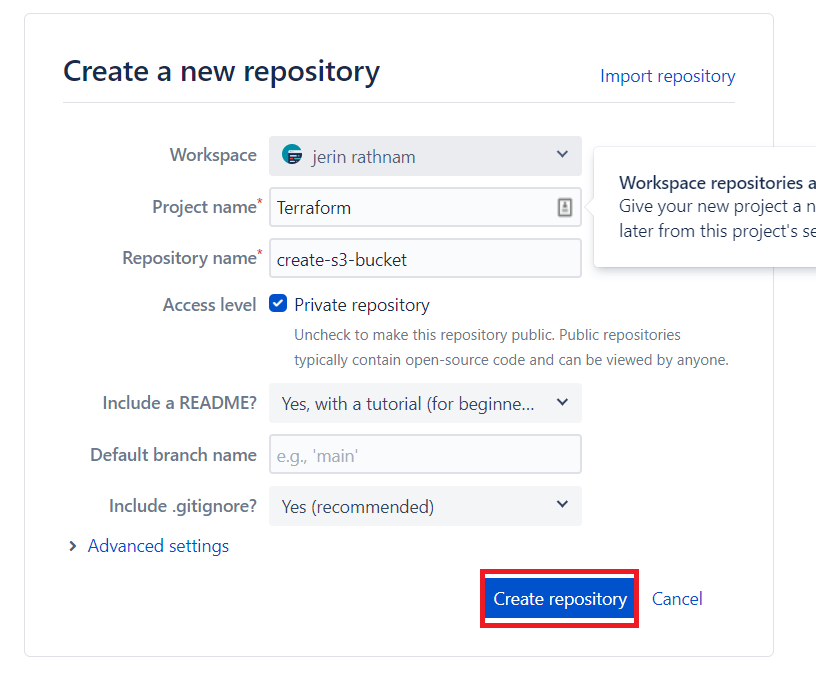
Step 4: Create a Repository in Bitbucket
Now go to your Bitbucket account and create a Repository in your Bitbucket, by clicking the “Create Repository” Button.
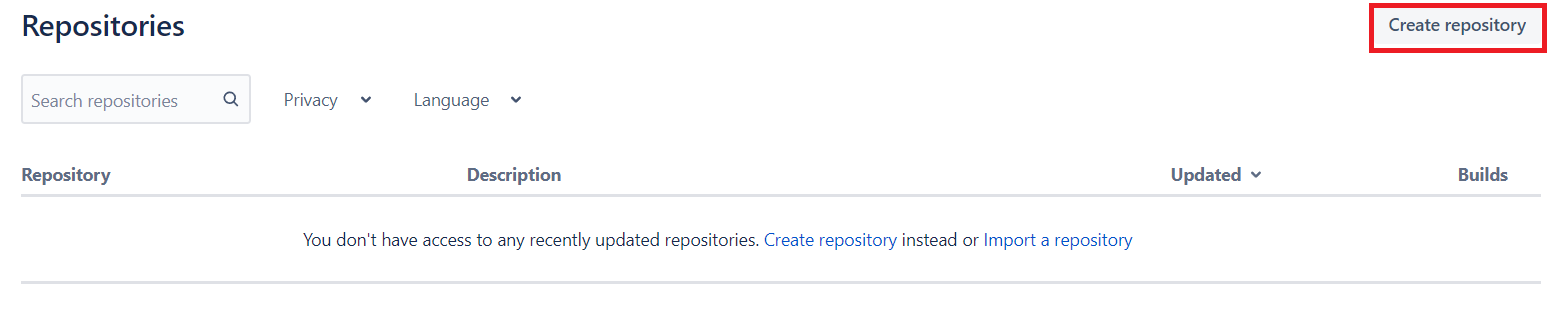
Fill out all the details and Click “Create Repository” Button.
Step 5: Create a New Workspace in Terraform Cloud
Now you are going to create a workspace for your Bitbucket repository in the Terraform Cloud. Click the “New Workspace” button to create a workspace.

For Choose Type, click the first link as Version Control Workflow.
For Connect VCS, Click the Bitbucket link, which we created workflow connection previously.
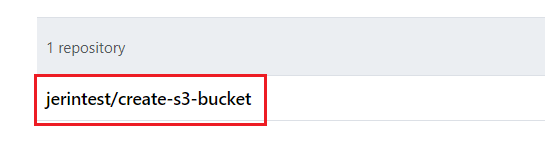
Then Choose repository section, Click a repository you want to connect to for your workflow. It will list all of your repositories in your Bitbucket workspace.
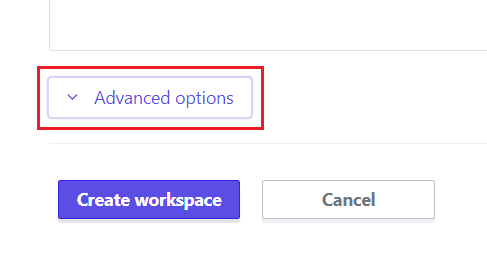
Click the “Advanced Options” to edit more options for your workflow.
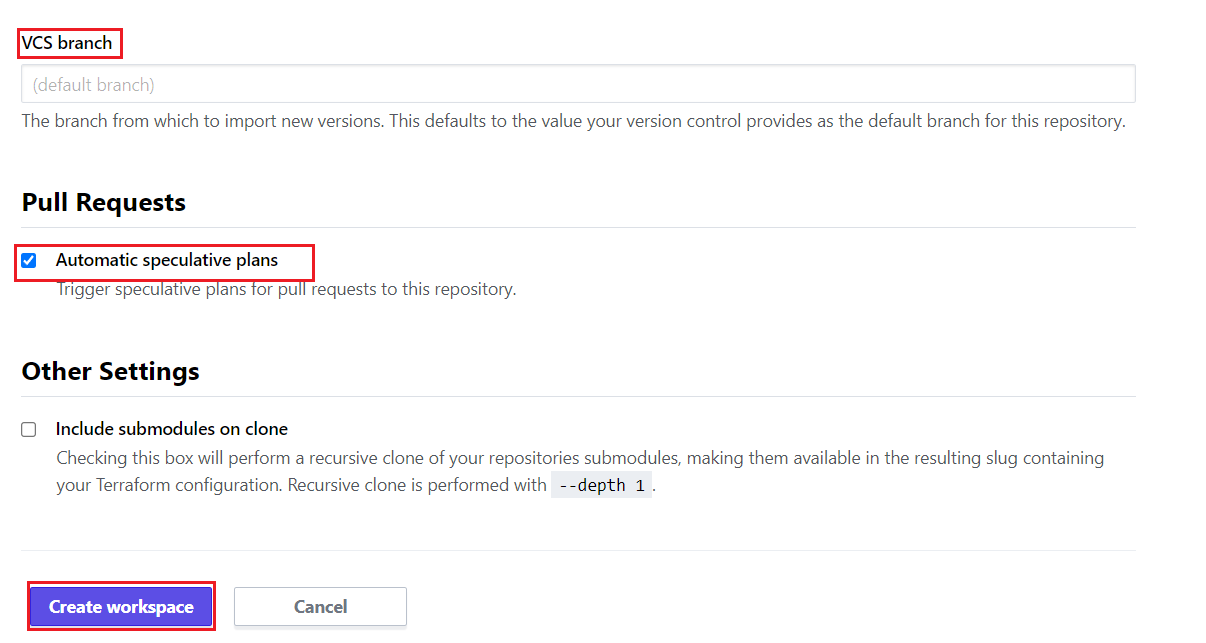
- In the “VCS branch” section, you can enter a specific branch name or just leave it, it will take the default main branch.
- In the “Pull Requests’ ‘ section, make sure to enable the checkbox to trigger an automatic plan for your terraform code, whenever you make changes in your code.
- And finally, Click the “Create Workspace”.
Step 6: Configure the Variables in Workspace
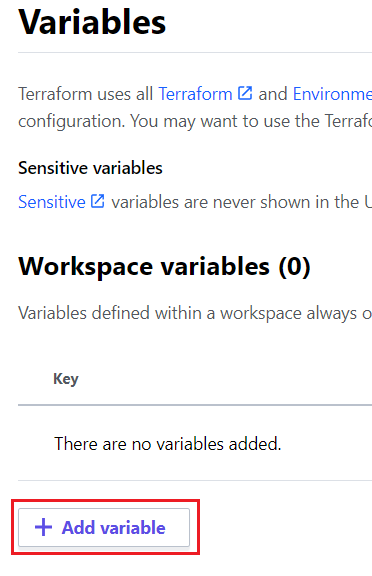
In your workspace’s variables section, click the “Add variable” to add variables for your code.
Enter the Variable name and value, Click the “Save variable” to save it. When you enter any sensitive data like access_keys and secret_keys, you can click the box “Sensitive”.
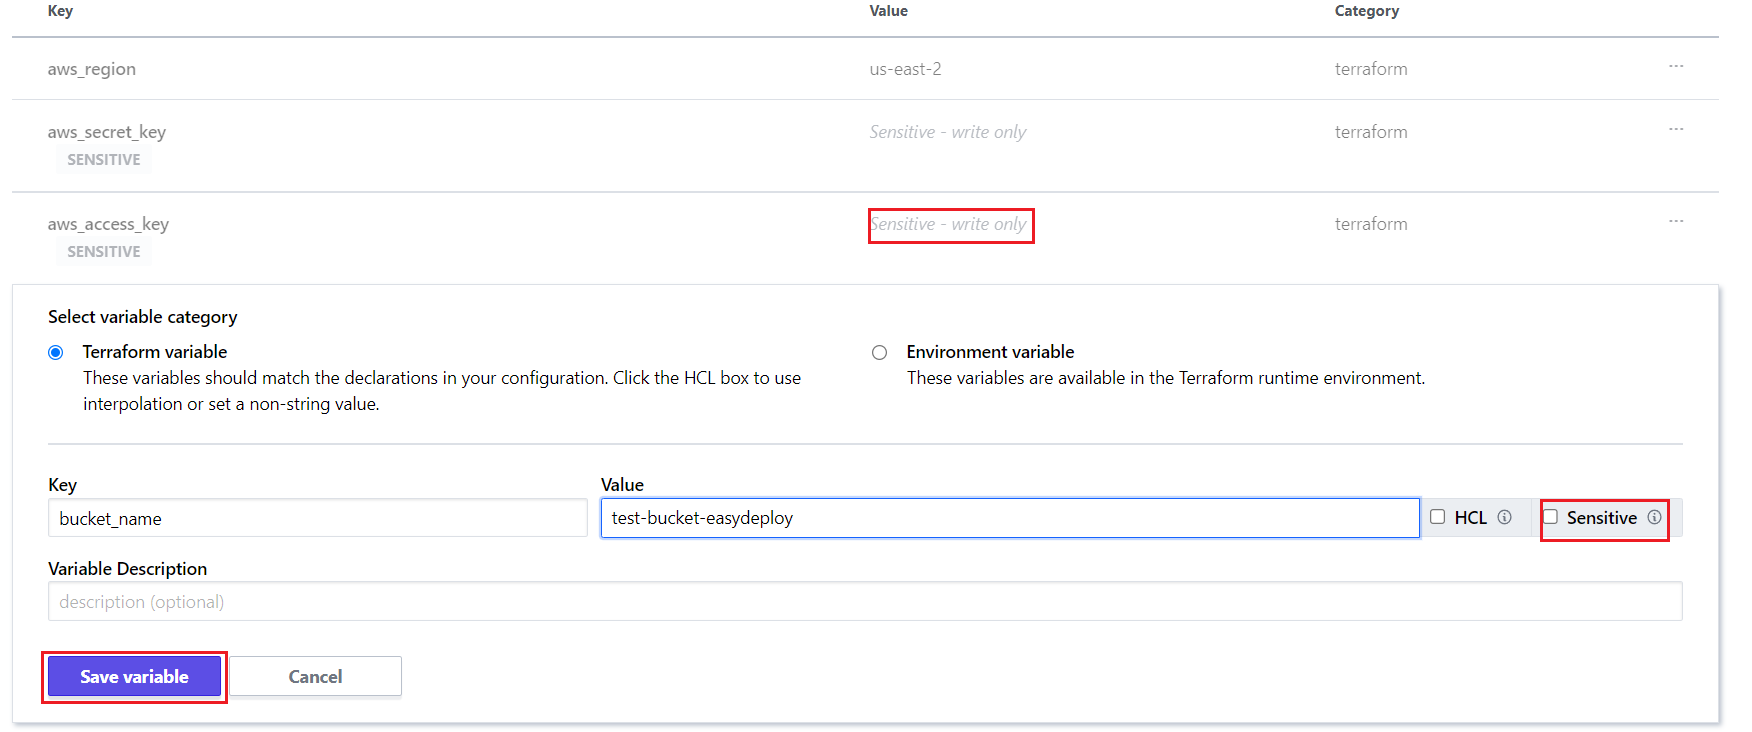
- So this won’t show the values in that variable, after you click the “Save variable”.
- And you can’t edit the sensitive variables once you save them. You can just delete it and recreate it again.
- Most importantly, you have to provide your AWS account’s access_key and secret_key.
- Then only terraform has access to deploy your code on the aws account.
You have successfully completed your Terraform Cloud setup with your Bitbucket.
Run Code on Terraform Cloud
Step 1: Push Your Code to Bitbucket Repository
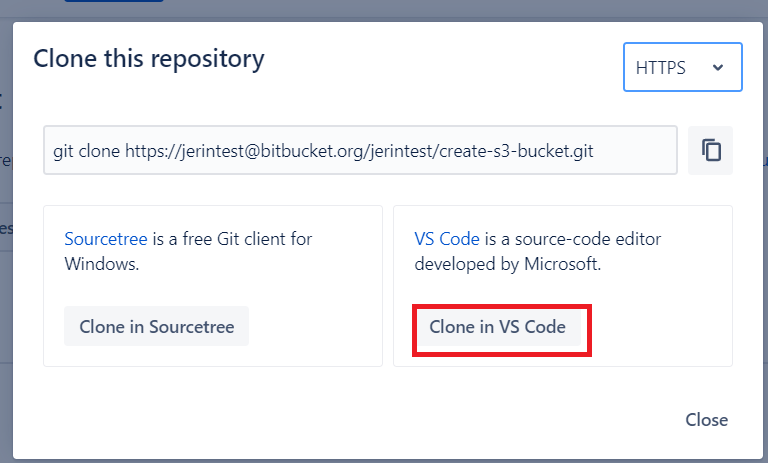
In your Bitbucket Repository, Click the “Clone” button and Click the “Clone in VS Code” button.

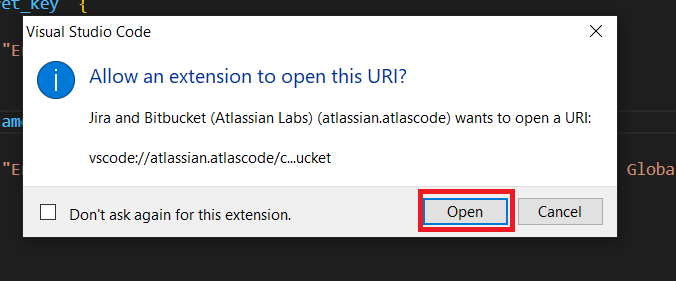
It navigates you to your VS code editor, and will ask for confirmation. Click “Open”.
Click “Add an existing folder” and select the folder where you have the code.

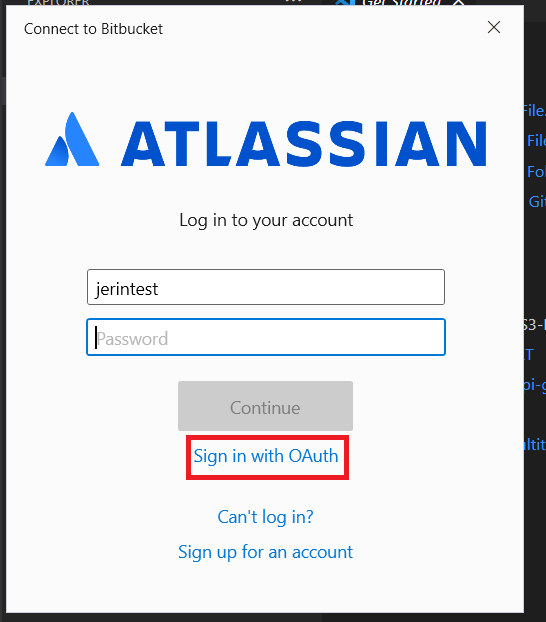
And it opens a Atlassian page and asks for a confirmation, you can click the “Sign in with OAuth” and then Click “Grant Access” to clone the repository into your local.
Now open the terminal in VS code and type the following commands to push your code.
- git add *
This command adds a change in the working directory to the staging area. It tells Git that you want to include updates to a particular file in the next commit.
- git commit -m “<commit message>”
This command followed by the -m flag and then your message in quotes.
The -m option of commit command lets you write the commit message on the command line.
- git push origin <branch-name>
In simple words git push command updates the remote repository with local commits.
The origin represents a remote name where the user wants to push the changes.
Git push command push commits made on a local branch to a remote repository.
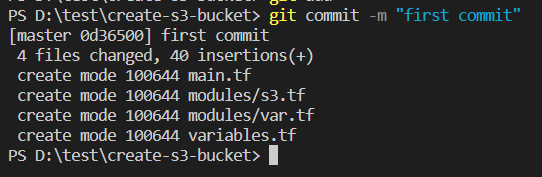
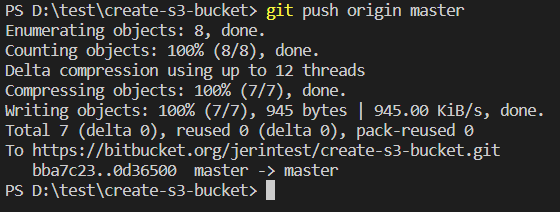
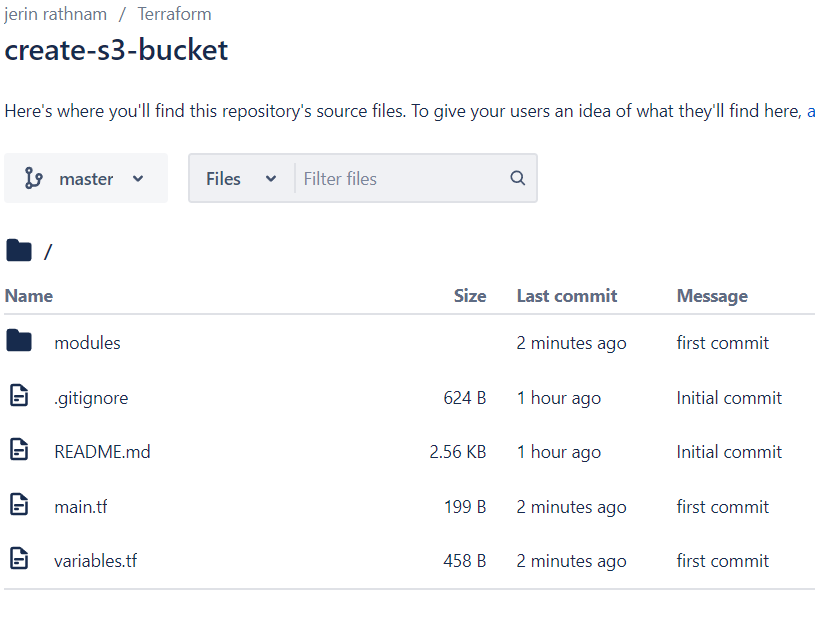
You can check your repository to see whether your code uploads or not.
Step 2: Plan and Apply the Code on Terraform Cloud
Go to your Terraform Cloud workspace, in the Overview section, there is a plan that has automatically triggered and planned successfully.
Click on the “See Details” button to see the plan of your code.
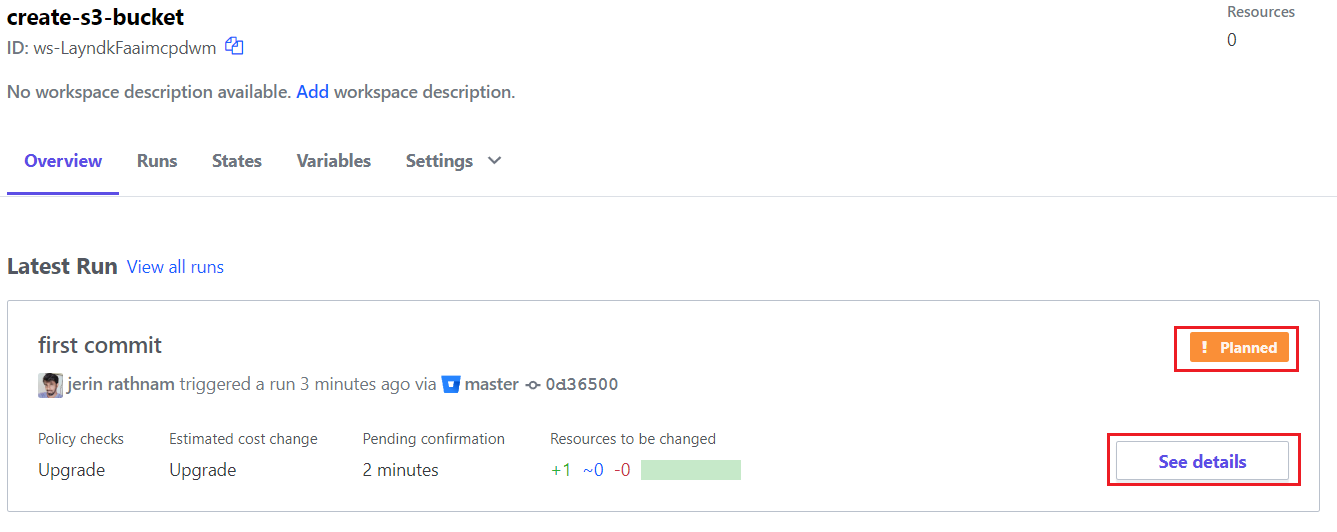
Here you can see your plan has successfully finished.
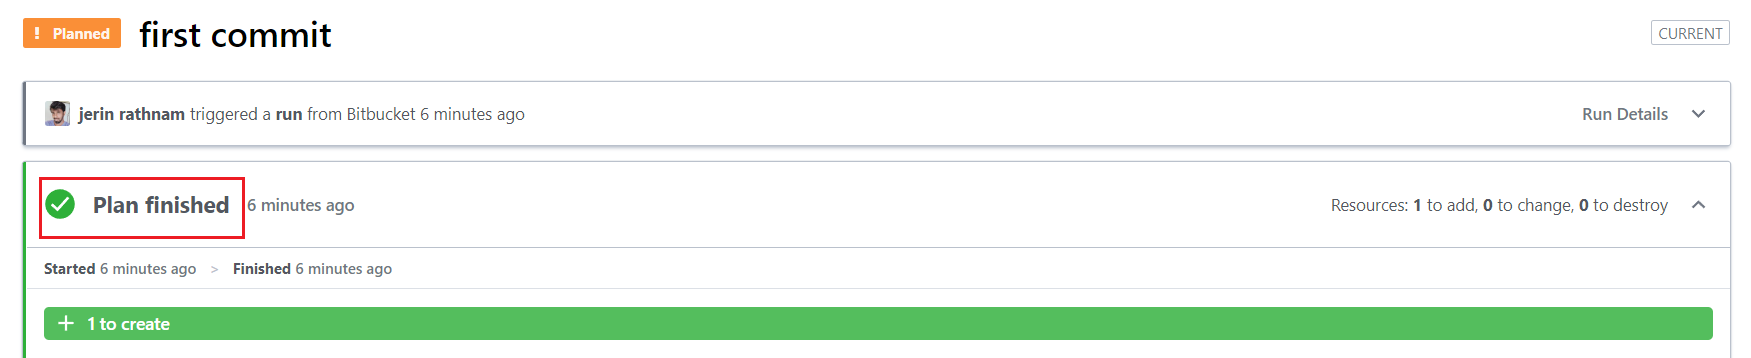
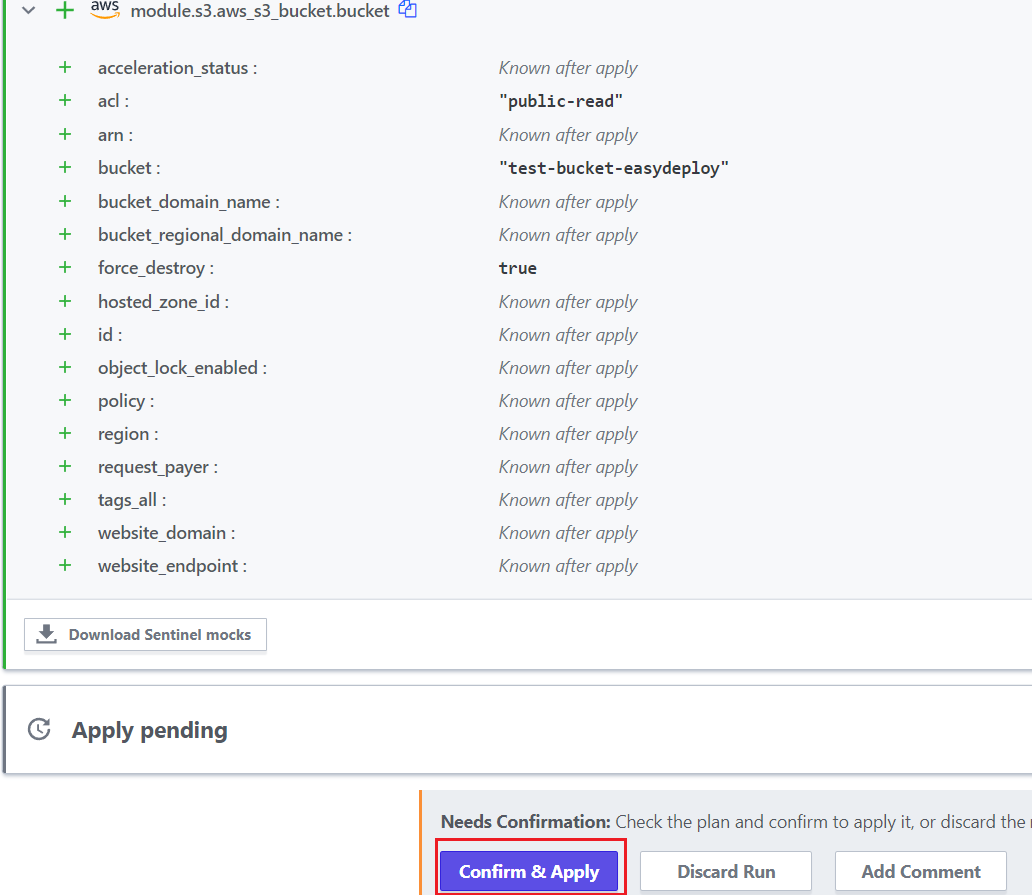
In the bottom of the page there is a list contains what resources going to create, and you can expand to see the full details of a specific resource by clicking the “+” icon

In bottom, It Needs Confirmation to Apply your code.
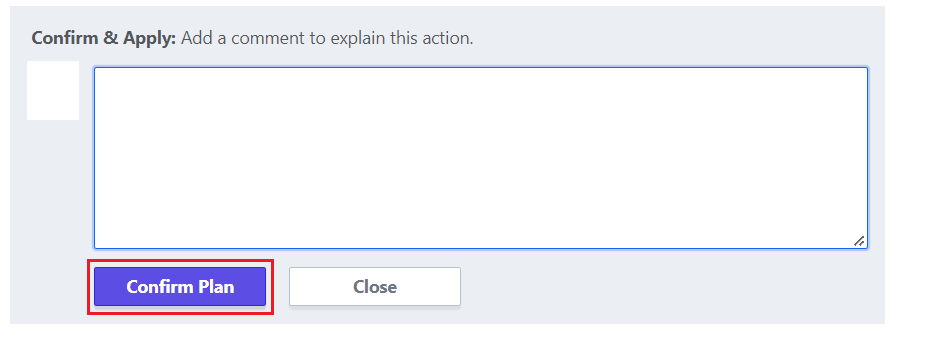
Click the “Confirm & Apply” button, and then click “Confirm Plan” to deploy your code to AWS.
As you saw the below image your plan applied successfully.
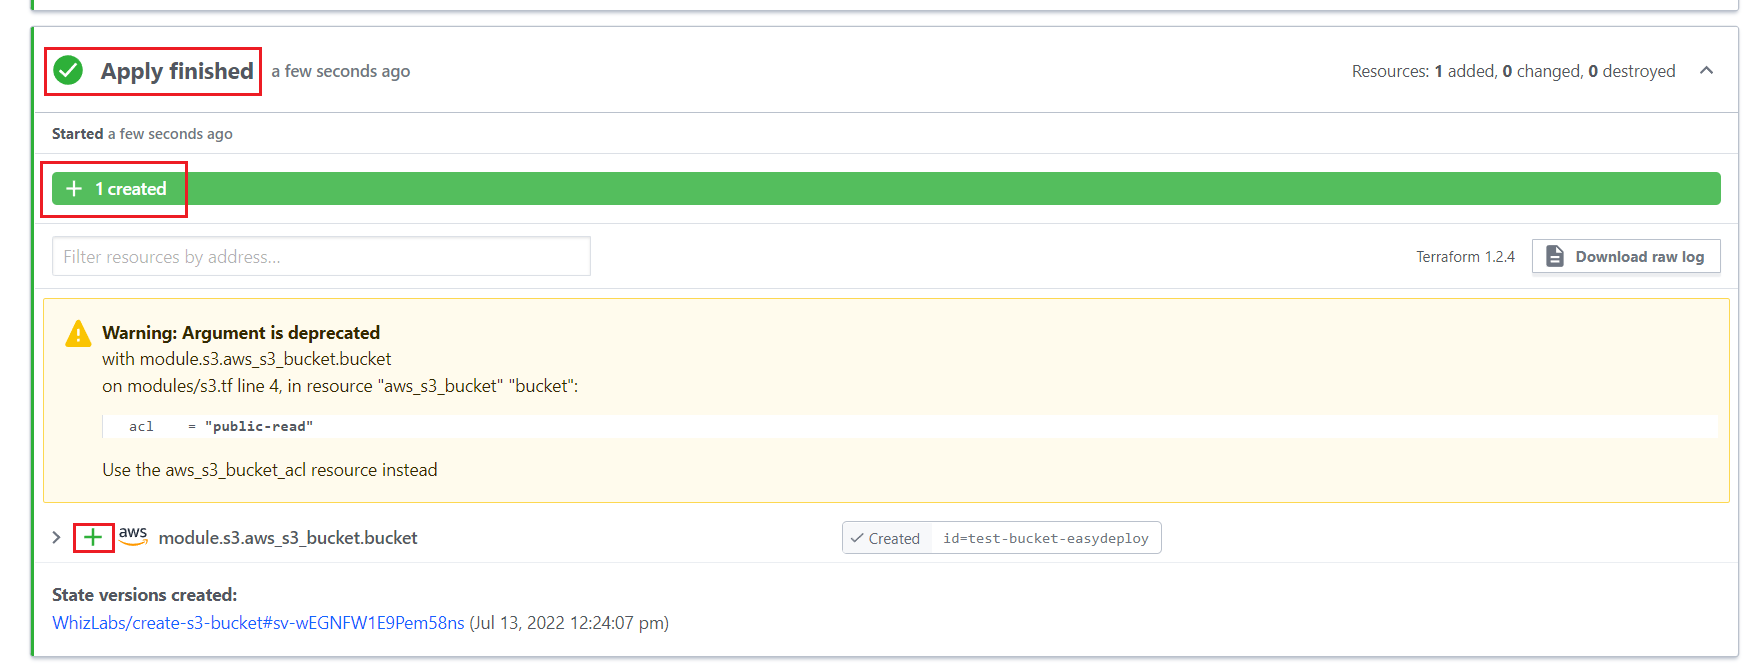
To confirm whether your bucket is created or not, see your aws account and select the S3 bucket section.

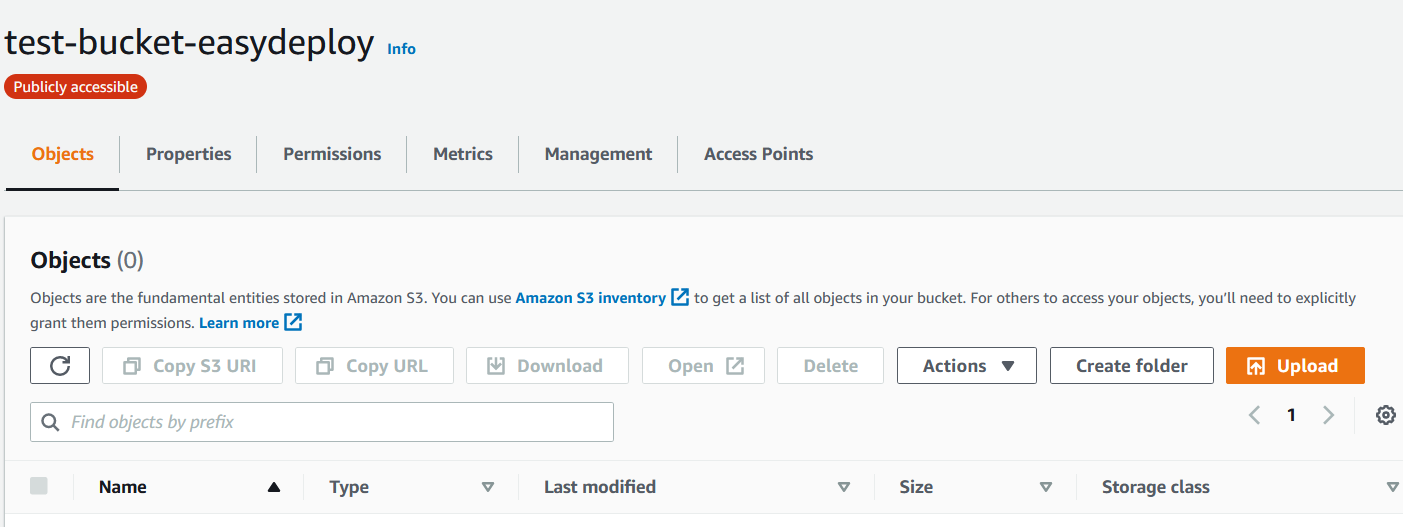
With just one click we have automated the whole workflow setup such is the power of automation by integrating Bitbucket and Terraform Cloud. With this we can easily deploy any of the infrastructure on AWS Cloud automatically. Whenever you push the code to your repository, Terraform Cloud will automatically triggered and deploy your code on AWS Cloud.
Hope you have learnt how to execute the terraform code using Terraform Cloud account. It is a very simple process to manage all your terraform codes inside the cloud account. If you have any questions in this article, please write it in the comments section!!


