
Cloudflare is one of the most popular Content Delivery Network (CDN) services available in the market. Prior to Cloudflare, we were using Amazon CloudFront CDN for our websites. However, we found the pricing model of CloudFront expensive and not suitable for our client’s websites. My intent here is not to mention the cons of CloudFront (as it has some advantages which other services don’t have) but to share my experience of setting up Cloudflare CDN.
How does Cloudflare CDN Work?
Content Delivery Network is a group of servers which integrates together in order to provide the fast delivery of the internet content. Let’s see how and why CDN is important for the fast delivery of the content.
Earlier, to access a domain, the request from the client machine was directed to the server directly that was hosting the domain. Usually, there would be some delay to serve the request (the delay depends upon the geographical location between the Server and the Client).
Nowadays, due to the tangential increase in the number of users the server machine will not be able to process each and every request. If there are a large number of users it will take more time to serve the request and there is more probability of server crash.
So, in order to avoid this, we are going to set up a Cloudflare account with CDN which is going to be in between the client and the server. The below diagram shows the exact function of Cloudflare CDN:
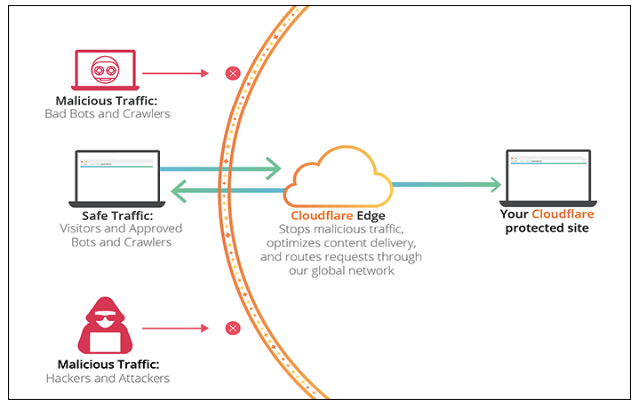
Image Credit: https://support.cloudflare.com/hc/en-us/articles/205177068-How-does-Cloudflare-work-
Once a Cloudflare account is set up, we move to implement the CDN service between the Client and the Server which will cache the static content of our domain. Also, it will serve the client request so that the contents will be delivered fast with reduced payload to the server.
The Cloudflare CDN service will download the Static contents of the website and it will be served from its server (i.e CDN Server) to the Client with enhanced security features. It will replicate our content to its data centers so our content will be delivered to the client in a hassle-free manner. As of now, Cloudflare has 180 data centers distributed around the world. The request by the client is served by the nearest geographically located data center.
Cloudflare also offers us with free DNS service so that we can host our domain after purchasing the domain from the domain registrars, it offers us with free SSL certificates so that our domain will be safe and the client data will be secured.
Cloudflare account offers us four plans such as Free, Pro, Business, and Enterprise edition. The free version is suited for small domains and the Pro version is for professional websites and blogs which require basic security and performance. The business plan is for small e-commerce websites with prioritized email support and the Enterprise plan is for companies requiring enterprise-grade security with 24/7 Phone, Email, Chat support and guaranteed uptime.
Advantages of Cloudflare
- Setting up of Cloudflare account is very easy and simple
- Setting up an account is free and even in the paid version it reduces cost by 30% when compared to other services like AWS CDN
- It offers free SSL certificates
- It provides enhanced security by hiding our server IP so that no hacker can attack the server
- It protects the website from external attacks such as DOS and DDoS attacks
- In case the website is slow, Cloudflare will serve the cache files until the website comes back to normal
Limitations of Cloudflare
- There is a possibility of blocking genuine users
- It is advisable to use Cloudflare CDN when there are a large number of users with enough traffic to our website
- Cloudflare provides limited options for security
Also Read: How to Set up RDS Autoscaling in RDS in 15 minutes?
Steps to Set up Cloudflare Account and It’s Services
Let’s understand the steps for setting up Cloudflare account and its services:
Step 1: Setting up Cloudflare Account
To Set up a Cloudflare account, we need to sign up for Cloudflare Account by clicking the URL https://dash.cloudflare.com/sign-up.
You will get the following page where you have to enter your Email ID and password. Once entered, click on the Create Account to sign up.

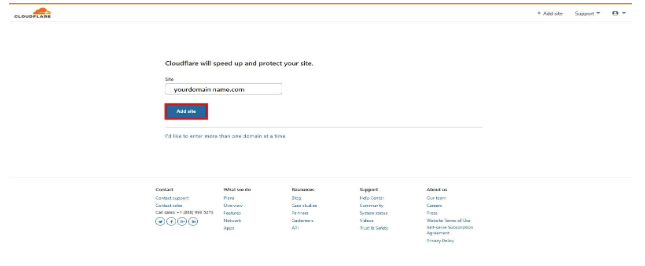
Step 2: Domain Name Entry
After successful signup, we have to provide the Domain Name for which we are going to implement the Cloudflare services and then click on the Add Site icon.
Step 3: Choosing a Plan for the Cloudflare
The previous step will navigate us to a screen where we have to Select a plan for our account according to our requirements. Here, I’m choosing Free plan and then we need to click on the Confirm Plan to confirm the selected plan.
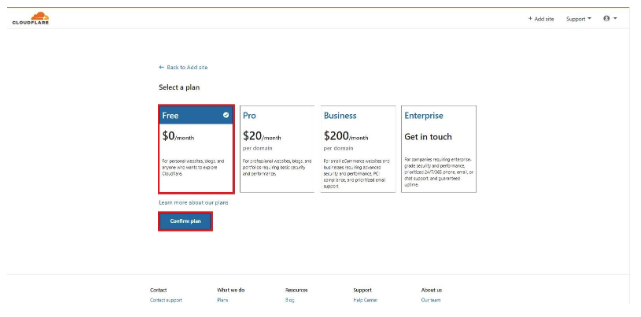
To view the detailed description about each plan, click the following link https://www.cloudflare.com/en-in/plans/
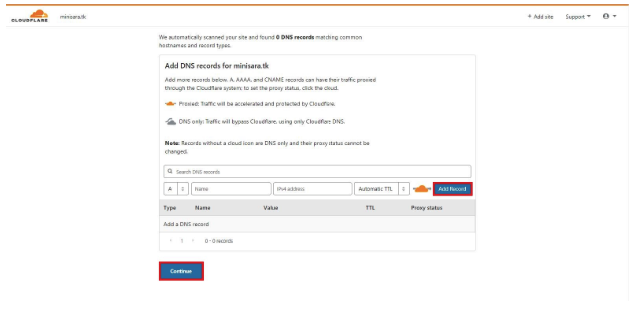
Step 4: Fetching the existing records
Once we have confirmed the plan, the Cloudflare will fetch the records of our domain with the information of name records. In the below screen, there is no record for the domain that we have provided. If we want to use Cloudflare to host our domain, we need to click on the Add Record or else you can skip this by clicking on Continue.
Step 5: Changing the name servers
In this step, Cloudflare will ask to change the name servers at the domain registrar’s end so that Cloudflare could give us the service of DNS as shown below in the screenshot.
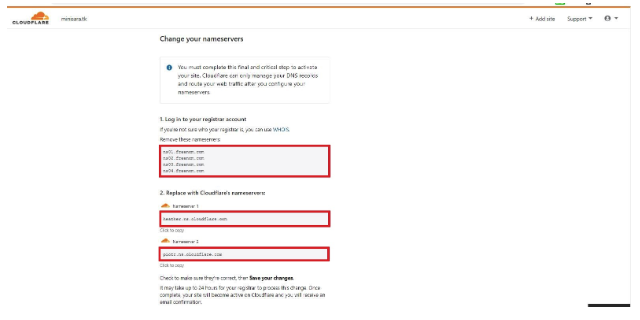
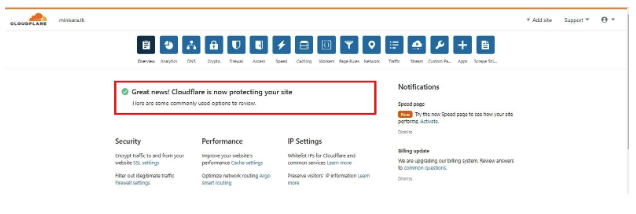
In the above screenshot, our domain registrar is freenom. Now, change the existing name servers of your domain with the one provided by Cloudflare. To change the Nameservers, Login to your Respective Domain Register and change the one with Cloudflare nameservers. After changing the name servers, Cloudflare will verify it and it will display the message as shown in the below screenshot. Now, you can manage your domain in Cloudflare itself.
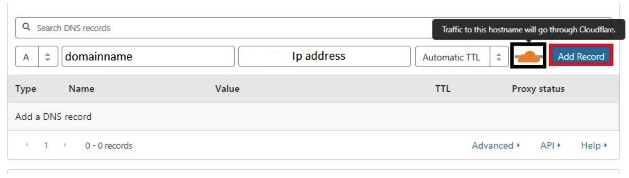
Step 6: Managing DNS records in Cloudflare CDN
In order to manage the DNS records in Cloudflare click on DNS icon in the Cloudflare home page and then add Records of your domain. Then to serve our domain via Cloudflare CDN, make sure to check the Orange cloud symbol as shown in the below screenshot.
Step 7: Managing DNS records in Cloudflare without CDN
In order to manage the DNS records in Cloudflare, click on DNS icon in the Cloudflare home page and then add Records of your domain. In case we don’t want to serve our domain via Cloudflare CDN, make sure to Uncheck the Orange cloud symbol as shown in the below screenshot.

Step 8: SSL Configuration in Cloudflare
To configure SSL in Cloudflare, Click on Crypto icon in the Cloudflare home page as shown below and choose the SSL with the features such as Off, Flexible, Full and Full (Strict).
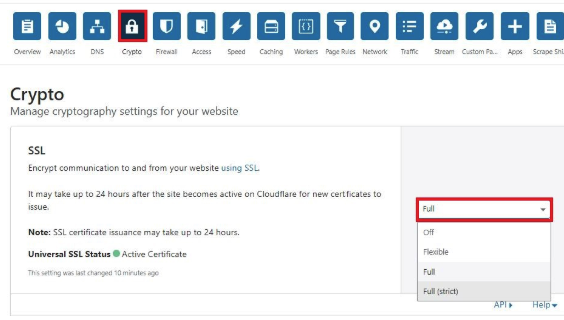
One can get the details about various option in SSL by referring to the below screenshot.
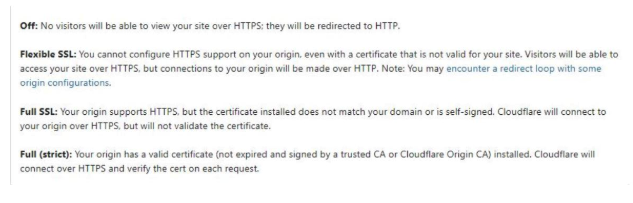
By Default, Cloudflare is providing free SSL for the duration of 365 days.
Step 9: Speed Optimization Settings
You can increase your website speed by enabling specific features in Cloudflare. To enable such features, navigate to the Speed icon in the Cloudflare home page as shown in the below screenshot.

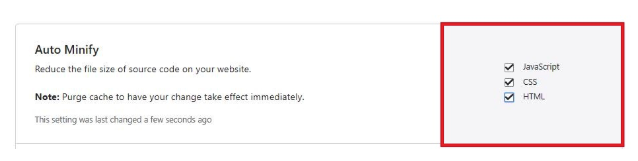
Scroll down to Auto Minify in the Speed page and then enable JavaScript, CSS, HTML, so that the contents of your website will be displayed in compressed format.
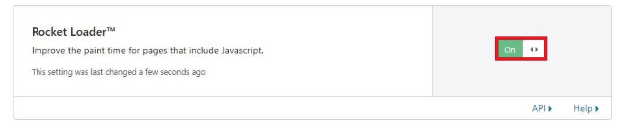
Scroll down to Rocket Loader in the Speed page and enable it as shown in the below screenshot.
Step 10: Enabling Caching
Cloudflare also offers cache control to invalidate the cache. To clear the cache, select caching from the panel. To purge the cache, we have 2 options. We need to click on Purge Everything icon to purge everything from the cache as shown in the below screenshot.
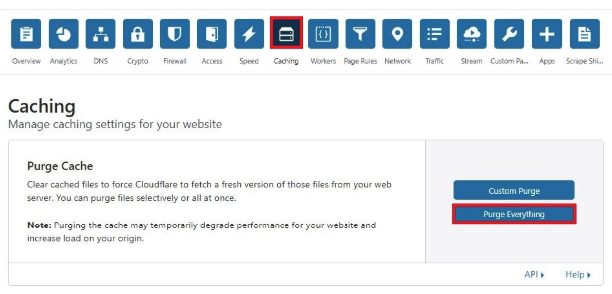
In case we want to clear the cache under the particular path, we can click on Custom Purge and then specify the specific path to clear the Cache. Finally, we need to click on Purge as shown in the below screenshot.

By default, Cloudflare offers us the Browser Cache Expiration time for 4 Hrs as shown in the below screenshot.

Step 10: Setting Page Rules
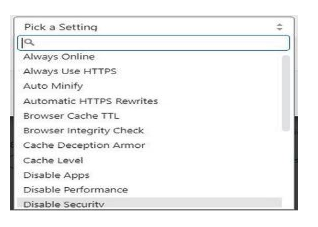
Select Page Rules from the Cloudflare home page, click on the Create Page Rules, and you can define your desired page rules.

After clicking on Create Page Rule, we have to provide the URL and have to choose the rule according to our needs. The below screenshot shows the list of page rules.
You can find detailed notes on Page Rules option at the following link:
As shown in the below screenshot, I have provided my URL and in the rule, I have given Allow Use HTTPS. Now, we need to click on the Save and Deploy to save our settings.
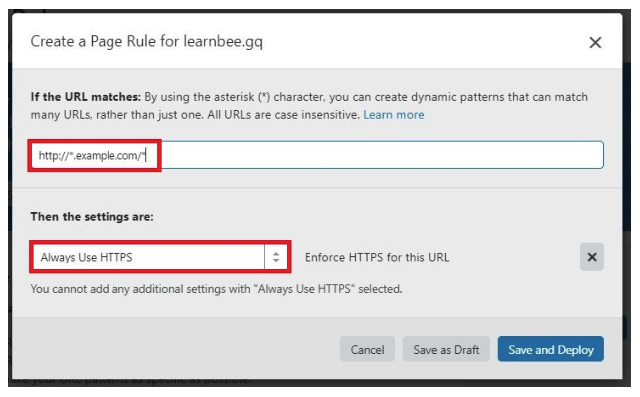
The above-created page rule will always redirect my domain to https. I have configured a Rule that my domain – http://*.example.com/* will always redirect to https://*.example.com/
Step 11: Cloudflare CDN checker
After successfully setting up Cloudflare CDN with the above-mentioned steps, you can check whether your site is working from CDN using the following link https://www.cdnplanet.com/tools/cdnfinder/
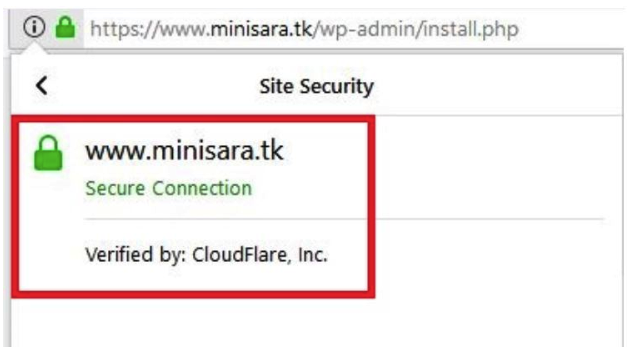
Another way to check this is by verifying whether your domain using Cloudflare certificate form the browser. For this, click on the lock symbol from the browser and then connection, there you can see verified by Cloudflare, Inc. as shown below.
Thus, we have successfully implemented Cloudflare services between our Server and the Client. Hope this article will help you to set up Cloudflare CDN and you will experience its advantages. Please share your experience with us in the comment section below if you have already set up Cloudflare.


