Introduction
AWS Cognito provides a comprehensive set of authentication, authorization, and user management features, making it a popular choice for many modern applications. When migrating AWS Cognito to a different AWS account, it’s essential to ensure a seamless transition without impacting the user experience or compromising security.
This tutorial is also published on our YouTube channel. You can follow the video tutorial below.
Prerequisites
-
Aws account
-
Aws account with admin access and IAM full access
-
Basic understanding of AWS, AWS Cognito, lambda, Roles, and policy
Intended audience
-
Engineer
Procedure
Follow these steps to use the migration Lambda function
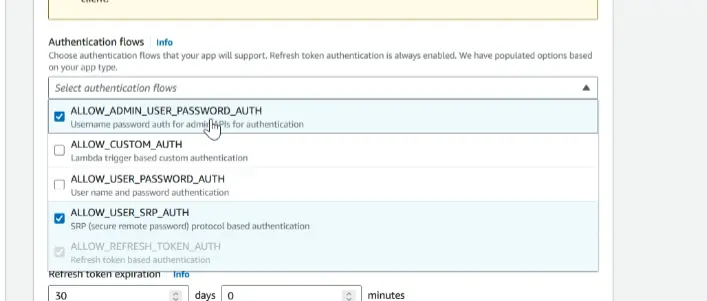
5.1 Create a new user pool client app in the old user pool This client must have the OAuth flow ALLOW_ADMIN_USER_PASSWORD_AUTH enabled
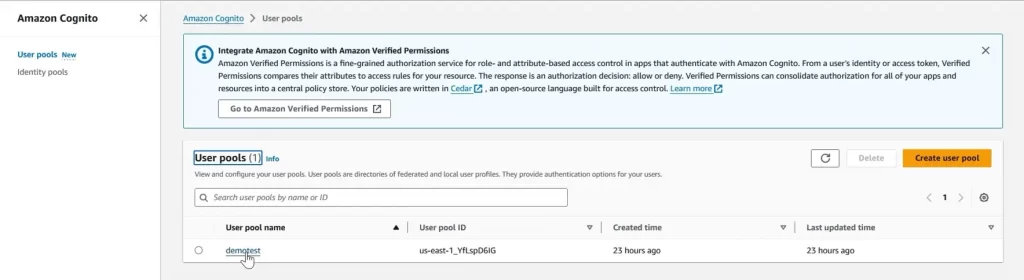
First, log into your AWS account of the existing Cognito user pool, which we consider the source
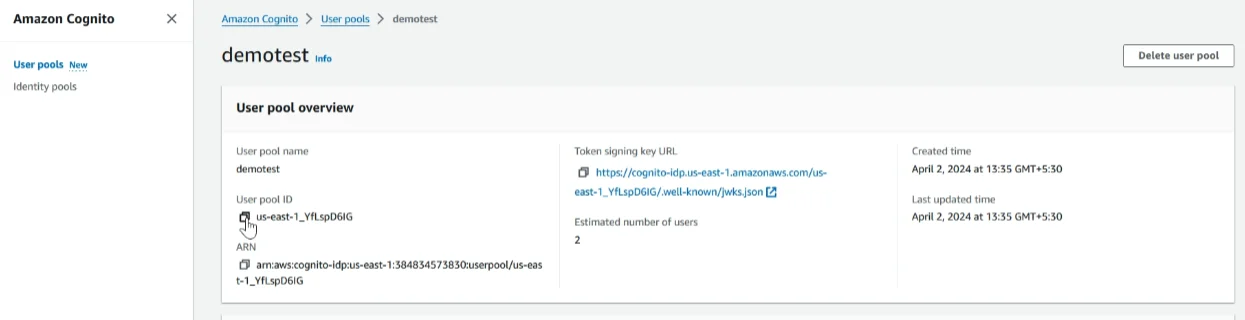
After login, navigate to the Cognito user pool and select the user pool you wish to migrate
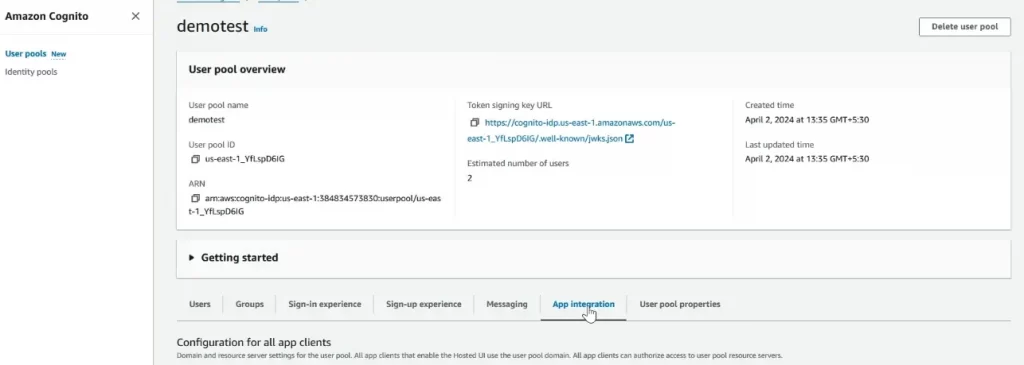
You will see the user pool overview. Select the ‘App integration’ menu below the image that looks like
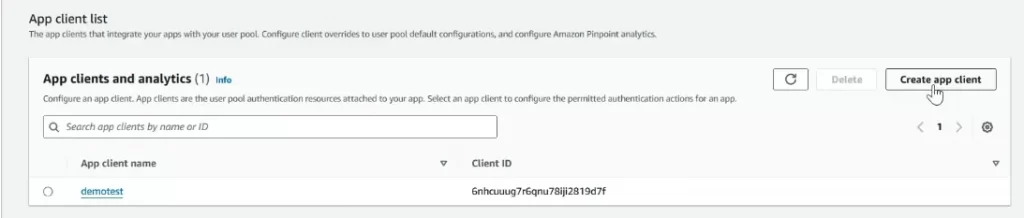
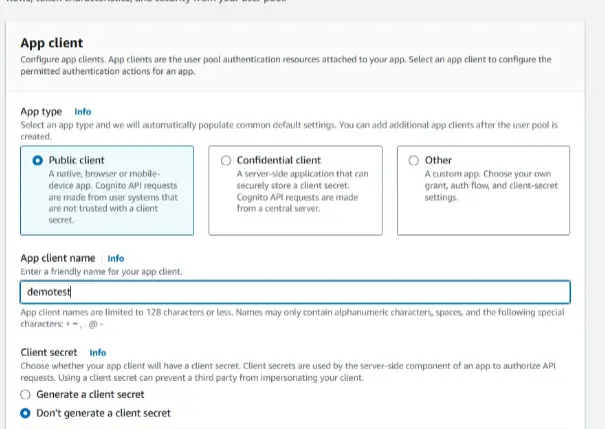
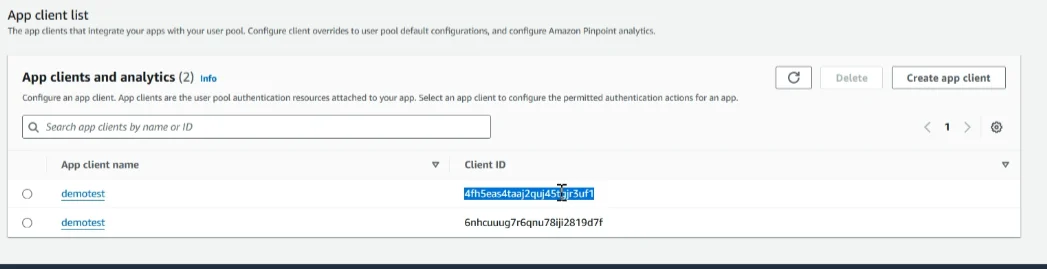
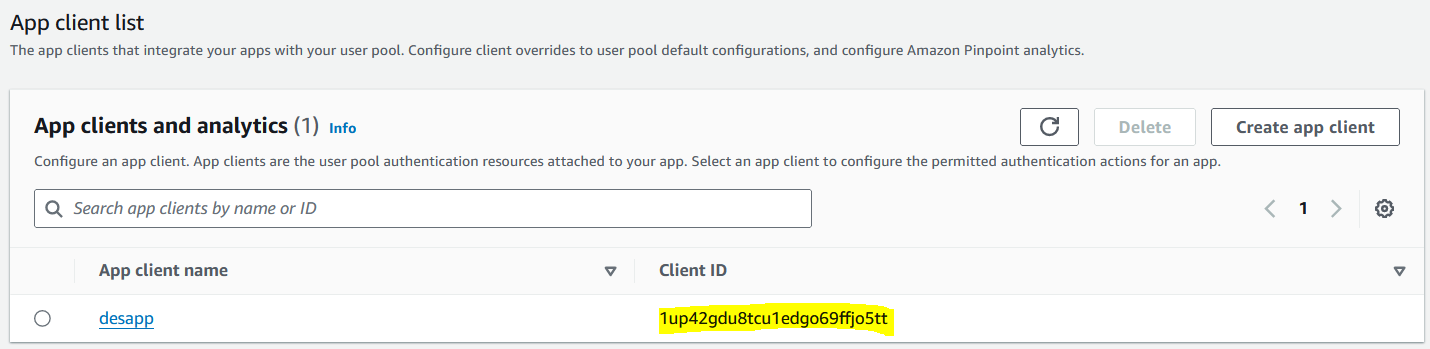
Below, at the end, you will see the ‘App client list’ section. Click on the ‘Create app client’ menu in the top right corner
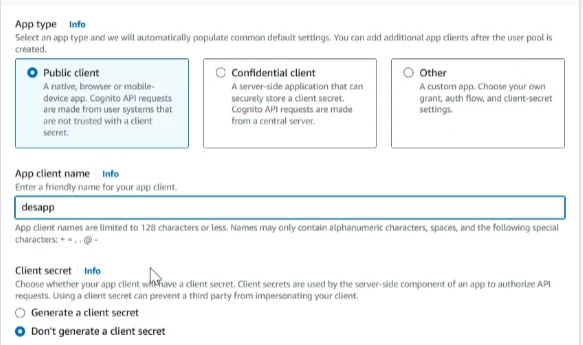
Mention the app client name as you prefer
Authentication flows section select the Allow_ADMIN_USER_PASSWORD_AUTH
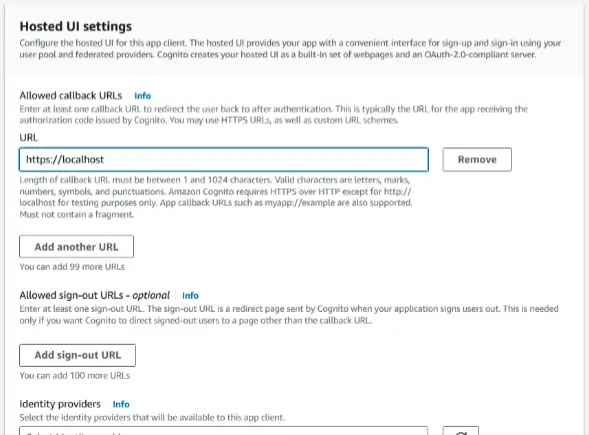
In the ‘Hosted UI settings’ section, for ‘Allowed callback URLs’, we specified ‘localhost’ for testing purposes. Feel free to provide any URL you prefer. We’ll leave the other details as the default
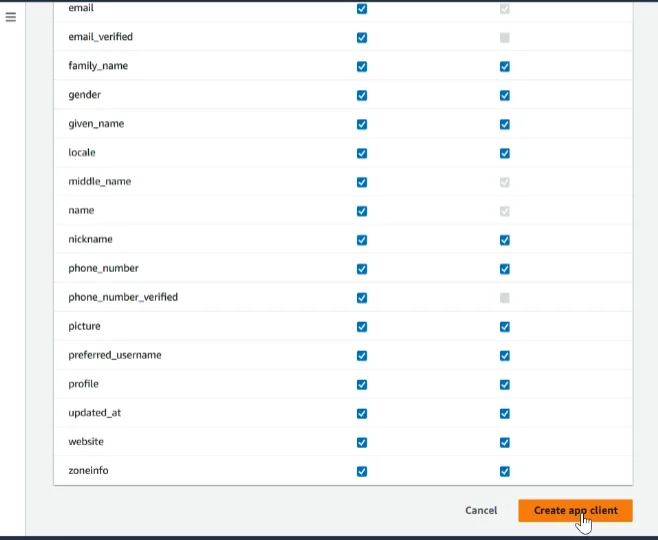
Click on Create app
After creating the app client, please note down the client app ID and user pool ID. We will configure these in the Lambda environment later
5.2 Create a new user pool that allows triggering user migration. Ensure these clients use the OAuth flow with ‘USER_PASSWORD_AUTH’ enabled
In the destination account, create a new Cognito user pool to migrate existing users
Log in to the destination account, navigate to the Cognito service, and click on ‘Create user pool’
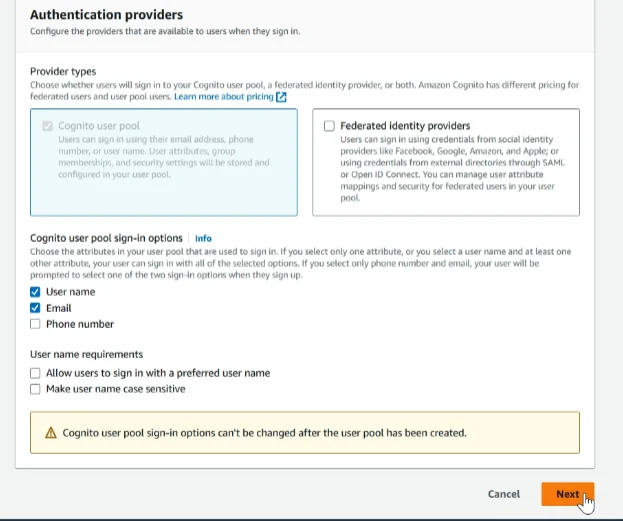
In the Cognito user pool sign-in options, we select both ‘username’ and ’email’. You can choose the options as per your preference, Click next
For MFA enforcement, we select ‘No MFA’. For other details, we’ll leave them as default, and then click ‘Next

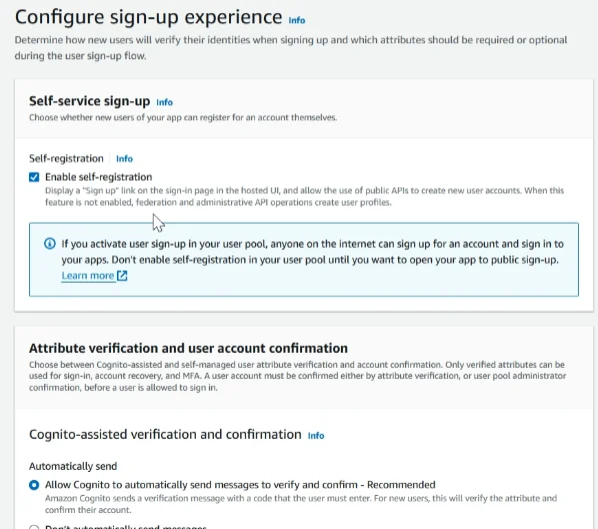
Configure sign-up experience section,we’ll leave them as default, and then click ‘Next
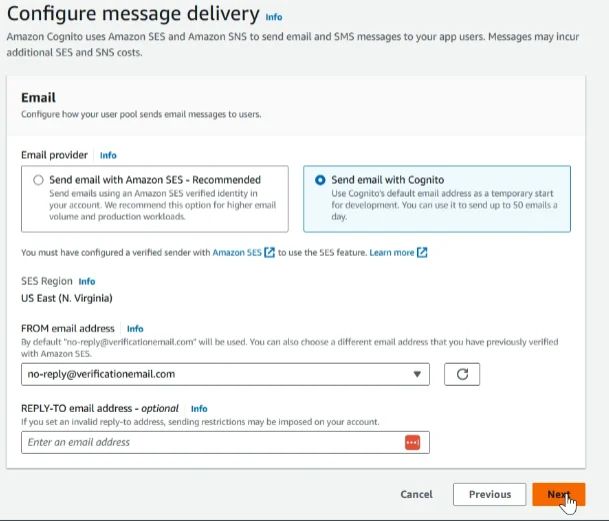
We select the email provider option send email with Cognito and click next
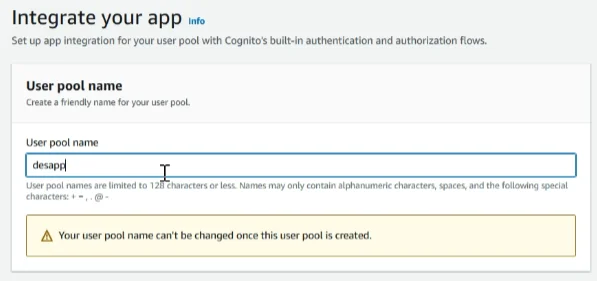
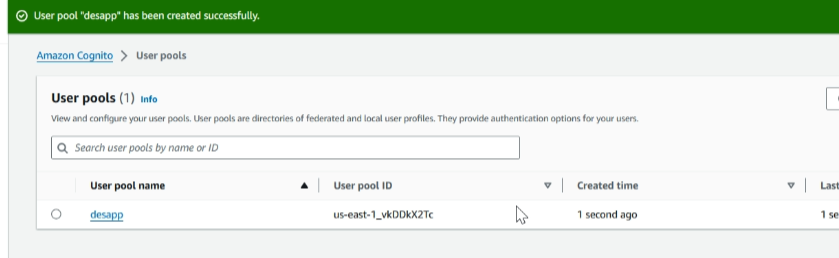
We mention the user pool ‘desapp’. You can mention it as you prefer
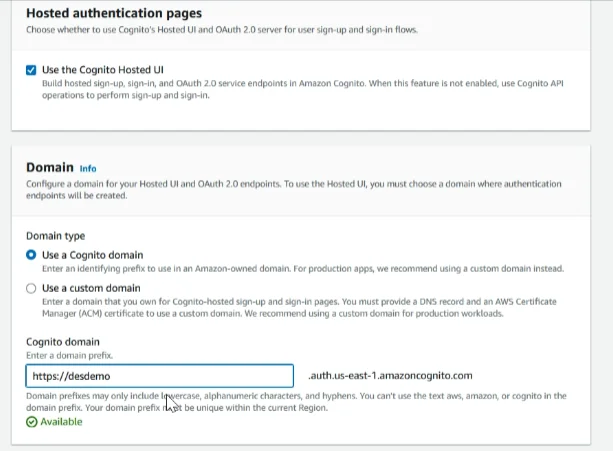
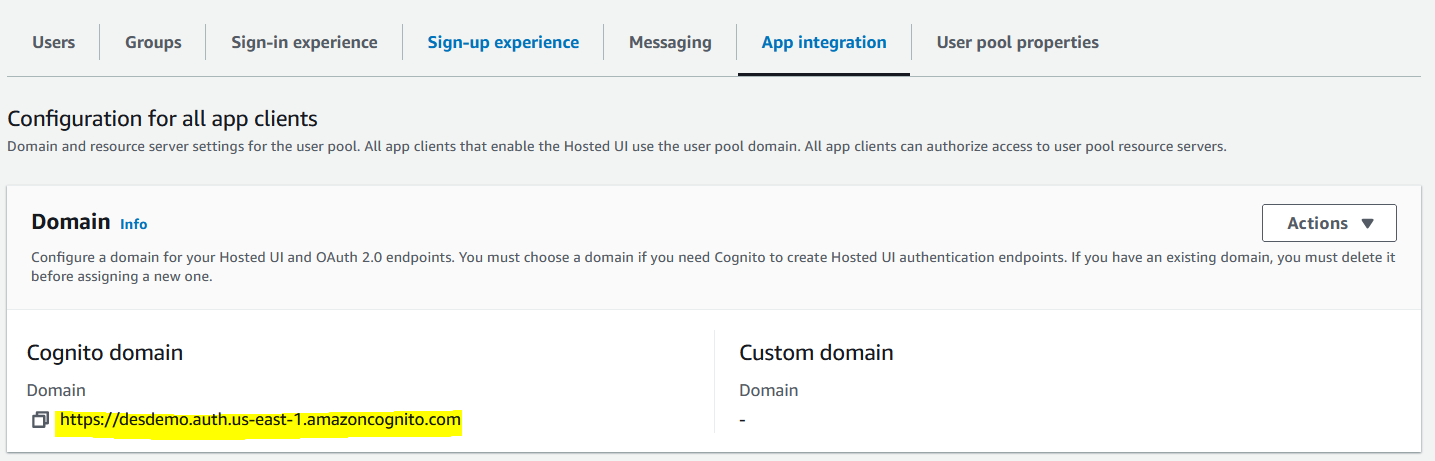
In the ‘Hosted authentication pages’ section, select ‘Use the Cognito hosted UI’, In the ‘Domain’ section, we mentioned the domain as ‘desdemo’
We mention the App client name ‘desapp’, You can mention it as you prefer and call back URL we provide localhost. you can provide any URL you prefer
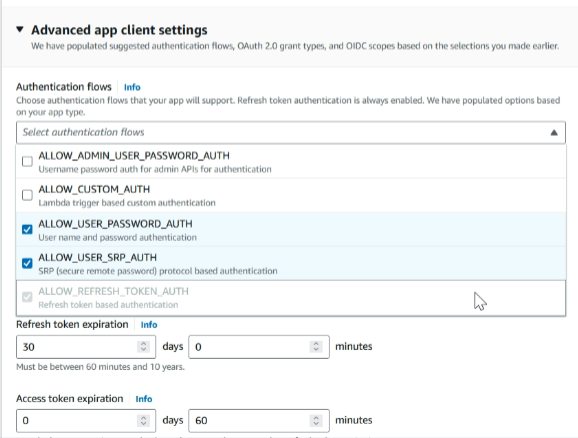
In the ‘Advanced app client settings’, under ‘Authentication flows’, select ‘ALLOW_USER_PASSWORD_AUTH’
For other details, we’ll leave them as default, and then click ‘Next
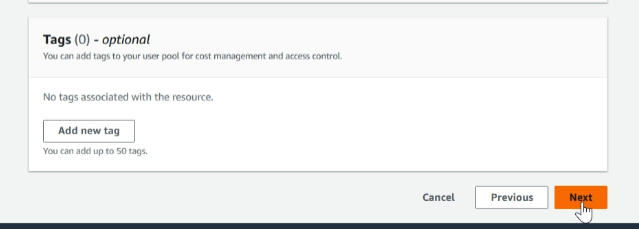
finally, click on Create User pool
5.3 Creating the lambda function and Lambda execution role
In the destination AWS account, create a new AWS Lambda function. This function will be responsible for initiating the migration process and executing the necessary API calls to replicate the user data from the source account
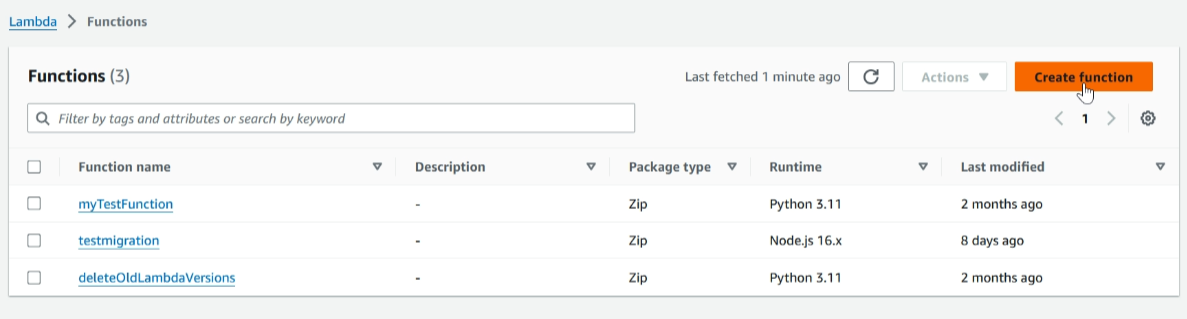
Navigate to Lambda and click on ‘Create Function’
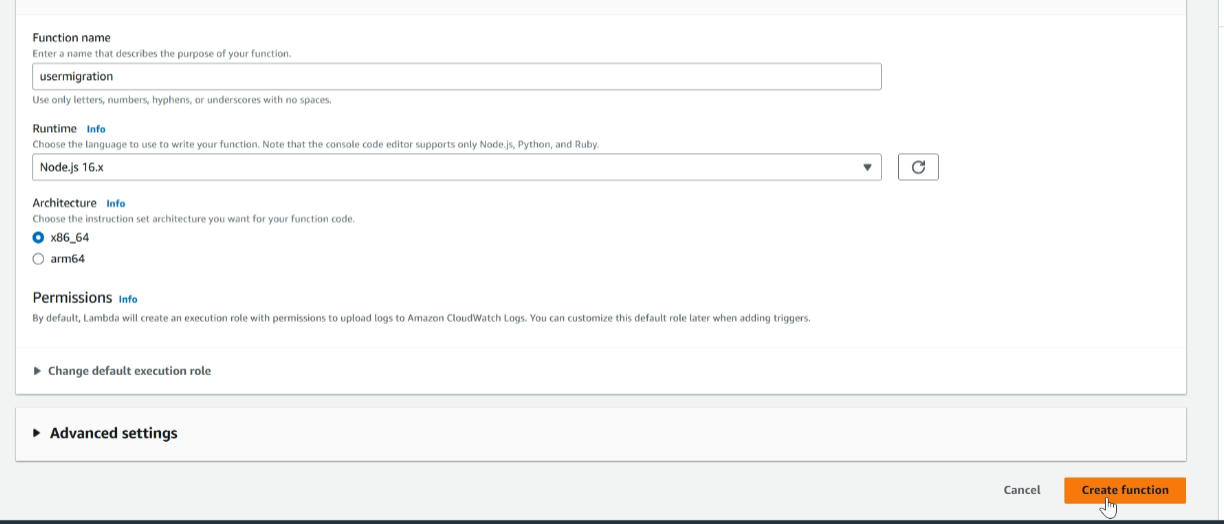
We mention the function name ‘usermigration’. In the runtime section, select ‘Node.js 16’, then click on ‘Create Function’
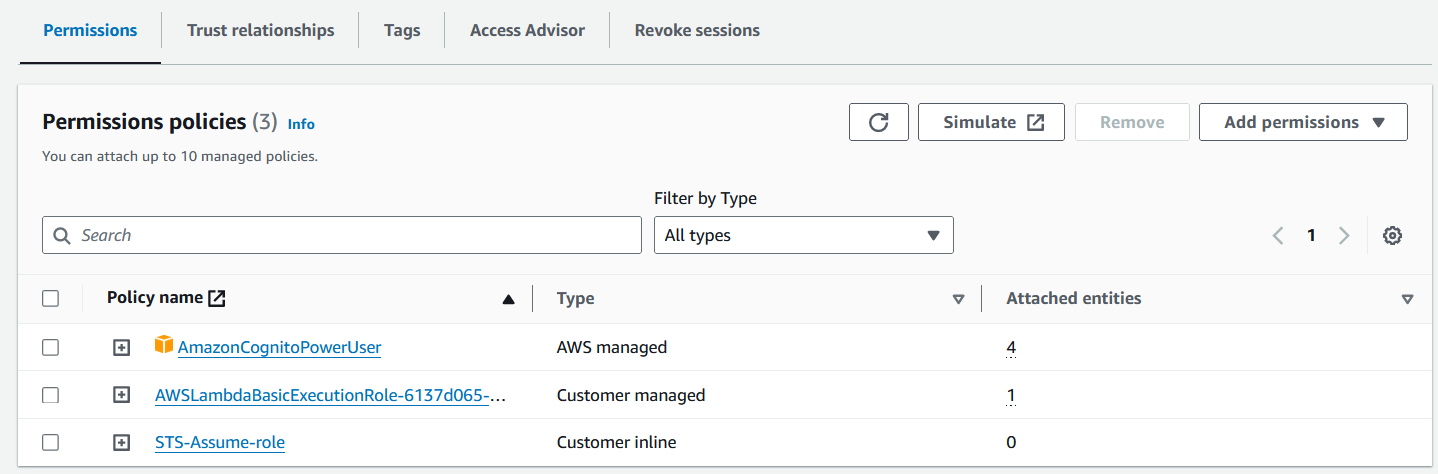
After creating the Lambda function, select the ‘Permissions’, then choose the role name that was created
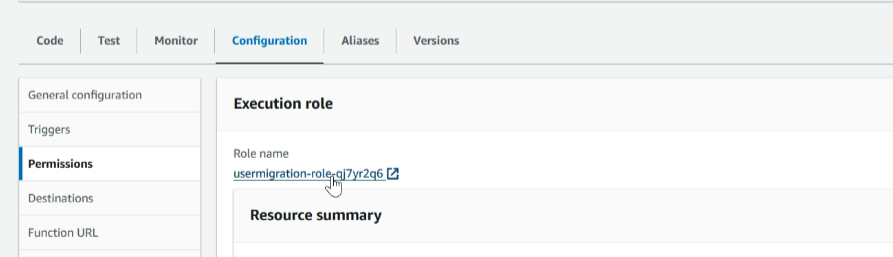
It will take you to the Lambda execution role
You need to attach the ‘AmazonCognitoPowerUser’ policy and create an inline policy for ‘sts-assume’. You can reference the script below
Please note that the ARN will contain the Account ID of the source account. You need to replace it with your own
{
"Version": "2012-10-17",
"Statement": [
{
"Sid": "Statement1",
"Effect": "Allow",
"Action": "sts:AssumeRole",
"Resource": [
"arn:aws:iam::384834573830:role/crossaccountcognito"
]
}
]
}
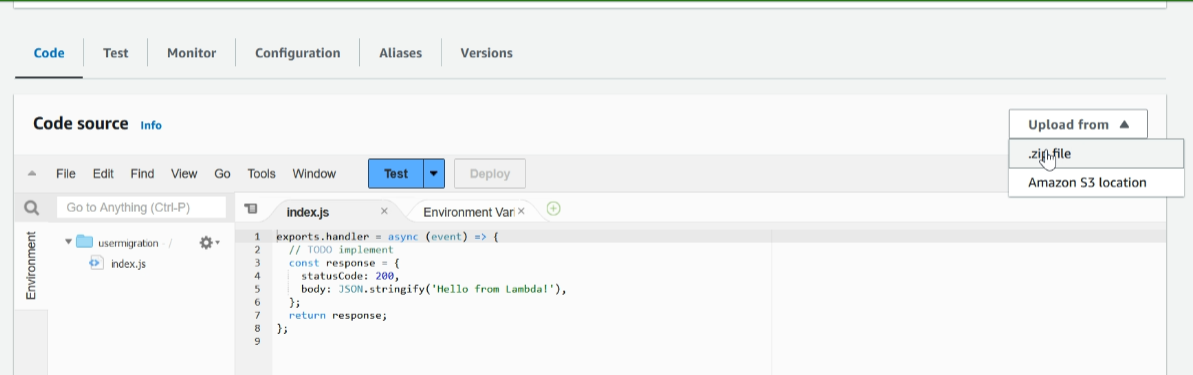
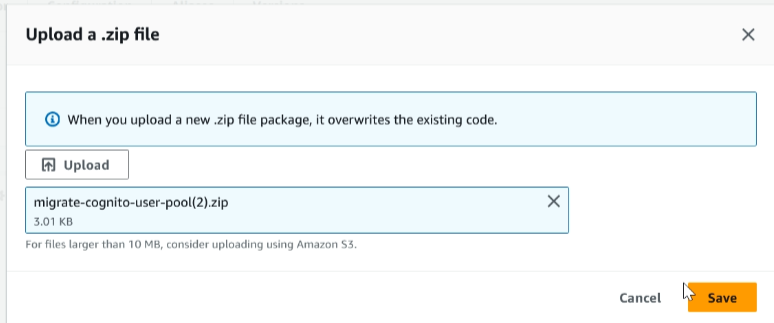
5.4 Download the lambda source code and upload it
You can download the lambda migration source code from this link: https://github.com/Niyaz07/cognito-migration-lambda-fn
To upload it
Navigate to the lambda function we created in the previous step. Select ‘Upload from’, click the .zip file to upload it, and then save
5.5 Creating the User Migration trigger executes a Lambda function
Navigate to the newly created Cognito user pool and select the user pool name
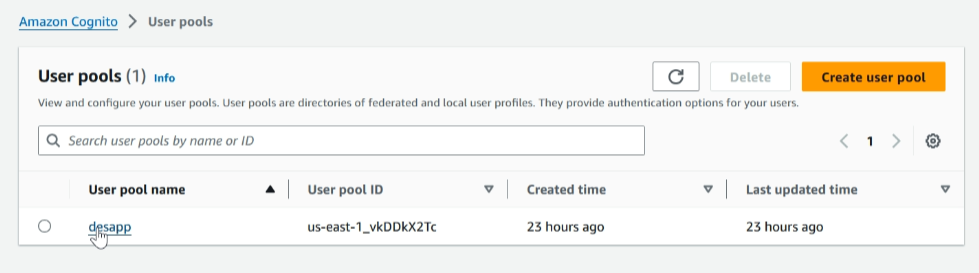
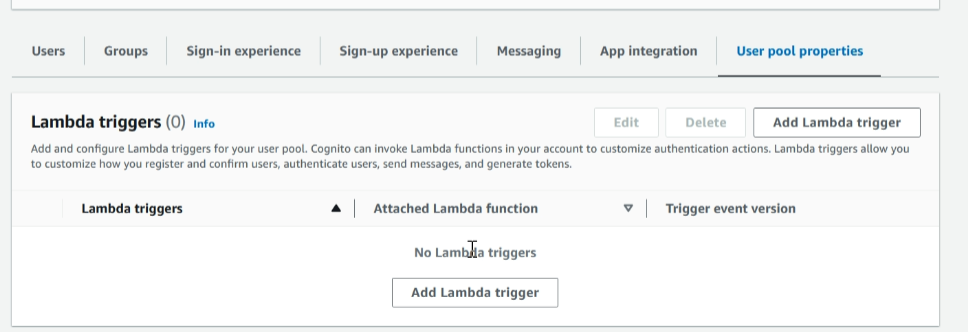
Select the user pool properties and add a lambda trigger.
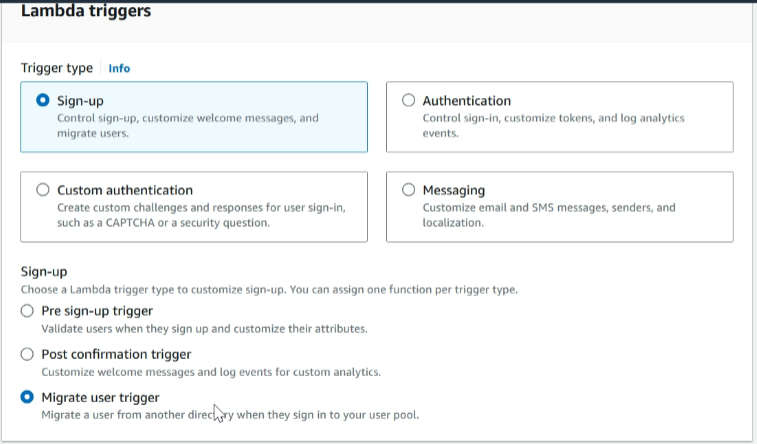
Trigger type select sign-up and sign-up option select the migrate user trigger
Select the lambda function that we created in the previous steps
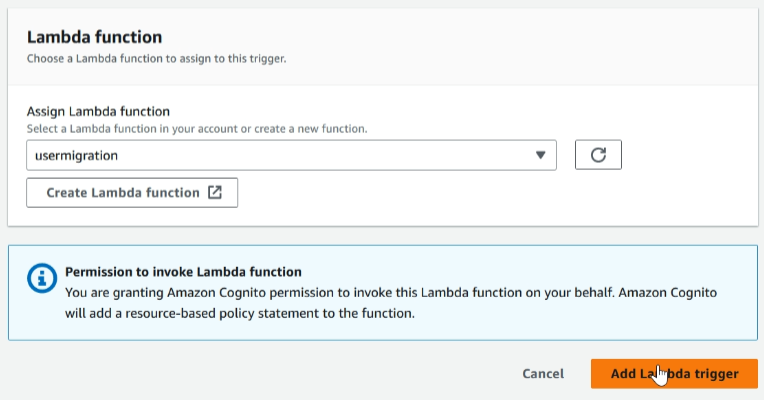
Click on add lambda trigger
5.6 The cross-account role for the old user pool should allow ‘AmazonCognitoPowerUser’ actions and trust the execution role of the lambda function in the destination account
Configuring Cross-Account IAM Roles
Create an IAM role in the source account that allows the Lambda function in the destination account to assume this role. This will enable the Lambda function to access AWS Cognito resources in the source account
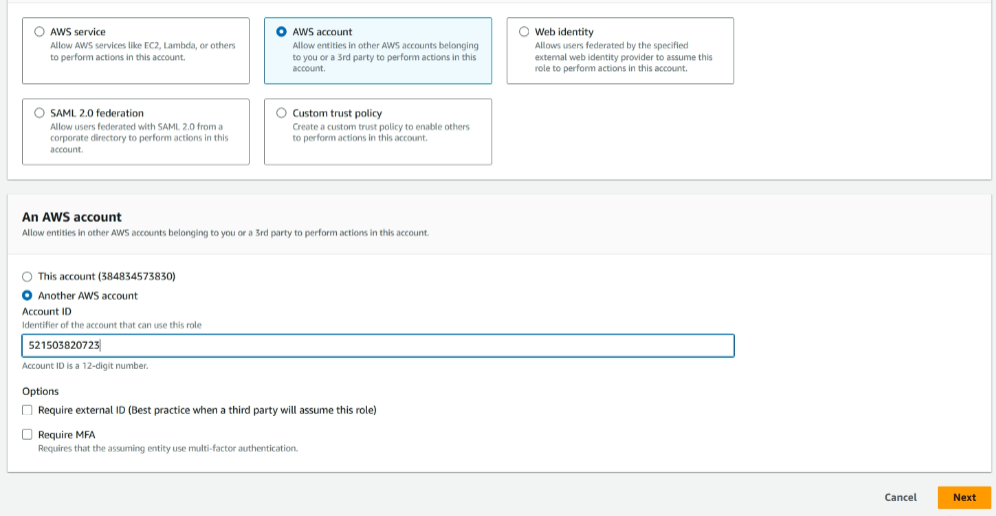
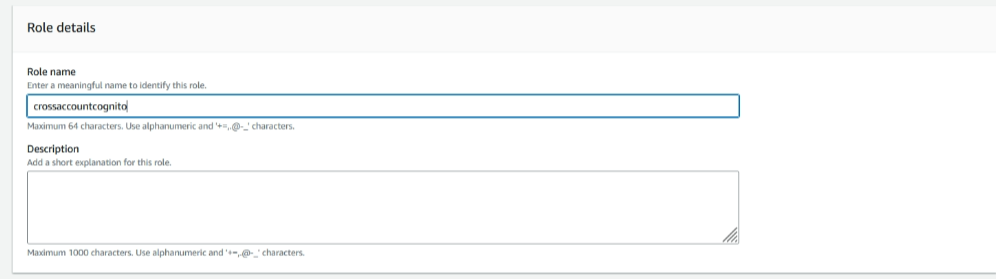
login into the source account of aws and navigate through the IAM, create a new role and select the AWS account, an Aws account section select another aws account provide your destination account id, permission policy select AmazonCognitoPowerUser
Specify the name we provided in previous steps in the Lambda execution role’s STS-assume policy under the resource ARN
Note: Please ensure you provide the cross-account role name we created in the STS-assume policy under the resource ARN as previously given
After creating the cross-account role, select that role
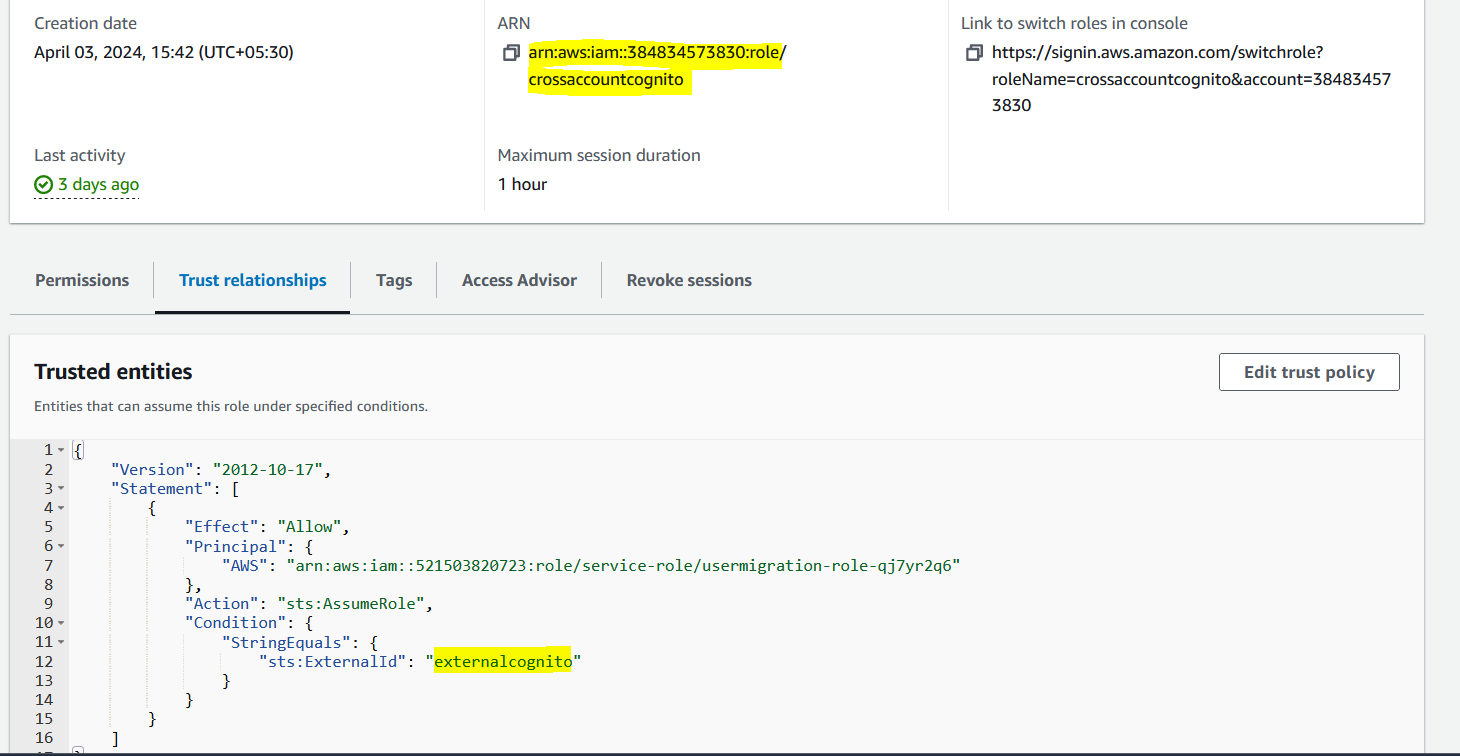
Edit the trust policy, you can reference the script below
Note: You need to replace the AWS field with your Lambda execution ARN. In this example, we provide the Lambda execution ARN which we created in the previous step
{
"Version": "2012-10-17",
"Statement": [
{
"Effect": "Allow",
"Principal": {
"AWS": "arn:aws:iam::521503820723:role/service-role/usermigration-role-qj7yr2q6"
},
"Action": "sts:AssumeRole",
"Condition": {
"StringEquals": {
"sts:ExternalId": "externalcognito"
}
}
}
]
}
Please note down the external ID value and the role ARN of the cross-account. We will configure the Lambda environment later
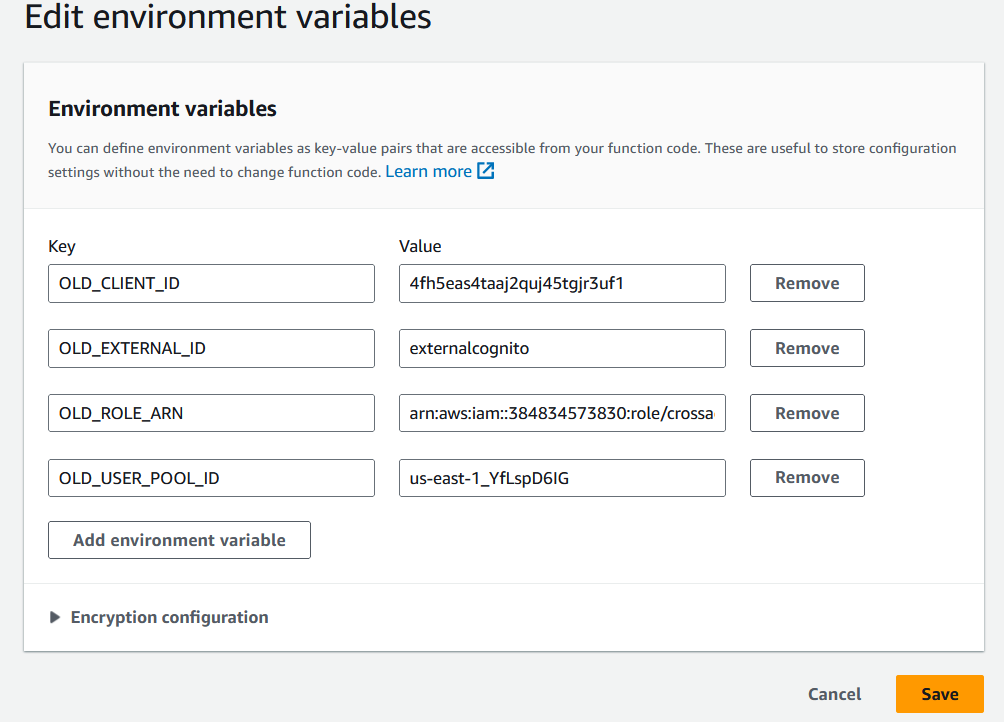
5.7 Configure the environment variables in the Lambda function of the destination account
Log in to the destination account and navigate to the Lambda function that we created in the previous steps
Go to the configuration menu, select the environment variables, and provide the noted values in the environment
Note: OLD_CLIENT_ID = <your-client-id >,OLD_EXTERNAL_ID = externalcognito, OLD_ROLE_ARN = <your-role-arn> , OLD_USER_POOL_ID = <your-pool-id>
5.8 Testing and Validation
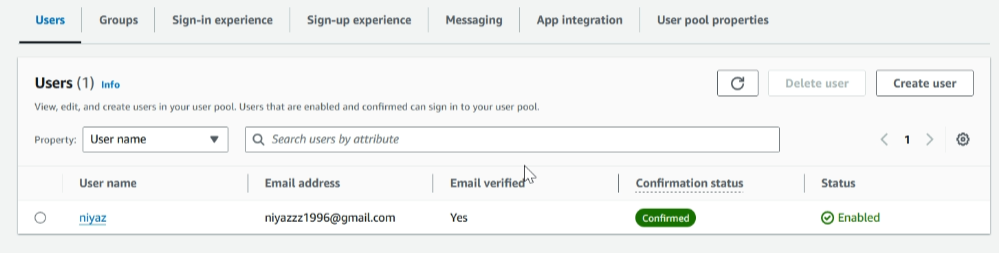
The User Migration trigger executes a Lambda function whenever a user isn’t found in the User Pool during login. so, Cognito will automatically create the user in the new User Pool
To migrate the users, we need to access the new user pool’s URL endpoint
Note: You need to provide your Cognito domain, app client ID, and callback URL of the destination Cognito user pool
kindly reference below the endpoint
https://<your domain>/oauth2/authorize?response_type=code&client_id=<your app client id>&redirect_uri=<your callback url>
Access the endpoint URL in your browser, it will take you to the sign-in page
log in with the same old user credentials of the source account cognito user
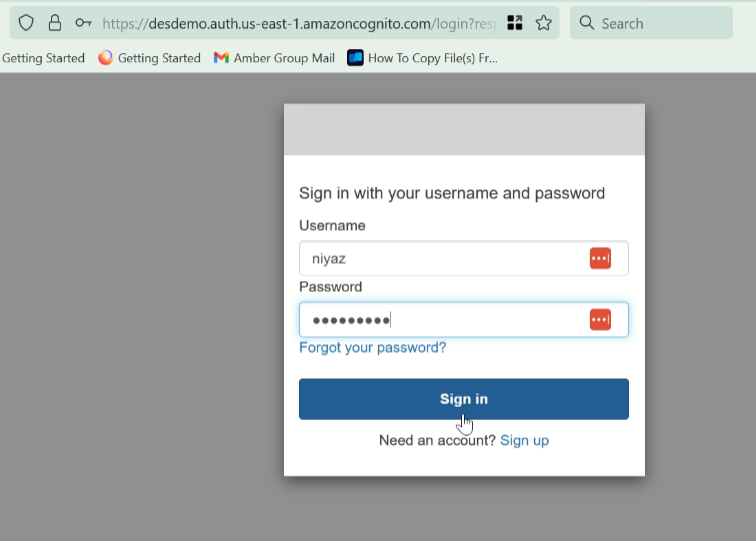
Click ‘Sign In’; it will sign in through the newly created user pool
After signing in, navigate to the newly created user pool in the destination account, where you can see the signed-in user generated in the new user pool


