Introduction
In the past two blog posts, information was provided on how to utilize the Database Migration Service (DMS) to upgrade a database.
In this article we are going to cover a new AWS service called MGN – Application Migration Service. What is the purpose of the MGN? Using DMS we can migrate our database to multi-regions or multi-accounts. But MGN is helps to migrate our application servers running in EC2 instances form one region to other region.
This is really helps to migrate our application to multi-region for host our application to multiple geolocations and also during this process there is no downtime in our application. MGN helps to replicate our servers to multiple regions.
Prerequisites
- An application or just an Apache server running on EC2 instance.
Create IAM user
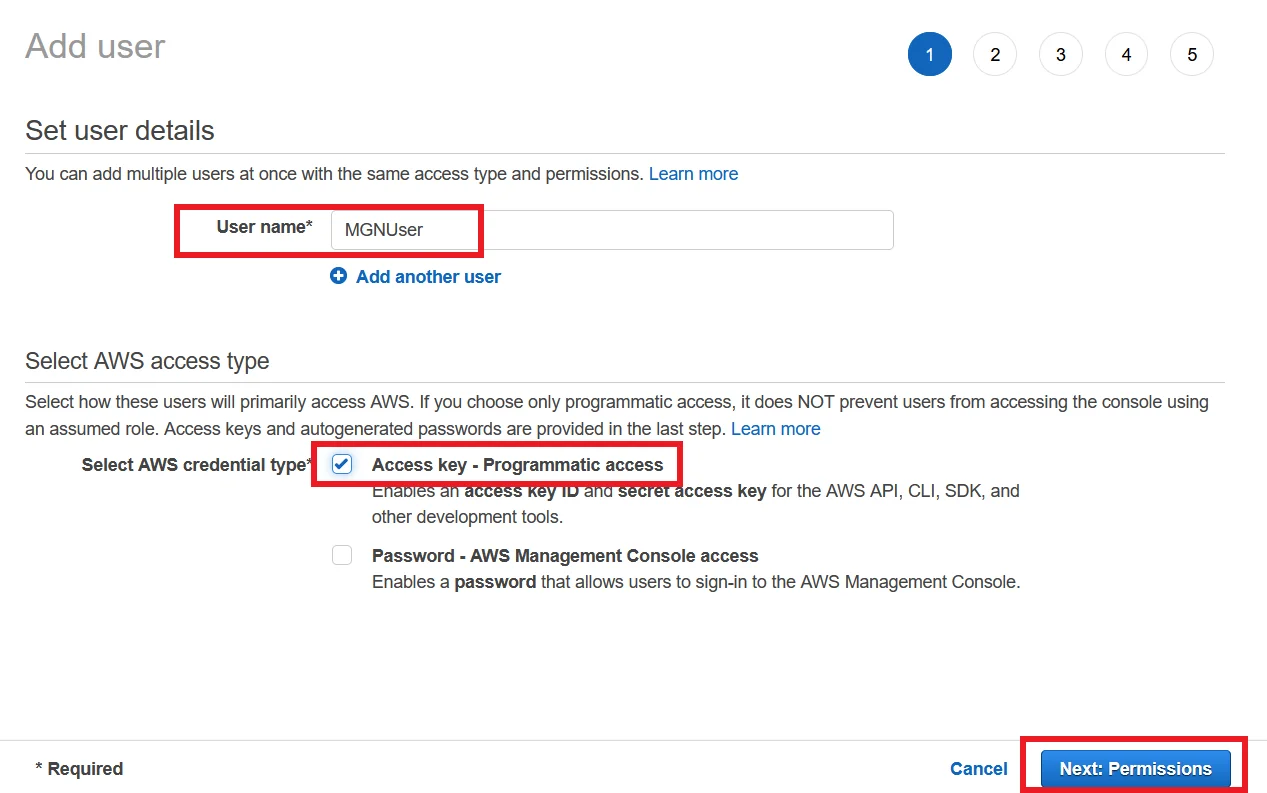
Go to AWS console and navigate to IAM -> Users and click Add user.
Enter an User name and for Select AWS access type, select Access key – Programmatic access, and click Next: Permissions button.
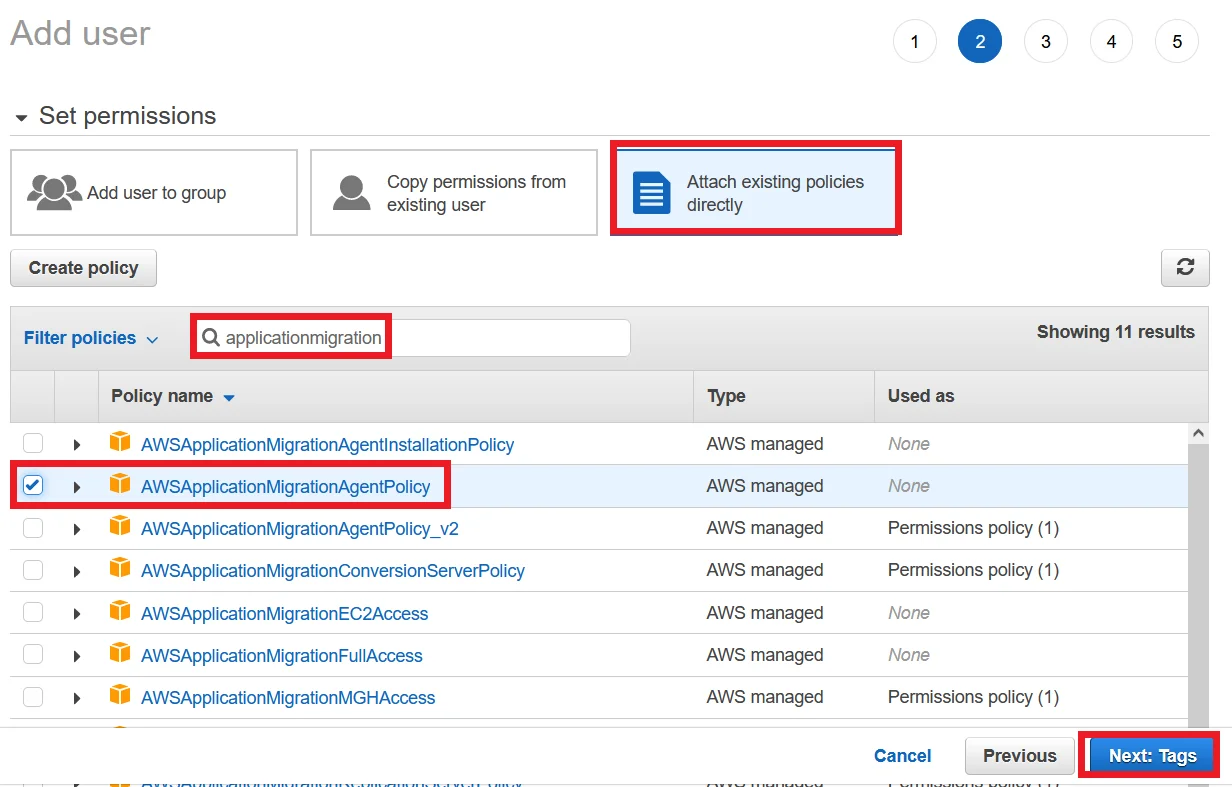
Under Set permissions, Choose Attach existing policies directly.
Search for applicationmigration, and Choose AWSApplicationMigrationAgenPolicy, and click Next: Tags.
Review the user details and click Create user.
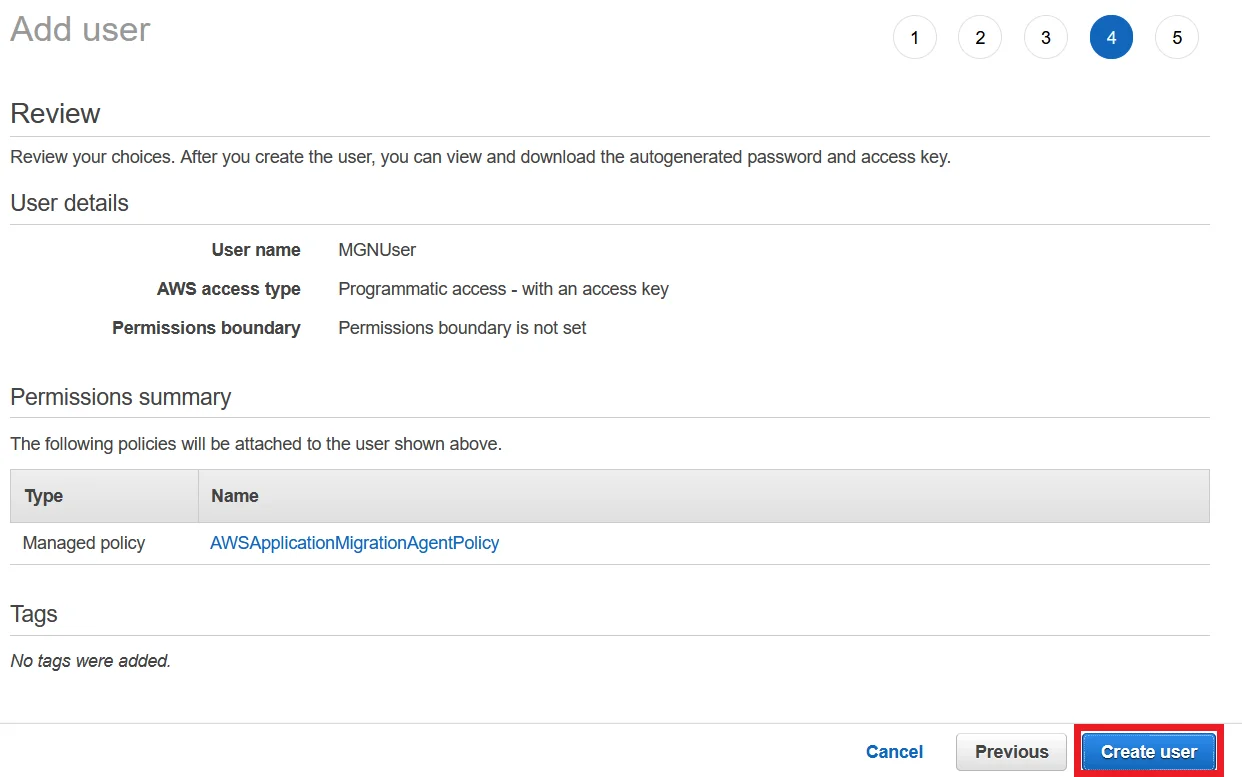
It will show the Access key and Secret access key for the created user. Copy the credentials and save it in somewhere else.

Add Source Servers in MGN in Target Region
Navigate to Application Migration Service in the Target Region.
For this scenario ap-south-1 is my target region. Here what I mean as target region is the region where we need to migrate our application.
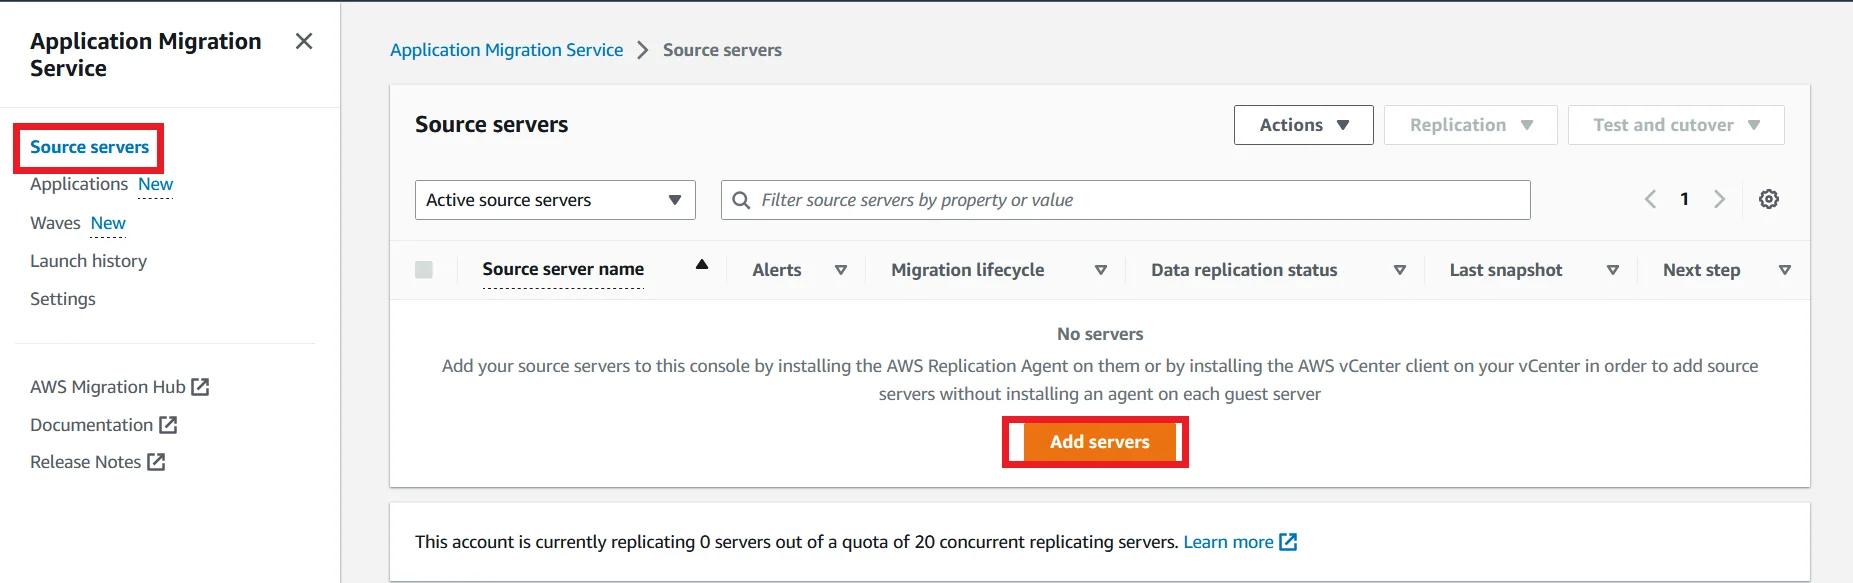
On the left side navigation, Choose Source servers and click Add servers.
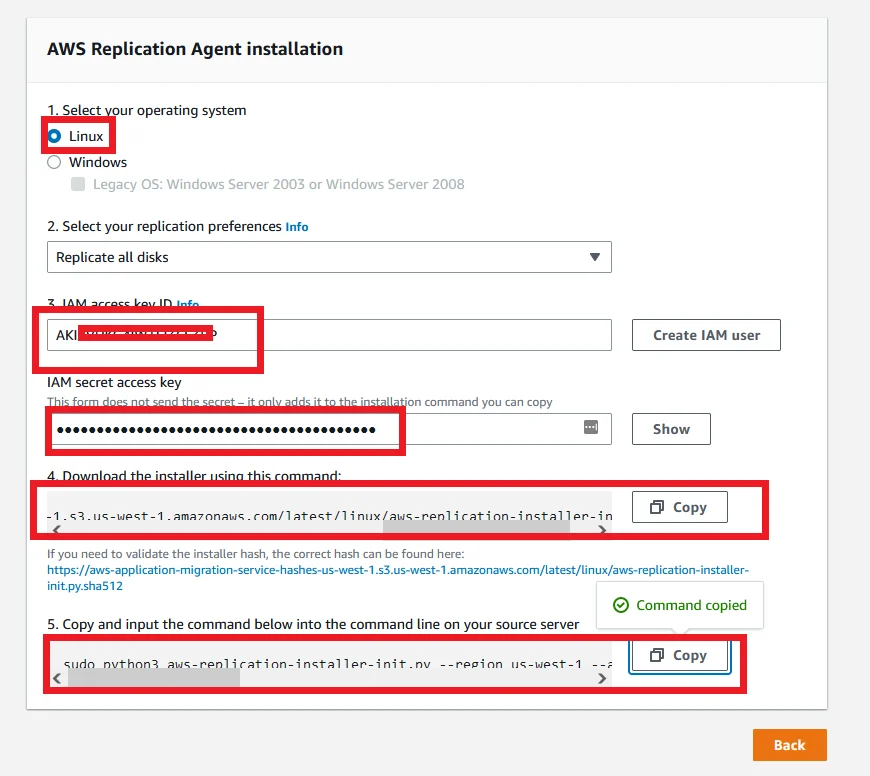
Select the operating system that your application is currently running the source region.
For IAM access key Id and IAM secret access key, provide the credentials which create the starting point of this demo.
Copy the 2 commands like the screenshot below and save it in a notepad.
SSH into your source server and Run the 2 commands which we get from the previous step.
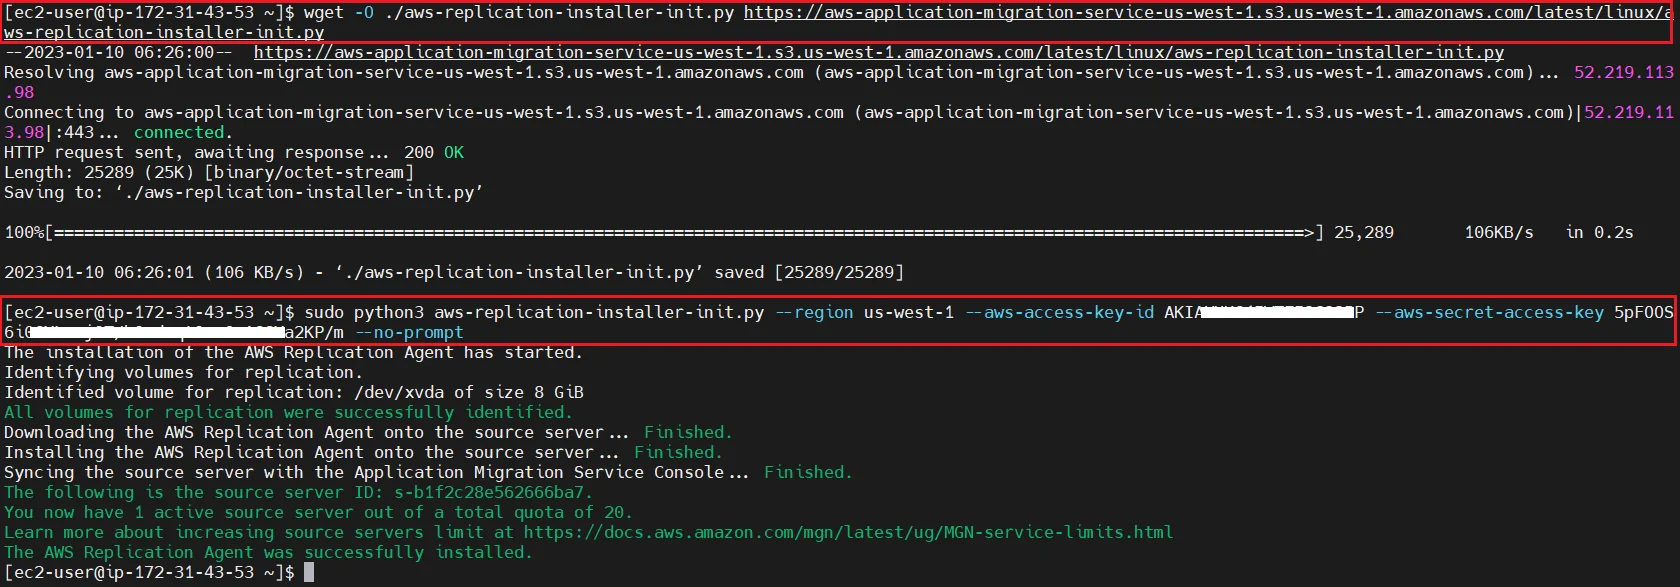
Once the MGN agent installation is successful, You can able to see the Source server inside the MGN dashboard in Target region.
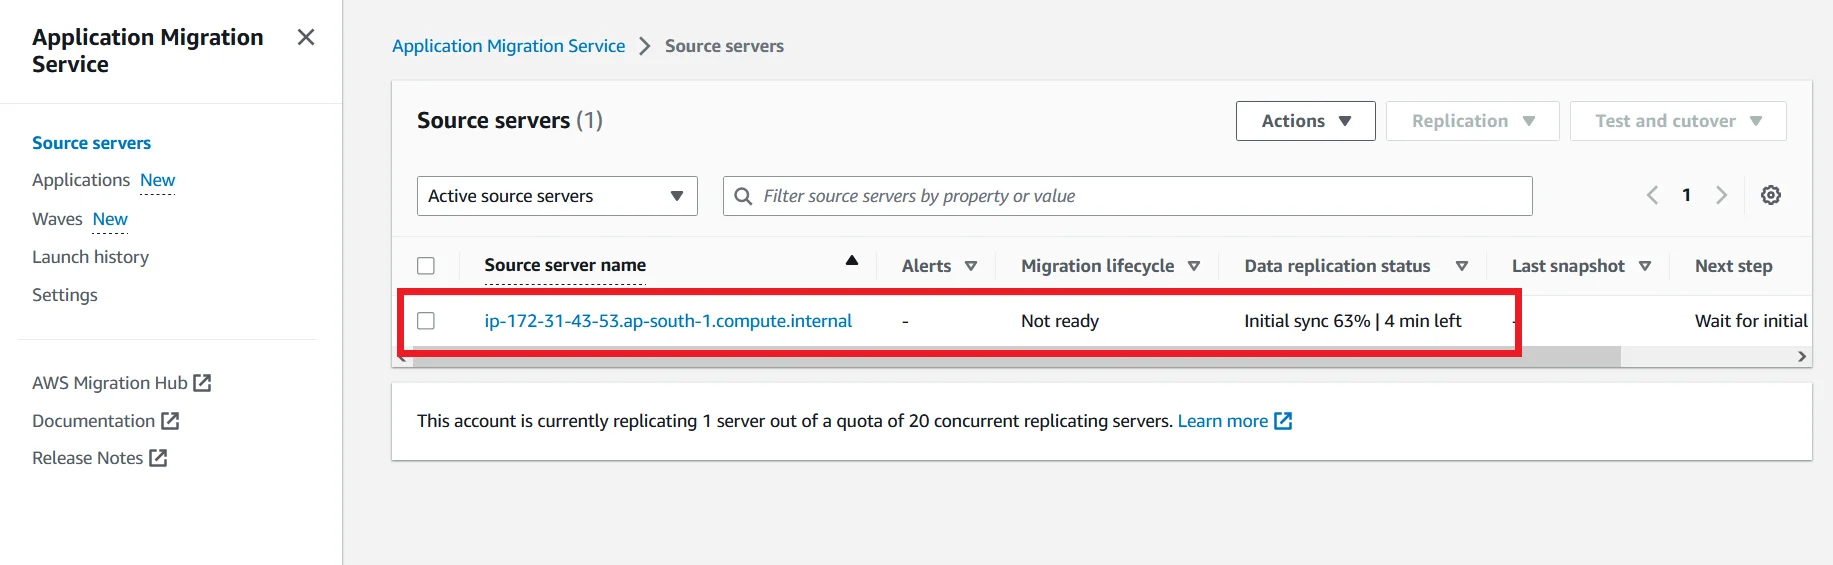
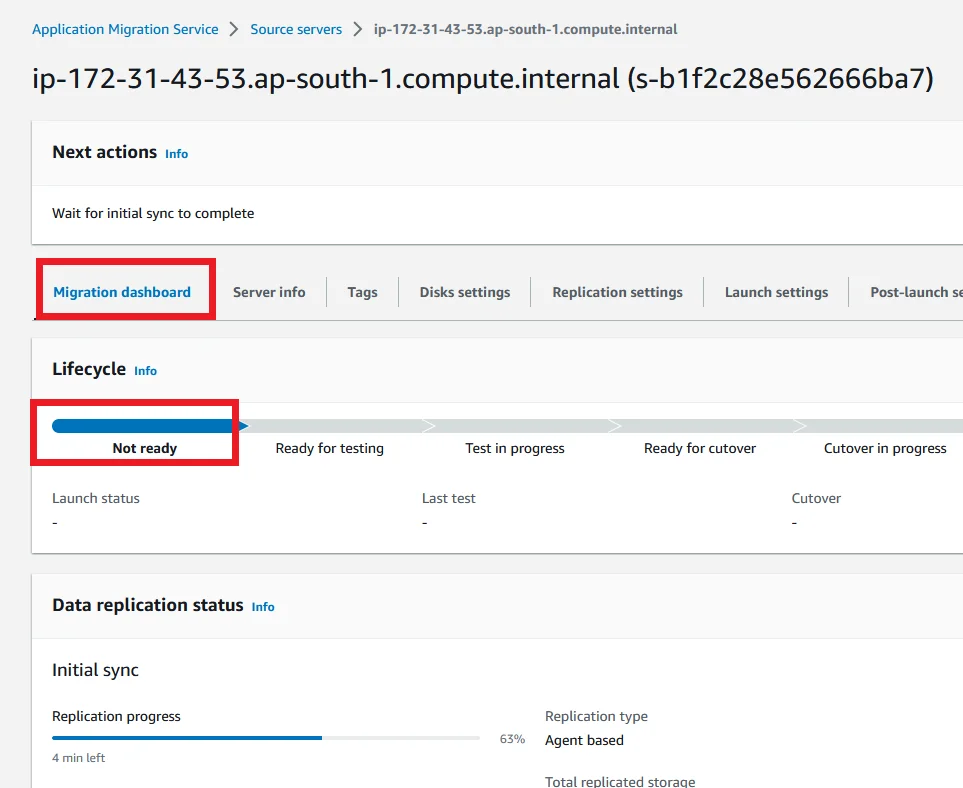
Select the source server and navigate into Migration dashboard. The Lifecycle status is Not ready.
Wait until the Data replication process to complete.
Modify Launch Template for Server
Edit General launch settings
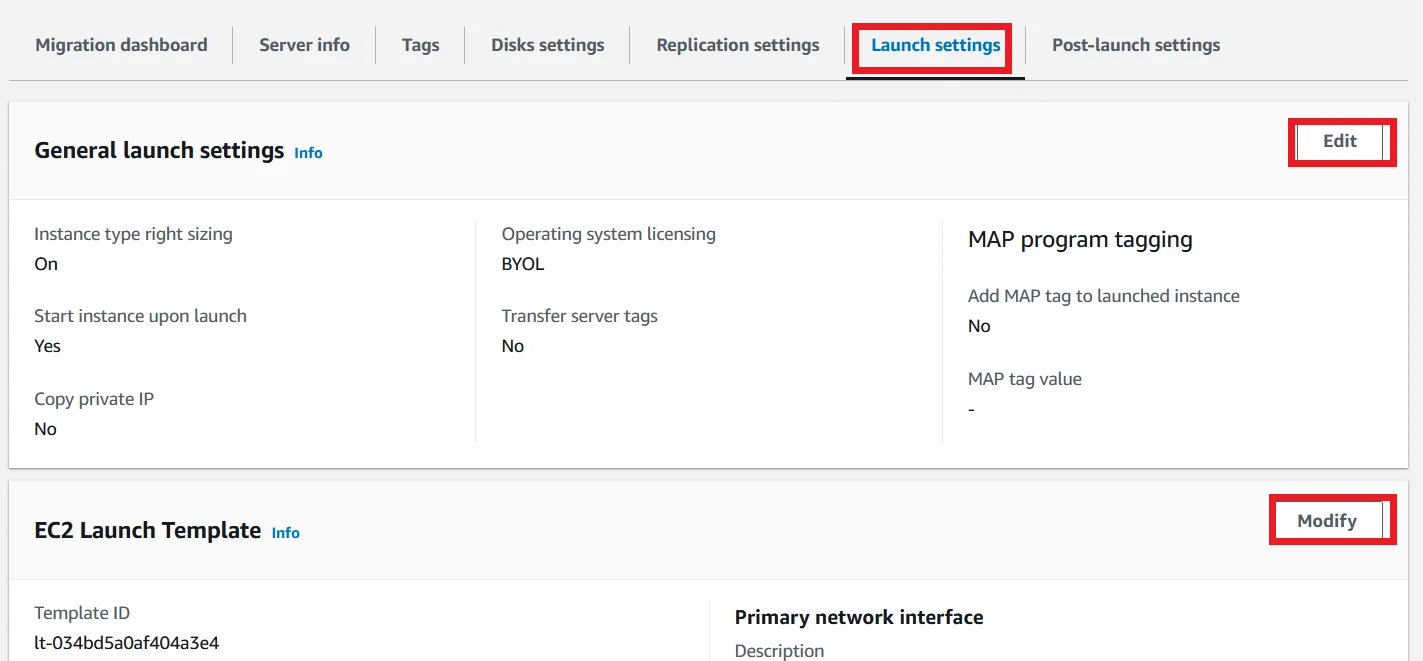
Go to Launch settings and click Edit button, which is inside the General launch setting.
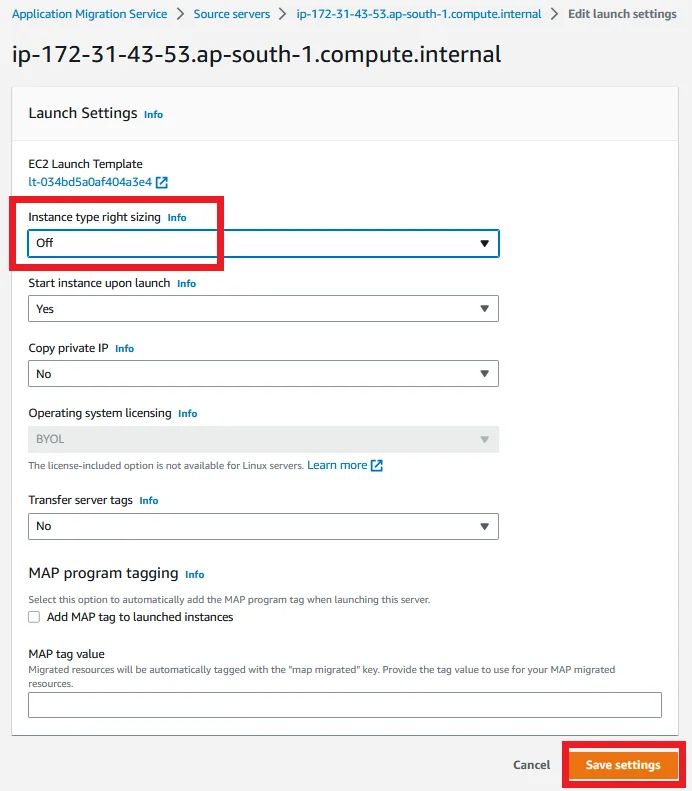
Choose Off for Instance type right sizing and leave all others as default and click Save settings.
Edit EC2 Launch Template
Now under the Launch settings, Click Modify for EC2 Launch Template.
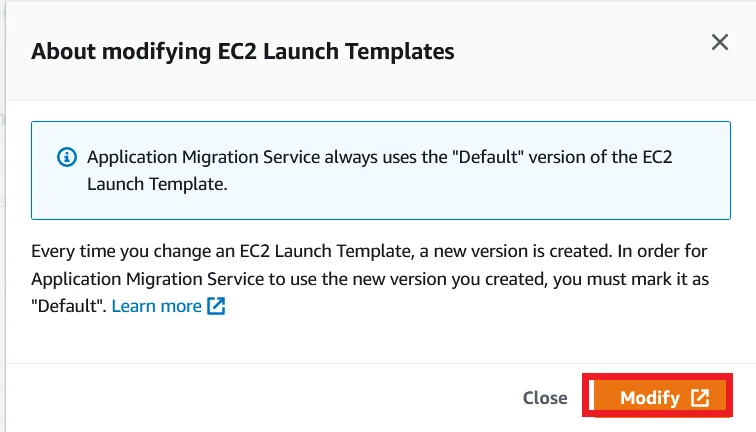
Click Modify, it will open a new page of EC2 Launch Templates.
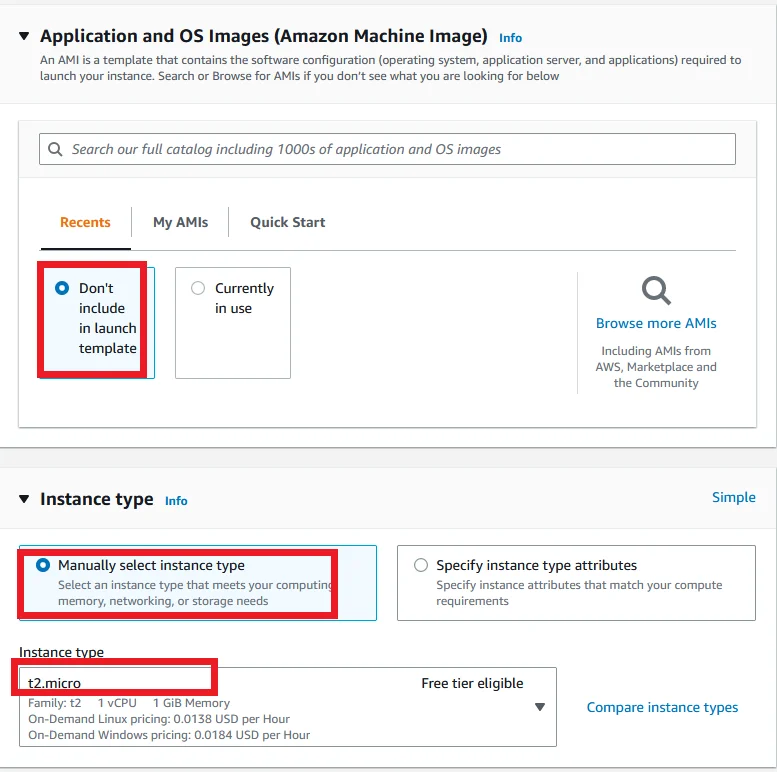
For AMI, choose Don’t include in launch template.
For Instance type, choose Manually select instance type, then choose any type of the instance that you want. For this case we can choose t2.micro.
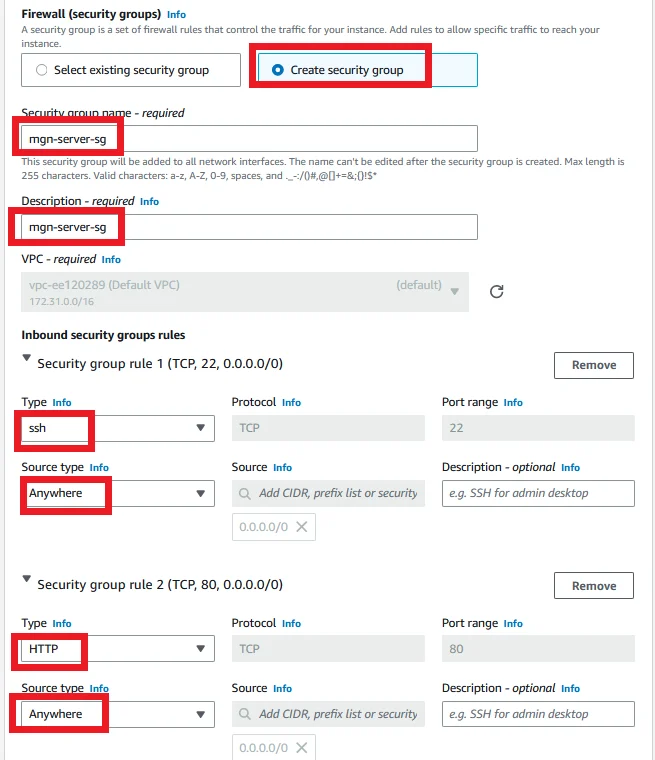
- Under the Firewall (security groups), choose Create security group.
- Provide Security group name and Description for security group.
- Then click Add rule, for Type choose ssh and Source type choose Anywhere.
- Again click Add rule, for Type choose HTTP and Source type choose Anywhere.
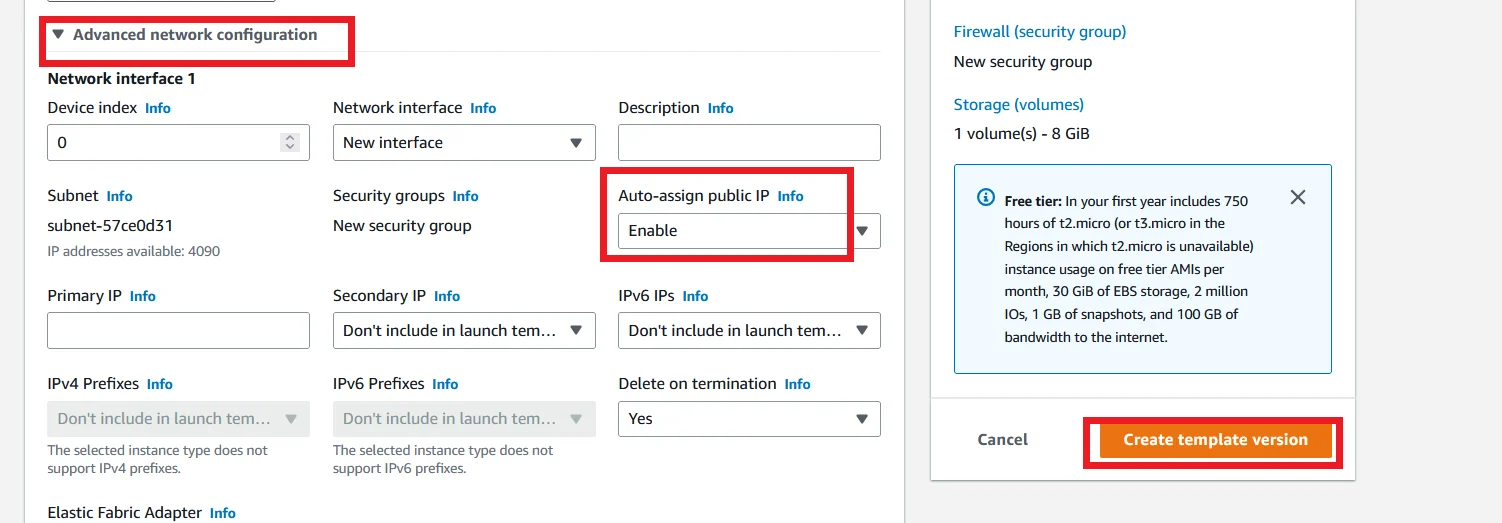
Expand advanced network configuration and for Auto-assign public IP, choose Enable.
All done for launch template. Click Create template version.
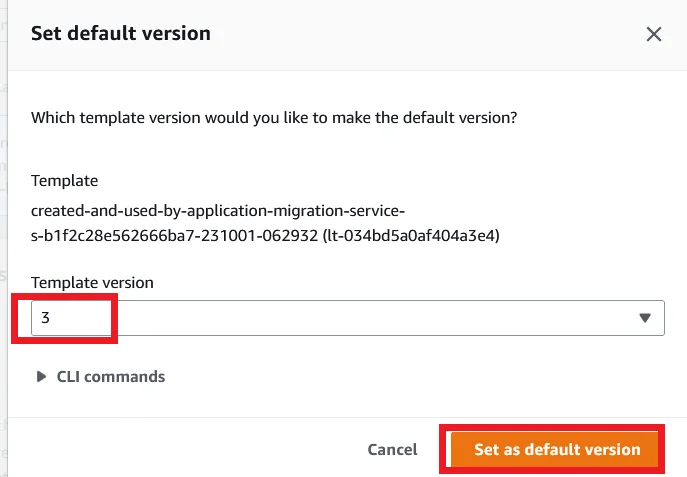
Choose the Launch template which we are edited and click Actions and click Set default version.

Choose the latest version for Template version and click Set as default version.
Why we do this because, every time we edit launch template it will create a new version. And the latest version of the template isn’t the default version of the template. Only the template’s default version is taken for creating instance. So whenever changes made in the template it is necessary to change the default version to latest.
Testing the Migration in Target Region
Launch Test Instance
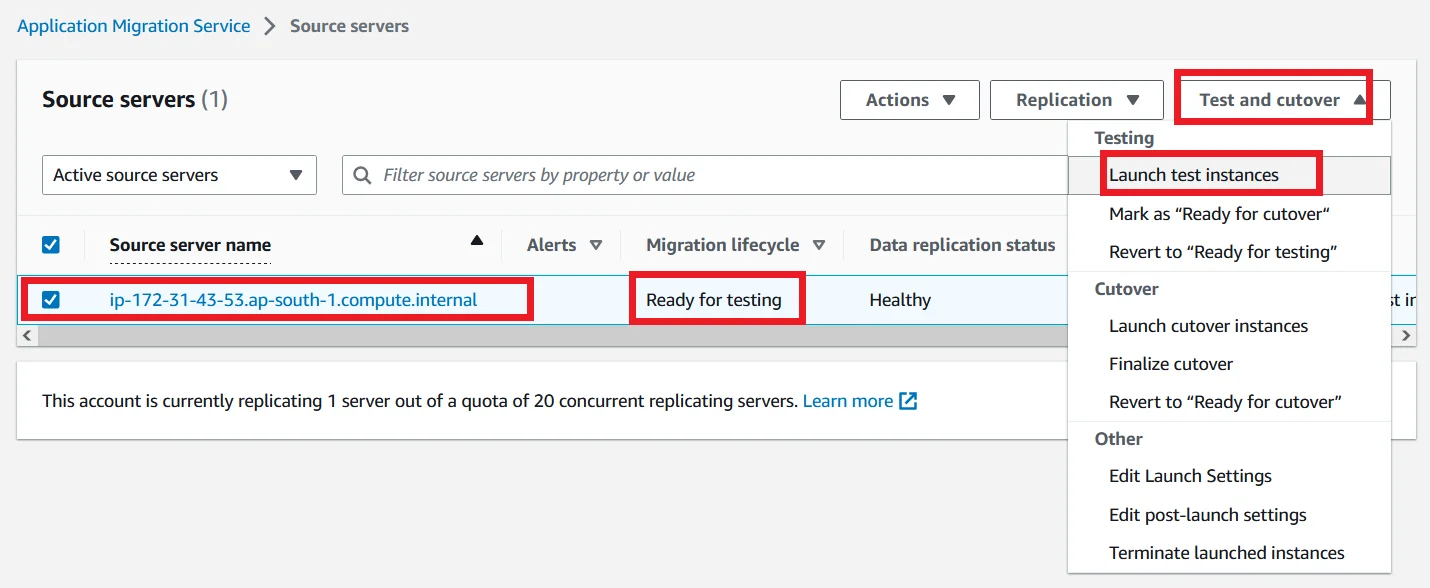
Go to MGN page and choose the source server. Once the Migration lifecycle is shows Ready for testing like the below picture, choose Test and cutover and under Testing Click Launch test instances.
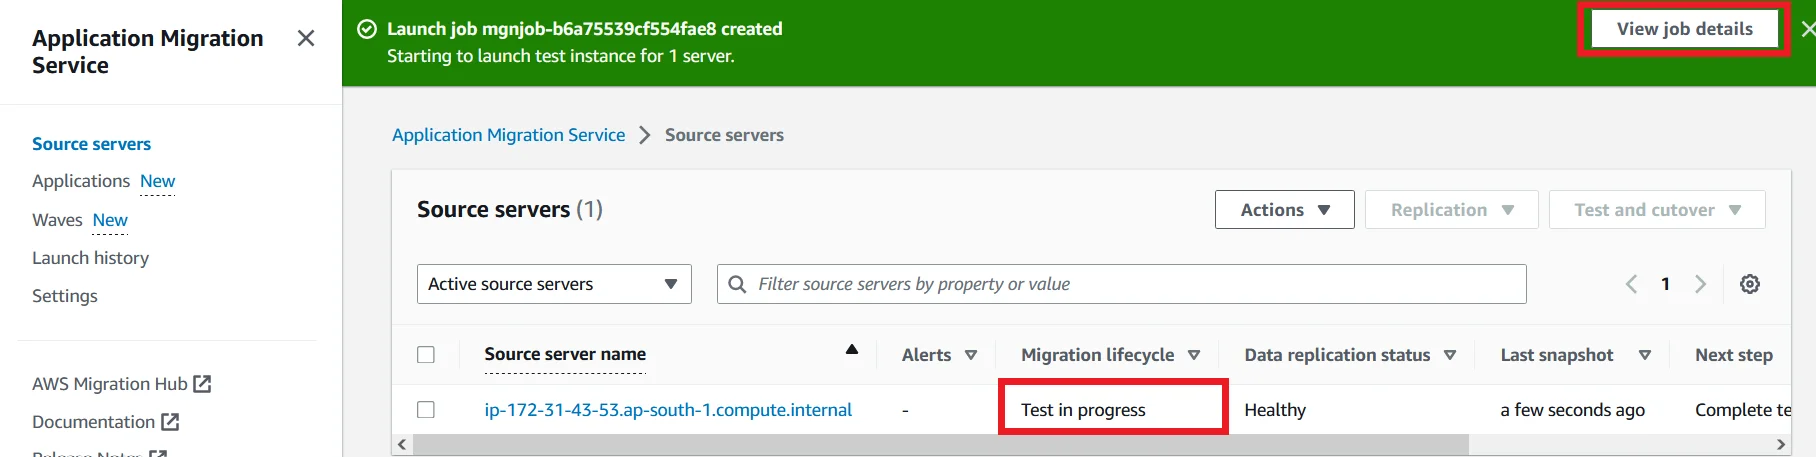
After that the Migration lifecycle shows Test in progress. Click the View job details like the below image.
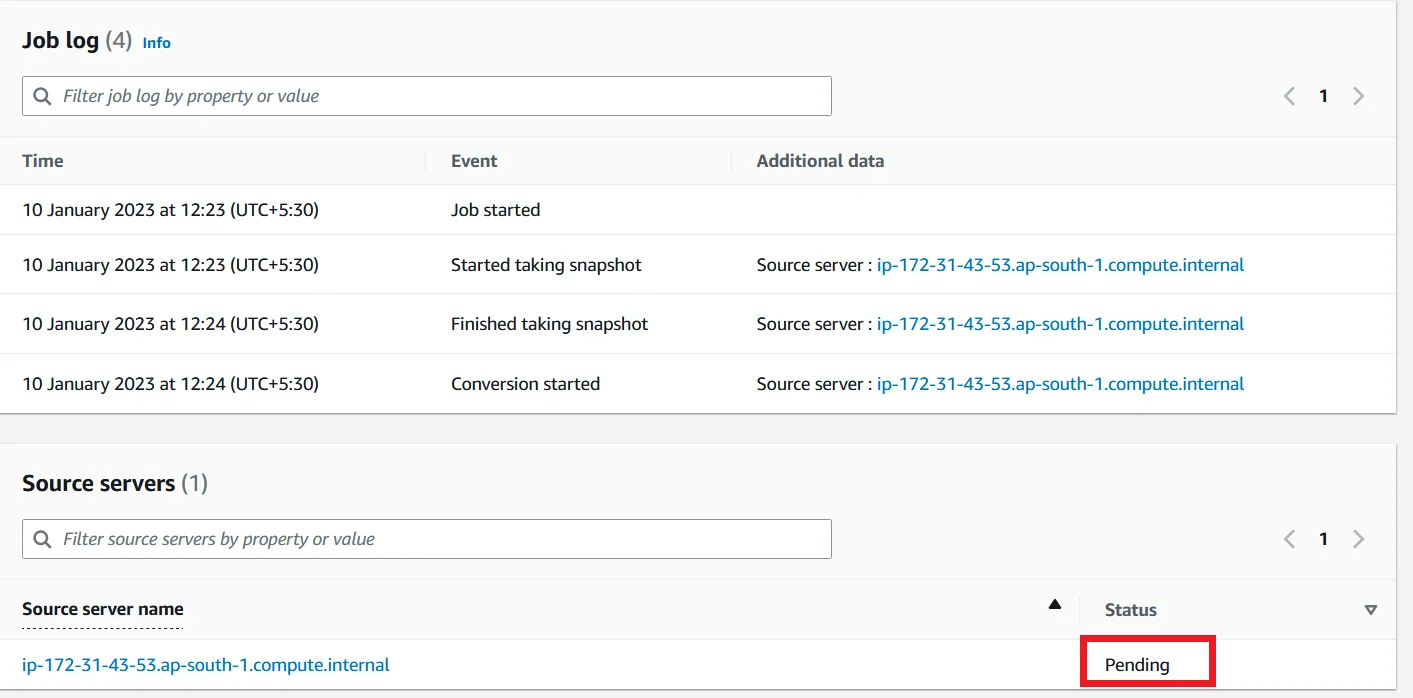
You can able to see the job logs. And the Status also in Pending state.
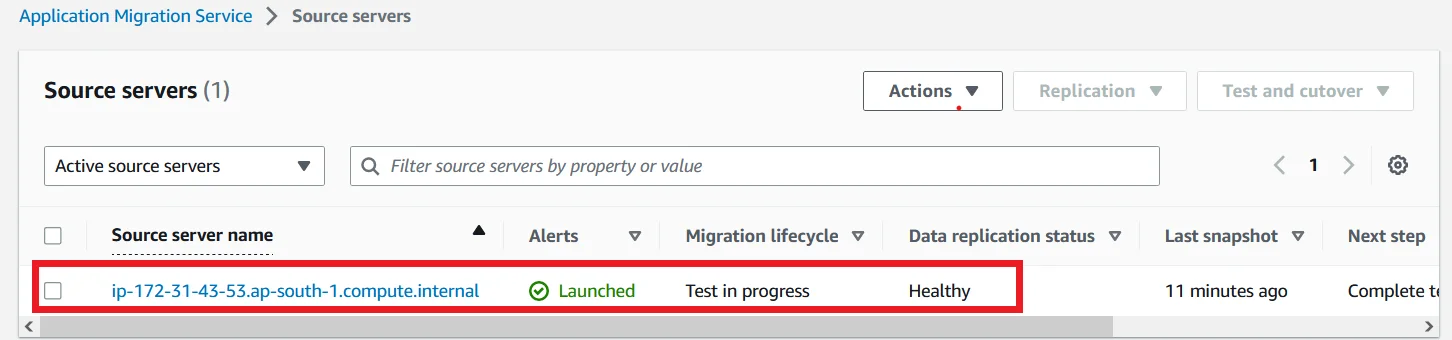
Validate the launch of test instance by confirming the following details like the screenshot below:
- Alerts column = Launched
- Migration lifecycle column = Test in progress
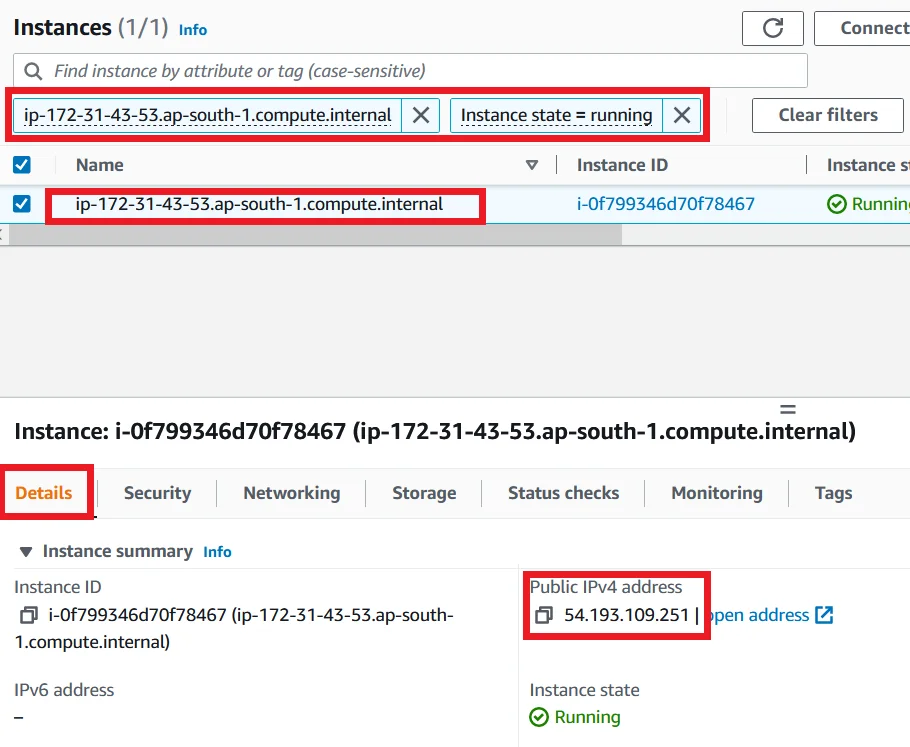
Once the instance is successfully launched, go to the EC2 dashboard and choose the test instance.
Under the Details section you can see the Public IPv4 address.
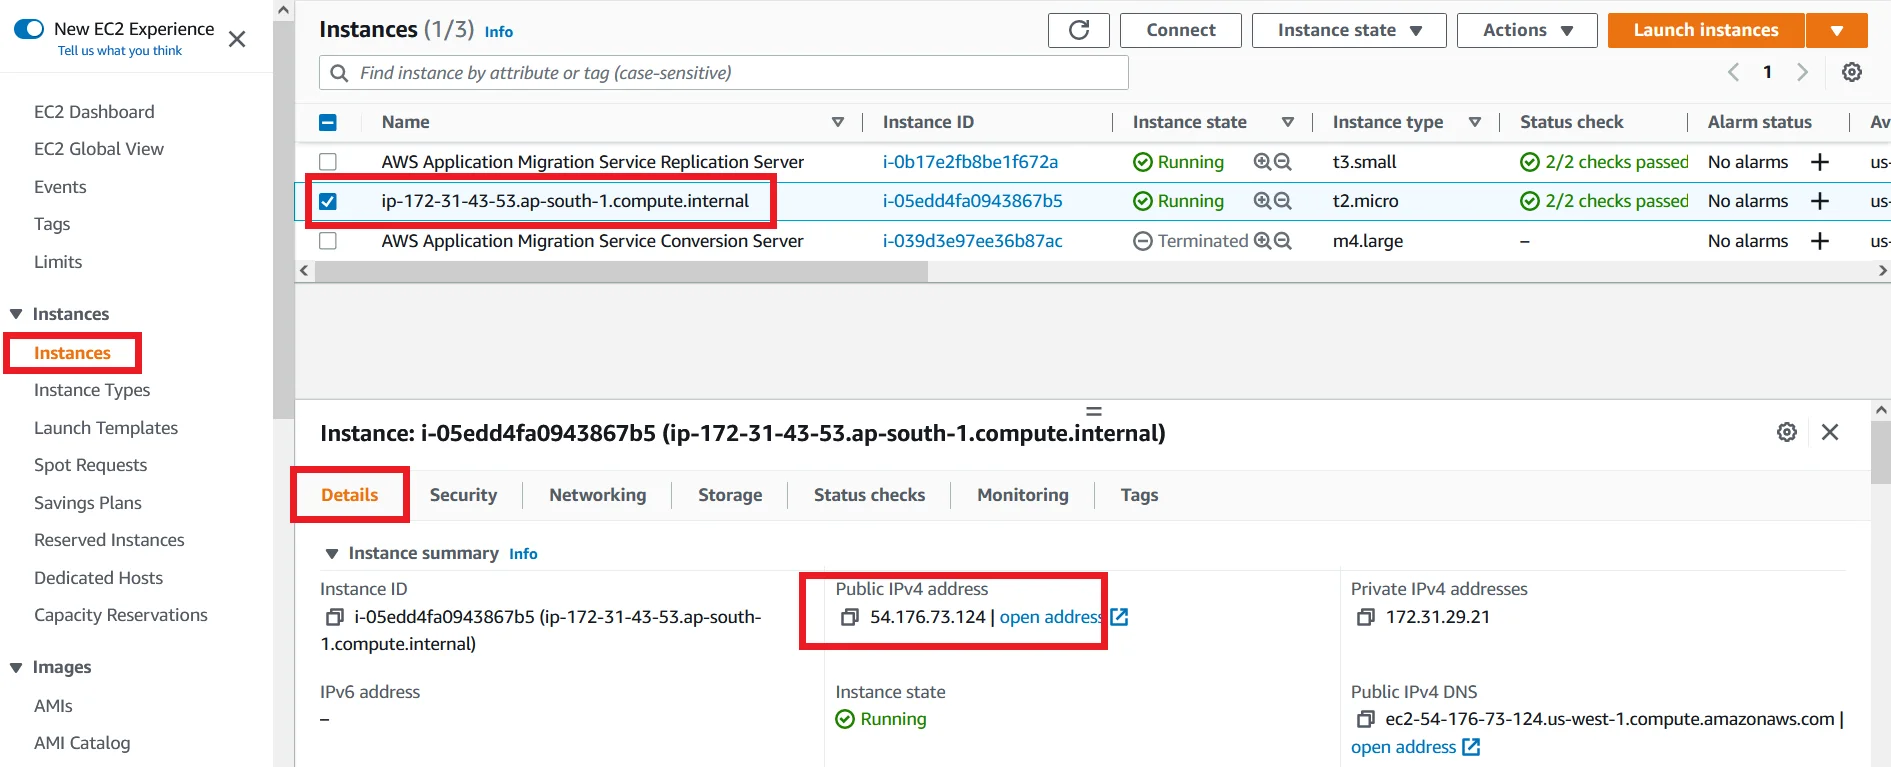
Copy the address and paste in browser and validate that your application is successfully migrated into the test instance.
So the test instance complete the migration successfully.
Remove Test Instance
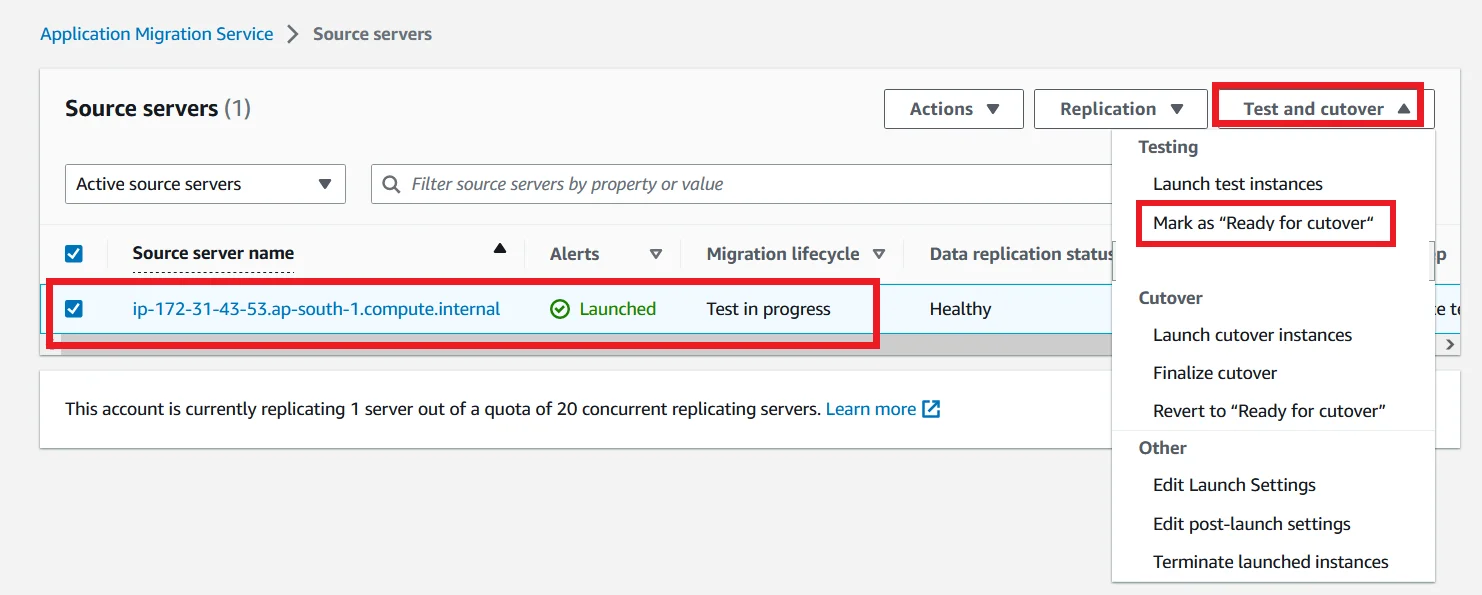
Now need to delete the test instance. Select the source server and click Test and cutover and click Mark as “Ready for cutover”.
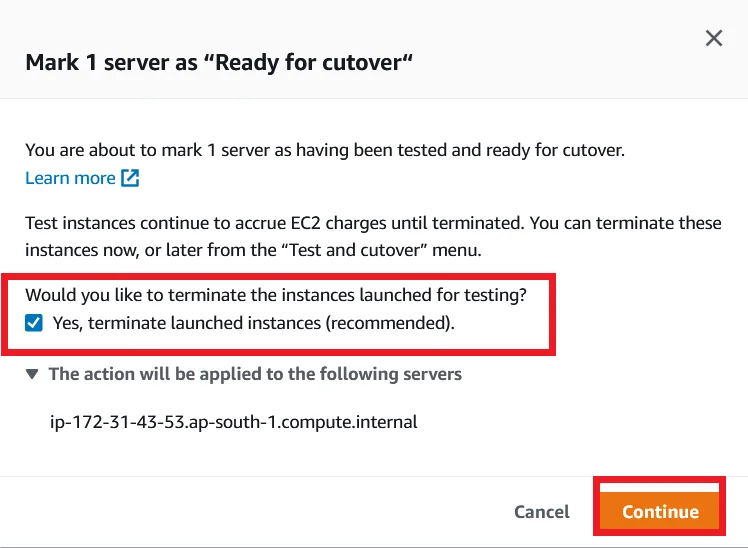
It asks you a confirmation about to delete the test instance. Click yes and click Continue.
Validate the status of termination job and cutover readiness:
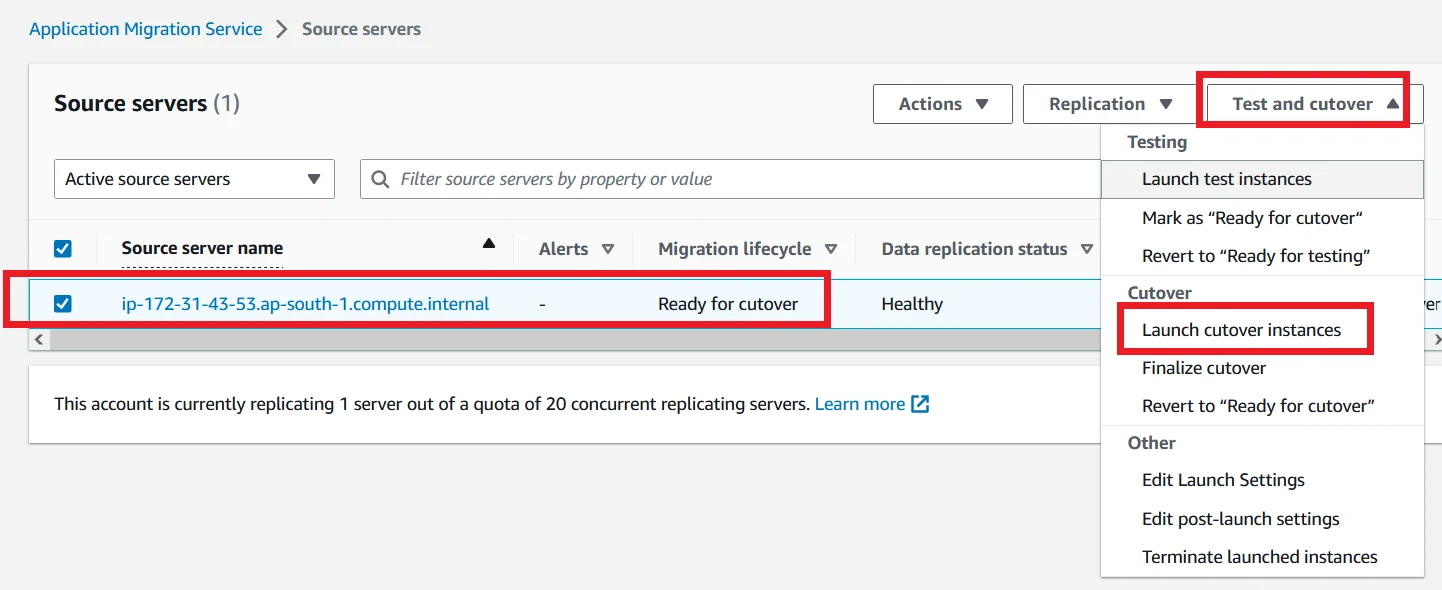
- Migration Lifecycle = Ready for cutover
Create Migrated Server Instance in target Region
Select source server and click Test and cutover and gain click Launch cutover instances under Cutover section.
Monitor the indicators to validate the success of the launch of your Cutover instance like the below screenshot:
- Alerts = Launched
- Migration lifecycle column = Cutover in progress

Go to EC2 and choose the instance which is created by MGN.
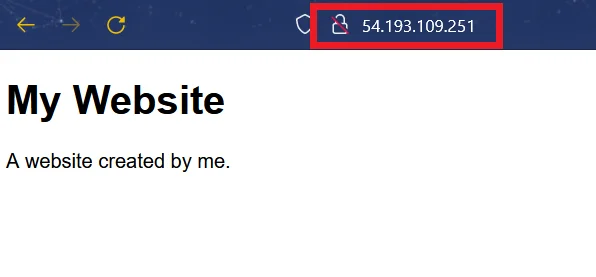
Copy the Public IPv4 address of the instance and paste it in browser for verify the migration of your application.
For me it is looks like the below picture.
If your website is shows perfectly, that means your application is migrated successfully between multi-regions.
Go to AWS MGN and chose the source server and click Test and cutover and click Finalize cutover under Cutover section.
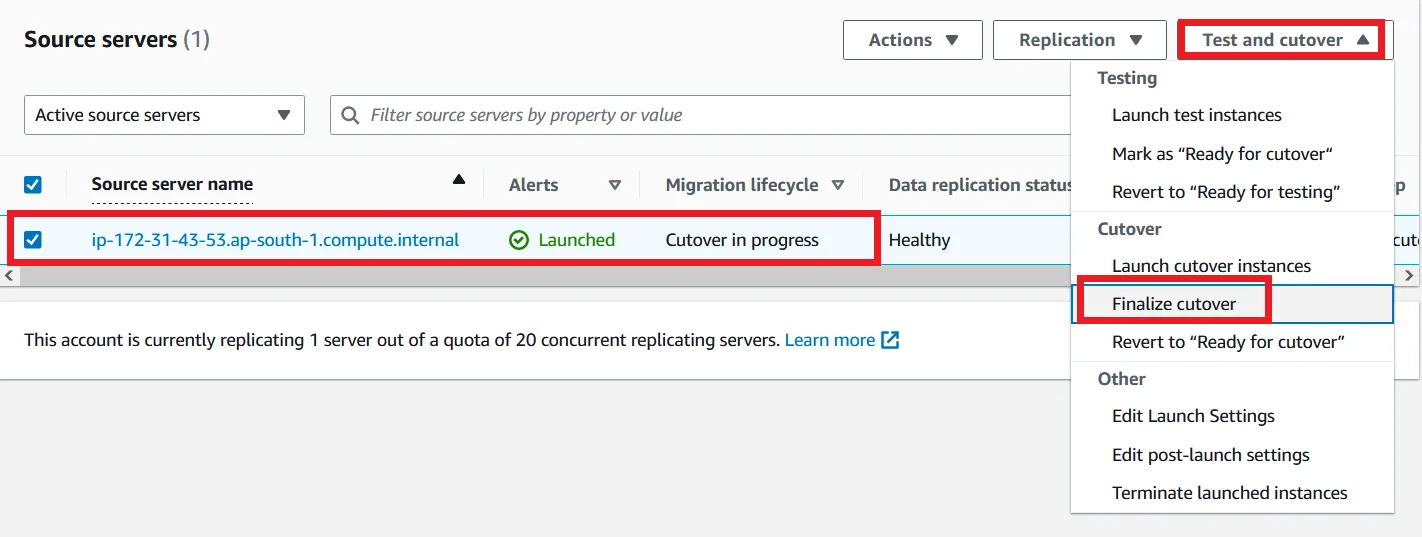
Once you click Finalize cutover, the following things has changed like the below picture.
- Migration lifecycle = Cutover complete
- Data replication status = Disconnected
- Next step = Mark as archived

Final Step
Now the continuous replication from the Source server to target server in target region is disconnected. So you can delete the Server in the source region and point the new server in the Target region to your DNS.
Using this MGN service we can do this migration process between regions without any downtime in our application.
I hope you enjoyed reading this article. See you soon in another one.


