Introduction
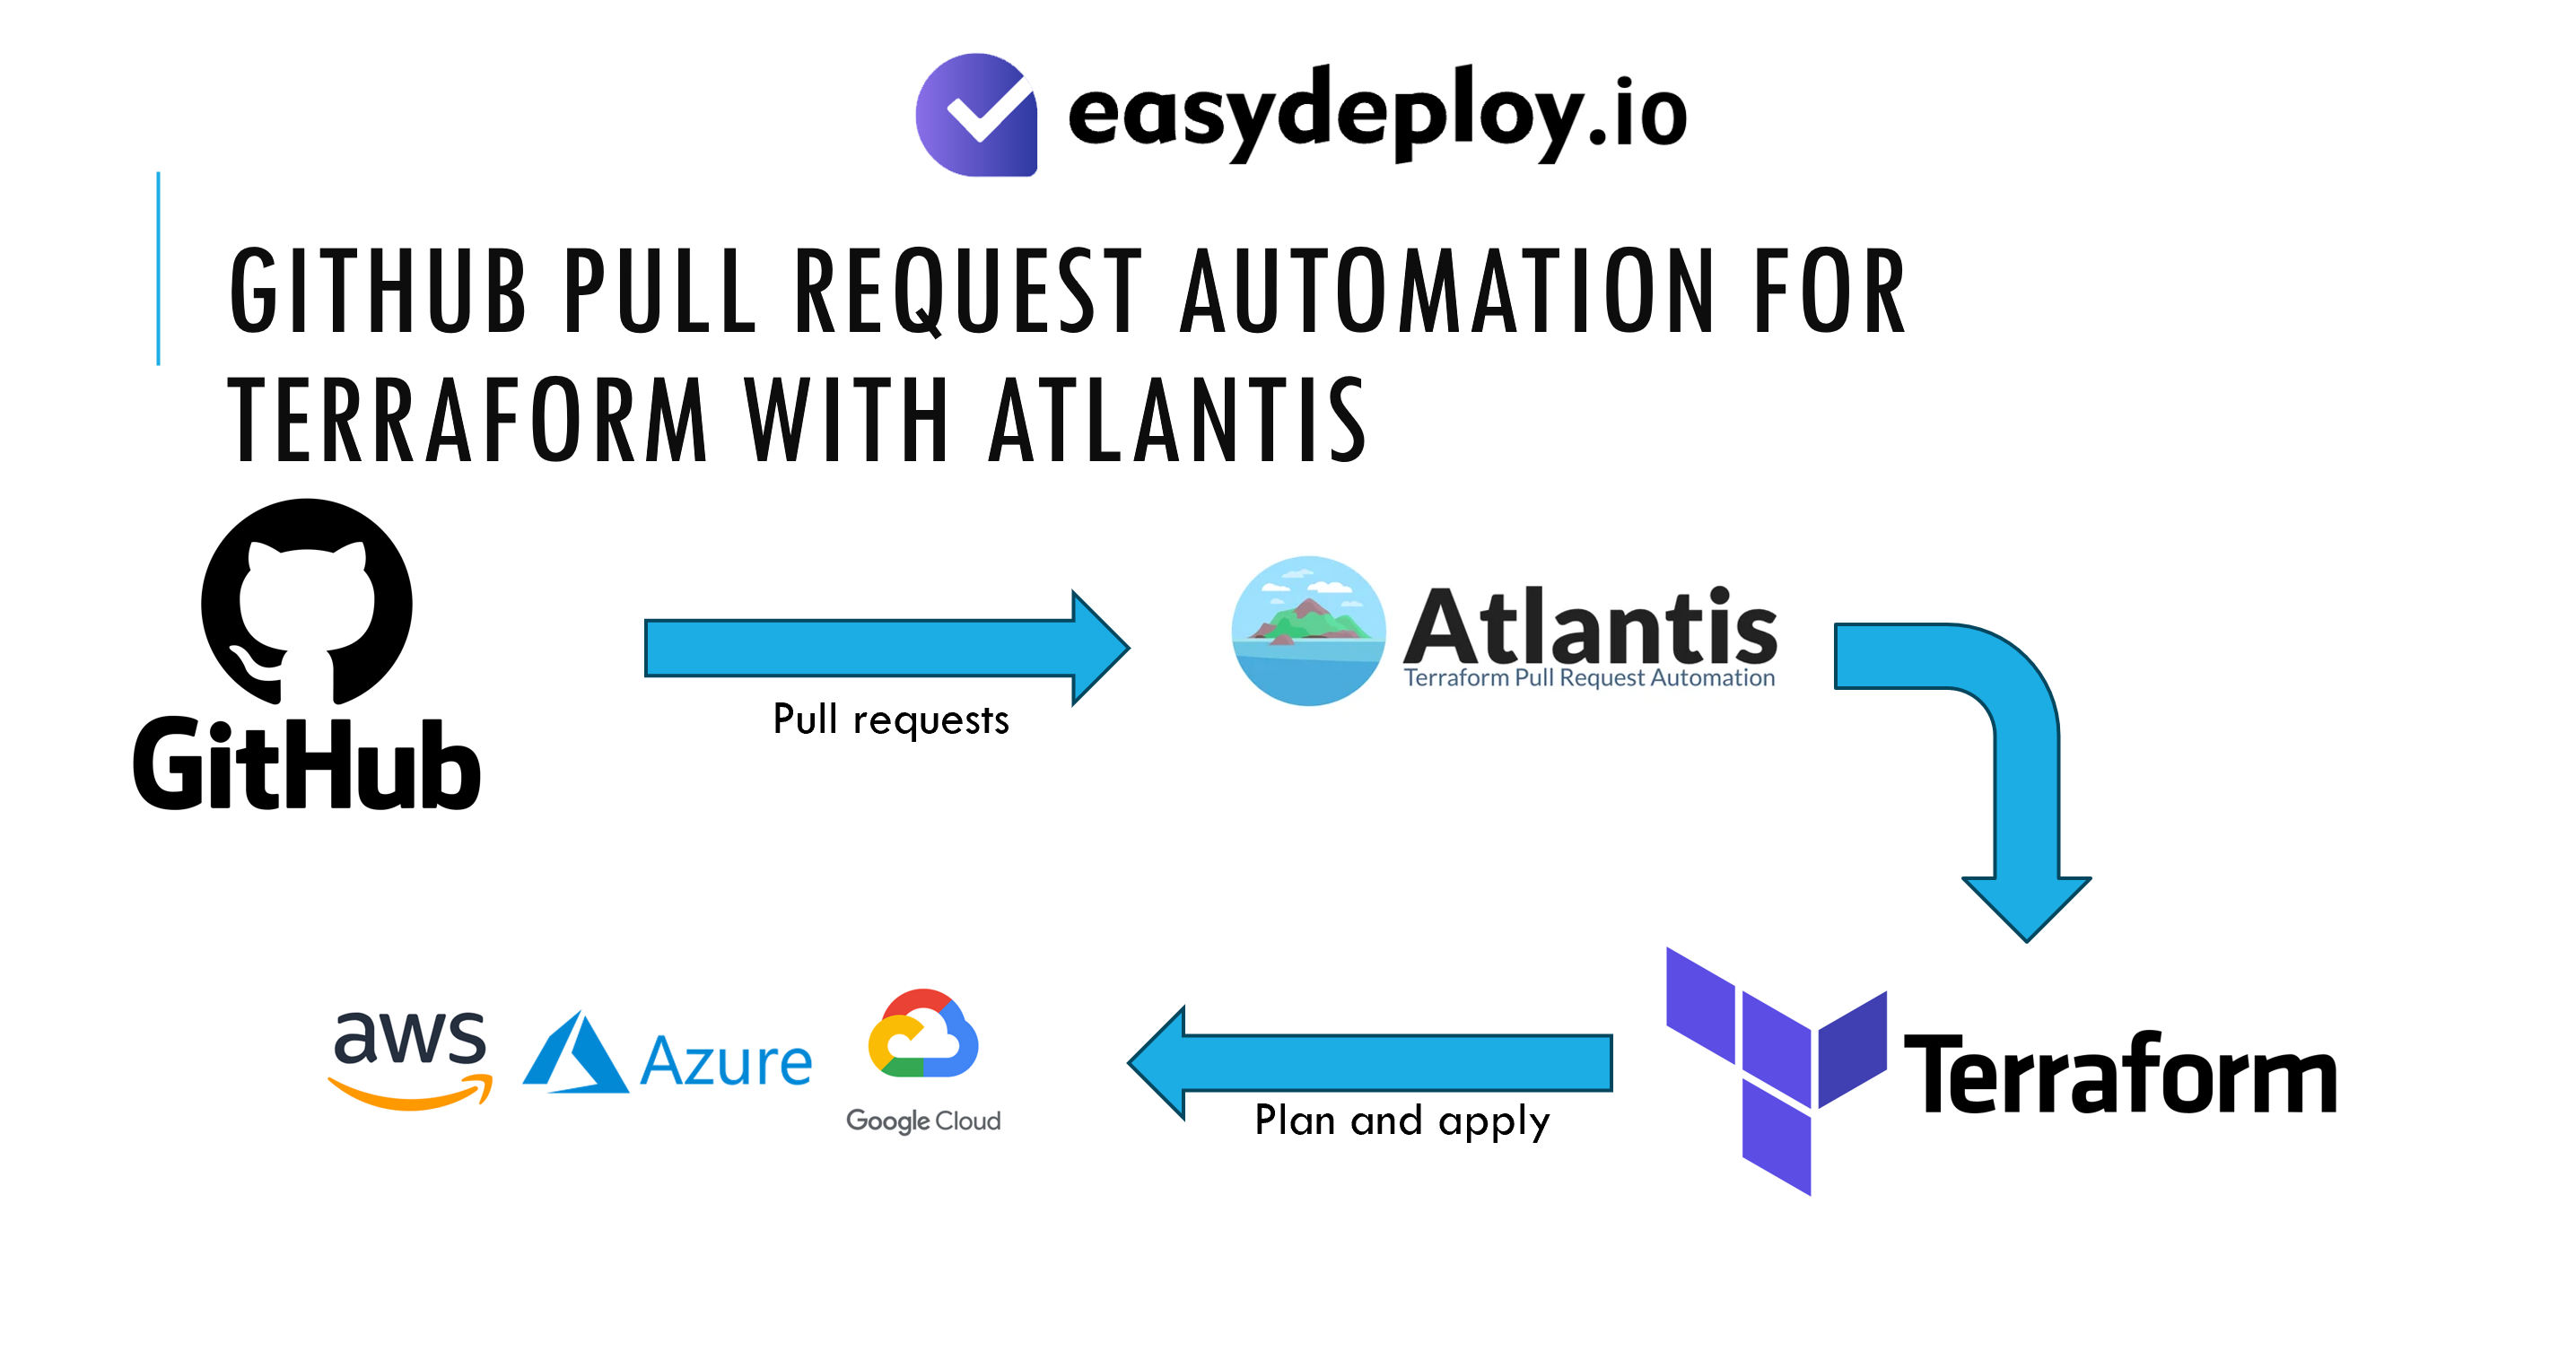
Atlantis is an open-source project that integrates with Terraform an Infrastructure as a Code tool and connects with popular version control systems (VCS) like GitHub, GitLab, and Bitbucket. It provides an automated workflow for managing infrastructure as code (IaC) using Terraform in a collaborative and controlled manner.
Atlantis will work like Terraform Cloud, to manage Terraform with VCS for an automated workflow. Since Terraform Cloud has raised its price for managing resources, Atlantis can install it on your machine and manage it your way. You can integrate Atlantis with your VCS for example GitHub repo that has your terraform code. Once you have pushed your terraform code to GitHub and created a pull request, Atlantis triggers via webhook and gives you a plan details of your terraform code in the comment section of your GitHub pull request. Once you verify and approve, it will create resources and after completion, it will automatically merge the pull request.
One of the major uses of Atlantis is that if anyone is working on a terraform code and creates a plan, Atantis locks the terraform state file for that terraform code and it won’t allow any others to run the terraform plan against the same terraform code. This will help to prevent Terraform state files from becoming corrupt.
If you’re using Terraform and want to implement better collaboration and automation practices, Atlantis could be a valuable addition to your toolset.
In this demo, I will show you how to run the Atlatis server as a Docker container in an Amazon Linux 2 machine and How it works.
We also have this in video tutorial posted on our YouTube channel.
Prerequisites
- Amazon Linux 3 EC2 instance with 4000, 22 ports allowed.
- Create a S3 bucket with versioning enabled. (this is for storing the tf state file because Atlantis won’t save the tf state file locally)
- Create a private GitHub Repository where we are going to have the terraform scripts (if there is an existing repository you can use that too)
Generate Access Token in GitHub
Before we run the Atlantis server we need to create an App password to authenticate our Private Github repository from our Atlantis server.
So log in to your GitHub Account and Click on your Profile icon followed by Settings.

Click on the Developer settings button.

Click Personal access tokens –> Tokens (classic) –> Generate new token –> Generate new token (classic)

Enter a name for this token inside the Note option.
For Expiration, Select any days to expire your token for your convenience. If you want your token not to expire, you can choose No expiration also.

Under the Select scopes, select repo and admin:repo_hook. Leave others as non-selected.

Scroll down to the bottom and click Generate token.

Now you can able to see a token like the below image. Copy that token and save it somewhere else.

Once you close this section you won’t be able to get this token again.
In case you have not saved the token and closed this page, then you should have to delete this token and create a new one.
Install Docker in Amazon Linux 3
Now we are going to install Docker in the EC2 server.
Open your AWS console, navigate to the EC2 page and select the EC2 server that you have created for Atlantis. Click on the Connect button.

Under the EC2 Instance Connect section,
Connection Type –> Connect using EC2 Instance Connect
Click the Connect button.

It will open a terminal of the EC2 instance.
Execute the following commands to install Docker in Amazon Linux 3.
sudo yum update -y
sudo yum search docker -y
sudo yum install docker -y
sudo systemctl enable docker.service
sudo systemctl start docker.service
sudo systemctl status docker.service

Once the installation done, run the below command to check the version of the Docker.
docker --version

Install the Atlantis Docker server
Now create a file called Dockerfile in the EC2 server.
Add the below lines inside the Dockerfile.
FROM ghcr.io/runatlantis/atlantis:latest

USER root
RUN apk add --no-cache aws-cli

RUN mkdir /home/atlantis/.aws
RUN touch /home/atlantis/.aws/credentials

RUN chown atlantis.atlantis /home/atlantis/ -R

Run the docker build command to build the Atlantis docker file.
docker build -t atlantis .

Run the docker images command to check the image of Atlantis.

Run the following command to run the Atlantis docker container. Change the following things with your values in the below code.
docker run -itd -p 4000:4141 --name atlantis atlantis server --automerge --autoplan-modules --gh-user=<github-account-username> --gh-token=<github-usr-access-token> --repo-allowlist=<list of allowed repos>Before you run the above command, which will run the atlantis in local port 4000 change the following details with your values.
-
github-account-username -
github-usr-access-token -
list of allowed repos: List of the repositories that you have your terraform codes. Accepts a comma-separated list, ex.github.com/username/repo1,github.com/username/repo2
--repo-allowlist='github.com/username/*' : If you add * for the repository section it will collect all the repos in your account.
Here is an example of the above command with a single repository;
docker run -itd -p 4000:4141 --name atlantis atlantis server --automerge --autoplan-modules --gh-user=jerinrathnam --gh-token=ghp_lj8nNeckni0N#C*54urnDBUCc0h3f#BFU --repo-allowlist=github.com/easydeploy-cloud/terraform-atlantisdocker run -itd -p 4000:4141 --name atlantis atlantis server --automerge --autoplan-modules --gh-user=jerinrathnam --gh-token=nNeckni0N#C*54urnDBUCc0h3f#BFU --repo-allowlist=github.com/easydeploy-cloud/*Once done run the following command to list the running docker containers.
docker ps
Now Copy the public IP of your EC2 instance and paste it into a browser with add 4000 and browse. It will open shows like the below image.
The Atlantis server runs successfully.

Configure AWS in Atlantis docker container
Open your AWS Console and navigate to the IAM page.
Navigate to Users and click Create User. For the User name, enter Atlantis or any name that you like. Then click on Next.

For permissions options, choose Attach policies directly.
For permissions policies, search for s3 and select AmazonS3FullAccess policy.

Again search for ec2full and select AmazonEC2FullAccess policy. Then click on Next.

Now just review the details and policies and click Create user.

Click on the name of the user and navigate to the Security credentials section.
Under Access keys click on Create access key.

For Use case select Command Line Interface(CLI), and select the confirmation and click Next.

Leave the Description tag and click on the Create access key.

Copy the both Access key and Secret Access key and save it somewhere else. We will use them later in this tutorial.

Run the following command in your EC2 server to get into the Atlantis docker container to configure the AWS.
docker exec -it atlantis /bin/shInside the container run this command to edit the AWS credentials.
vi /home/atlantis/.aws/credentialsAdd the below contents into the credentials file and save it.
[default]aws_access_key_id = <ACCESS-KEY>aws_secret_access_key = <SECRET-KEY>
Change the following values in the above code
-
ACCESS-KEY: Access key ID of the AWS IAM user -
SECRET-KEY: Secret Access key ID of the AWS IAM user
Note: If you have many profiles you can make entries accordingly in the above file and use it in the Terraform
Configuring webhooks in GitHub Repository
Open your GitHub repository which you’re gonna use it your terraform code repo. Go to Settings –> webhooks –> Add webhook.

-
Set Payload URL to
http://$URL/events, where$URLis the Public IP of the EC2 instance where Atlantis is hosted. Be sure to add/events -
double-check you added
/eventsto the end of your URL. -
Set Content type to application/json.
-
Set Which event would you like to trigger this webhook? to Let me select individual events.

only select the following things and leave others unchecked.
- Issue comments
- Pull request reviews
- Pull requests
- Pushes

Make sure the Active is checked and Click Add webhook.

Now as you can see the Webhook has been added successfully.

Create a terraform code with S3 as the backend
Copy the Clone HTTPS URL of your GitHub repository.

Clone the GitHub repo in your local machine.

Open the cloned repository folder with VS code.
Create a new file called main.tf
Copy the below code and paste it in the main.tf file.
############ PROVIDER BLOCK ############
provider "aws" {
region = "<EC2-REGION>"
profile = "default"
}

############ SAVING TF STATE FILE #########
terraform {
backend "s3" {
bucket = "<S3-BUCKET>"
key = "atlantis/terraform.tfstate"
region = "<S3-REGION>"
profile = "default"
}
}

################# EC2 INSTANCE CREATION #########
data "aws_ami" "ubuntu" {
most_recent = true

filter {
name = "name"
values = ["ubuntu/images/hvm-ssd/ubuntu-focal-20.04-amd64-server-*"]
}

filter {
name = "virtualization-type"
values = ["hvm"]
}

owners = ["099720109477"] # Canonical
}

resource "aws_instance" "web" {
ami = data.aws_ami.ubuntu.id
instance_type = "t2.micro"

tags = {
Name = "terraform-atlantis"
}
}
Change the following values in the above code:
-
EC2-REGION: the region where the resource needs to be created. -
S3-BUCKET: Name of the S3 bucket for terraform S3 backend. This bucket should be created before you get into this tutorial. -
S3-REGION: The region name where the S3 bucket is present.

Open the terminal in the same folder and run the following commands to push the terraform script to the GitHub repository.
git add *
git commit -m "Create EC2 Instance"
git checkout -b develop
git push origin develop

To verify this Go to the repository page in the browser and switch to develop branch and you can see the main.tf file is present in the develop branch.

Test the Terraform Atlantis workflow
Under the Pull requests section, Create a pull request by clicking New pull request.

Make sure the compare branch is develop.
Click on Create pull request.

Add a title for your pull request and Click the Create pull request button.

After a couple of seconds, it will write a command like Show Output. Expand the output to see the detials.

It will show the terraform plan details of what services are going to be created. Every time you create a pull request it shows a planned output of the terraform. You should verify that to know about what exactly is gonna happen.

Once you have verified the planned output, Add a comment in that pull request with the following command.
atlantis apply -d .
Then click on the Comment button.

Once you have added the apply comment, Atlantis will execute terraform apply to create resources.

If the resource creation in completed successfully, Atlantis will merge the Pull request automatically.

To verify that Atlantis created resources successfully open your AWS console and go to the EC2 section. You can able to see the new EC2 instance will be created by the Atlantis server that you mentioned in Terraform.

Navigate to the AWS S3 console and open your S3 bucket which you have configured your terraform S3 backend.
You can find a state file created in the S3 bucket as terraform.tfstate.

Conclusion
From this demo, you will learn about what is Atlantis and how it works with Terraform to manage the workflow of managing cloud resources with Version control systems.
One of the major uses of Atlantis is It will lock the state file while a pull request uses it. this feature will enable the security to prevent multiple users from using the same state file and getting it collapsed.
I hope you enjoyed this tutorial and learned a new and exciting tool. See you soon with another tutorial. Happy learning!


hi when i run container from the given Dockerfile ,container exists and not running up
Can you share the error message?