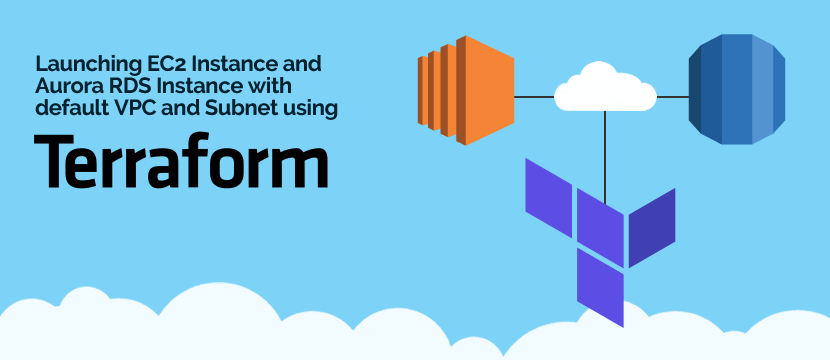
Previously, we’ve covered an article on the steps of Setting up RDS Autoscaling in AWS in 15 minutes. Now, in this article, we’ll cover the step by step tutorial for launching EC2 Instance and Aurora RDS Instance with a default VPC and Subnet using Terraform.
If you are looking for the steps to launch EC2 Instance and Aurora RDS Instance with the default VPC and Subnet using terraform, this blog will help you. Here, in this blog, we will explain how to set up AWS EC2 instance and Aurora RDS instance using terraform. Note that Terraform is capable of working in many environments but here I’m choosing Amazon Web Services (AWS).
Tutorial on Launching EC2 Instance and Aurora RDS Instance with Default VPC and Subnet using Terraform
Follow this step by step tutorial and launch your EC2 instance and Aurora RDS instance with default VPC and Subnet using Terraform.
Step 1: Setting up an AWS account and creating an IAM user.
This first step is to create an account or if we already have an account, we need to Sign In. You can use the following link to log into your AWS account.
# https://aws.amazon.com/
Step 2: Creating an IAM User.
Once logged into the AWS account, we need to create an IAM user. This can be done by following the steps below:
Services→ Security, Identity, & Compliance→ IAM→ Users→ Create User
We need to attach the policies while creating a user (required policies can also be added or deleted after creating the user). Here I’m going to launch an EC2 instance and Aurora RDS instance, so I’m attaching the following policies with the user.
AmazonEC2FullAccess

AmazonRDSFullAccess
Step 3: Access Keys and Secret Keys
While creating a user, make sure to download the Access Key and Secret Key and keep it safe because Terraform identifies the User account with those 2 keys. In case you lose the keys, there is no other way to create a new user.
Step 4: Launching a base Instance
To make the terraform to work, we need to launch an AWS EC2 instance with the minimum configuration from which we need to initialize Terraform to launch the resources and then SSH into the instance and switch to root.
Also Read: How to Setup Cloudflare CDN?
Step 5: Downloading and Installing terraform
Once the server has launched SSH into the server and then download the terraform based on your distribution system by clicking the below link:
| https://www.terraform.io/downloads.html |
After downloading terraform we need to unzip it and have to update the PATH environment variable if you are going to install the terraform other than the path /usr/local/src. Here I’m going to use the path /usr/local/src and Linux 64 bit distribution.
# cd /usr/local/src #wget https://releases.hashicorp.com/terraform/0.12.6/terraform_0.12.6_linux_amd64.zip # unzip terraform_0.12.5_linux_amd64.zip # mv terraform /usr/local/bin/ |
Now we need to execute the following command to make the terraform binary to work from anywhere from the server to proceed.
# ln -s /usr/local/src/terraform /usr/bin/terraform
|
Terraform installation can be verified by entering the following command in CLI.
# terraform
|
You will get a screen like the one which is given below:
The common commands are the one which we have to execute with Terraform, the most commonly used commands are:
# terraform init (to initialize terraform in any directory which we are creating) # terraform plan # terraform apply |
Step 6: Terraform Codes
Terraform code is generally written in HashiCorp Configuration Language (HCL) and this code is very efficient in building infrastructure and hence it’s also called infrastructure as a code language. The terraform code file is saved as .tf extension files, it is capable of integrating many numbers of .tf files so there is no need for us to create the modules in a single file.
Step 7: Terraform Provider.tf file
The first step in using terraform is to configure the providers which we want to create. The following is my provider file and I’m saving it as provider.tf file.
provider "aws" {

  region = var.region

  access_key = var.access_key

  secret_key = var.secret_key

}
|
In this provider, file tells the Terraform that I’m going to use AWS provider. And I’m going to define the region in which the Terraform has to launch the instance and the account in which it has to launch the Terraform uses access_key and secret_key.
Note that in the above provider file, I’ve declared the parameters as variables which the terraform can identify using var prefixed before the argument.
Step 8: Terraform Variables.tf file
To make the terraform identify which parameters are variables, we have to save them in the file variables.tf. The contents of the variables.tf file is given below:
variable "region" {

description = "AWS region"

}

variable "access_key" {

description = "AWS access_key "

}

variable "secret_key" {

description = "AWS secret_key"

}

variable "image_id" {

description = "AWS image_id"

}

variable "db_name" {

description = "RDS db_name"

}

variable "db_username" {

description = "RDS db_username"

}

variable "db_password" {

description = "RDS db_password"

}

variable "availability_zone" {

description = "AWS availability_zone"

}

variable "instance_type" {

description = "AWS instance_type"

}

variable "rds_instance_identifier_name" {

description = "RDS instance_identifier_name"

}

variable "rds_cluster_identifier_name" {

description = "RDS cluster_identifier_name"

}
|
Here, I’ve declared those parameters as environmental variables (for which we need to provide the Parameters during execution) and we can add a description for our easy understanding and convenience.
Step 9: Terraform ec2.tf resource
For each provider, there are different kinds of resources we need to create such as a server, RDS, load balancer, etc., The contents of my ec2.tf files are:
# Create an EC2 instance

resource "aws_instance" "web" {

  ami        = var.image_id

  instance_type = var.instance_type

  key_name = "${aws_key_pair.test.key_name}"

  availability_zone = var.availability_zone

  associate_public_ip_address = true

  #disable_api_termination = true

  security_groups = ["${aws_security_group.web.name}"]

  #source_dest_check = false

tags = {

Name = "test"

}

}

resource "aws_eip" "web-1" {

instance = "${aws_instance.web.id}"

vpc = true

  tags = {

Name = "test instance ip"

}

}
|
Here, in my EC2 instance creation module, I’ve declared the image id, instance type, availability zone as environmental variables, and the ‘$’ before the variable parameters indicate that it will fetch the value from the already created parameter (which are called dependencies).
Also, we can create and attach tags to the ec2-instance which we can do that by providing it in the tags modules. The aws_eip resource is used to create an Elastic IP and attach it to the created EC2 instance. While launching an instance we need to attach a security group with the instance which specifies Inbound and Outbound rules, The security Group file is given below and I’ve saved it as secure.tf
##Defining security group for Web

    resource "aws_security_group" "web" {

    name = "terraform security group"

    description = "Accept incoming and outgoing connections."

    ingress {

    from_port = 80

    to_port = 80

    protocol = "tcp"

    cidr_blocks = ["0.0.0.0/0"]

    }

    ingress {

    from_port = 443

    to_port = 443

    protocol = "tcp"

    cidr_blocks = ["0.0.0.0/0"]

    }

   ingress {

    from_port = 20

    to_port = 21

    protocol ="tcp"

    cidr_blocks = ["0.0.0.0/0"]

    }

    ingress {

    from_port = 13000

    to_port = 13100

    protocol = "tcp"

    cidr_blocks = ["0.0.0.0/0"]

    }

    ingress {

    from_port = 22

    to_port = 22

    protocol = "tcp"

    cidr_blocks = ["0.0.0.0/0"]

    }

     egress {

    from_port   = 0

    to_port     = 0

    protocol    = "-1"

    cidr_blocks = ["0.0.0.0/0"]

    }

   # vpc_id = "${aws_vpc.myVpc.id}"

    tags =  {

    Name = "terraform"

    }

    }
|
Ingress specifies the inbound rules and Egress specifies the outbound rules. Here for inbound, I allowed ports 20-21, 13000-13100, 443, 80, 22 and for outbound all ports.
In order to give SSH access to the EC2 instance, it’s advisable to generate and add a public key to the default user’s authorized key file. For this, I’ve created a file called key.tf and find the contents of the file below:
resource "aws_key_pair" "test" {

  key_name = "test.pem"

  Public_key = "ssh-rsa HGnQd6w5YPTQIttrAO+v2NERbkaSSJpAkbfvMA
FoXLjg8mFqWoQQzUSRFXIB7sIcPIFPzCdmiPWMJWTMVY
lDyIiCI+BK8E4vbMB4c1wuS7/uDkQCyKH2lbgcIYu+RRHnrLm
R8jtdg2f3Nqu8IIXCrO19xf62Vh+pWMsQ7l5a0BL11NA163fIr
CnG8xNSw3Q/qQ/zOWmfLnx/ test@server1"

}
|
Note: Adding the above file as such will not work for you so please add your generated key in the public_key.
Step 10: Terraform Aurora RDS creation rds.tf
I’m informing the Terraform to launch Aurora RDS 5.6 Cluster and instance with default VPC and custom security group. I’ve declared the cluster identifier name, master database name, username, and password as an environment variable and I’ve given the instance class as default value as db.t2.small.
resource "aws_rds_cluster" "aurora_cluster" {

cluster_identifier         = var.rds_cluster_identifier_name

database_name              = var.db_name

master_username            = var.db_username

master_password            = var.db_password

backup_retention_period    = 7

preferred_backup_window    = "02:00-03:00"

vpc_security_group_ids     = ["${aws_security_group.rds_sg.id}"]

skip_final_snapshot        = true

}

resource "aws_rds_cluster_instance" "aurora_cluster_instance" {

availability_zone =  var.availability_zone

cluster_identifier = "${aws_rds_cluster.aurora_cluster.id}"

instance_class     = "db.t2.small"

publicly_accessible   = true

identifier         = var.rds_instance_identifier_name

}

################# RDS SECURITY GROUP ##################

resource "aws_security_group" "rds_sg" {

 name = "myrds-sg"

  description = "RDS Terraform MySQL Security Group"

 ingress {

from_port = 3306

to_port = 3306

protocol = "tcp"

   security_groups = ["${aws_security_group.web.id}"]

   }

  egress {

from_port   = 0

to_port  = 0

protocol = "-1"

cidr_blocks = ["0.0.0.0/0"]

  }

tags =  {

Name = "TERRA_RDS_SG"

}

}
|
Once the Aurora RDS instance is launched, it will be attached with the RDS created Security group named TERRA_RDS_SG
Step 11: Terraform init
The terraform binary consists of basic, it does not come with the code for any providers. So, in order to use Terraform, we need to first initialize the terraform in the directory where we have saved our .tf extension files which tells the terraform to Scan the codes, figure out the providers we are using and download the code for them. To initialize terraform run the following command:
# terraform init
|
Once the terraform initialization is done, it will download the provider code-named .terrraform folder into our present working directory.
Step 12: Terraform Plan
Once the terraform provider code is downloaded, we need to run the following command:
# terraform plan
|
The plan command will help us to see what terraform will do before actually doing it, so it will help us to make any changes to the codes.
Step 13 Terraform apply
To create the resources which we have actually done in the codes, we need to run the following command
# terraform apply To Auto apply directly, run the following command # terraform apply --auto-approve |
This command will show the same output as plan but it will ask us to continue with our plan so type “yes” to intimate the terraform to create the resources in my case. It will launch an EC2 instance and an Aurora RDS instance.
Final Words
Thus we have successfully deployed EC2 Instance and Aurora RDS instance with default VPC and Subnet using Terraform. Hope this tutorial helped you to launch the EC2 instance along with Aurora RDS instance with default VPC and Subnet using Terraform. Don’t forget to share your experience of implementing this tutorial in the comment section below.
If you have any questions regarding this tutorial, just put a comment below and we’ll respond back to you.

