Introduction
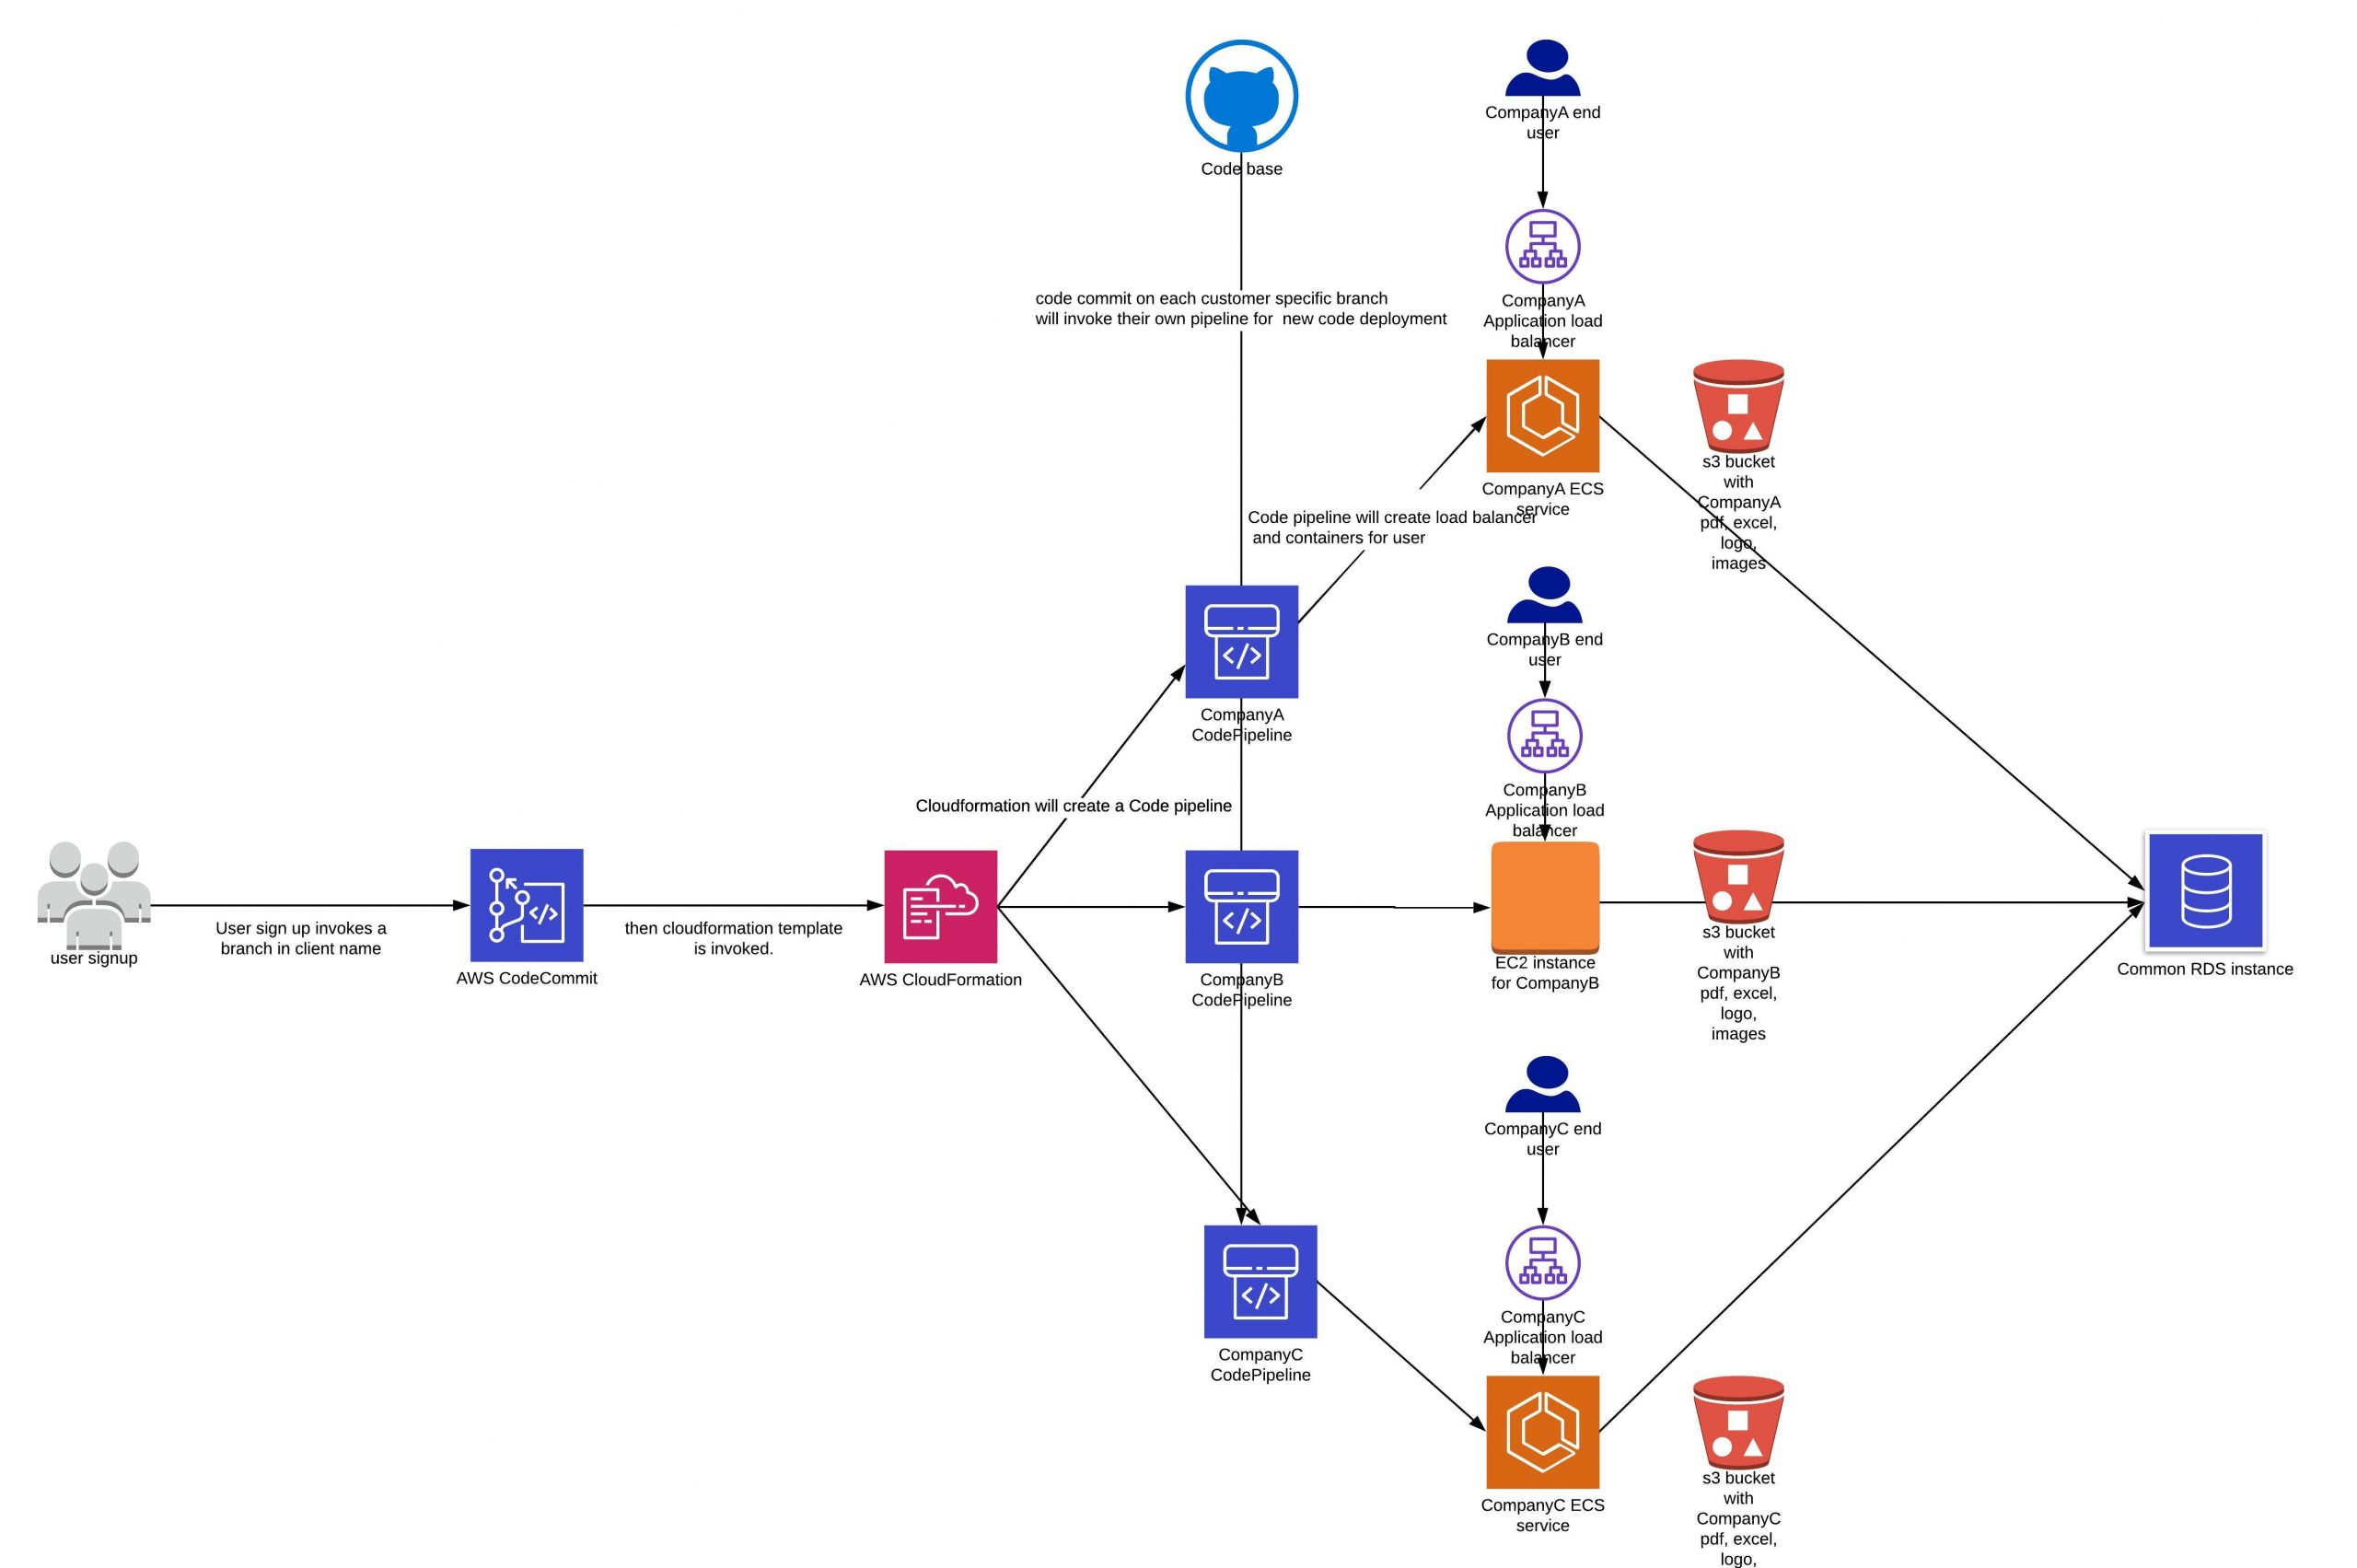
We came upon a requirement from one of our client stating that when their customers registers with their application they should have automated the SAAS platform which should launch a EC2 instance to host their web application that should be under Elastic Load Balancer and their database should be in RDS and as well as each customer should be provided with a subdomain and automated code deployment. So, we decided to choose Multi Tenant SAAS architecture with instance isolation and implemented the same. You can contact us if you have any similar requirement with either docker or EC2 isolation.
Prerequisites
- AWS account.
- In the AWS Account Create an IAM Role with AWSCodeDeployRole
- Client’s SAAS Domain Name should be registered and their Corresponding NS records should be pointed to Route53.
- Code base should be either in any of the following version control tools such as AWS CodeCommit, GitHub or BitBucket
Wildcard SSL Certificates for the main domain should be purchased/imported on Amazon Certificate Manager (ACM).
The Architecture:
How we did it
Launching EC2 instance
I have launched an EC2 instance with the configuration T2 Micro,30GB HDD and with base OS Ubuntu 18.04, The EC2 instance should be installed with angular setup, codedeploy-agent and EC2 instance should be assigned with IAM Role with full Permissions (not getting into too much on IAM role as it is not in scope of this blog).
Angular Installation
- For Angular Installation which we have done already in the instance and if you have any doubts regarding the installation kindly refer the below link
Code-deploy-agent installation
- For codedeploy-agent installation SSH into the EC2 instance and run the below commands
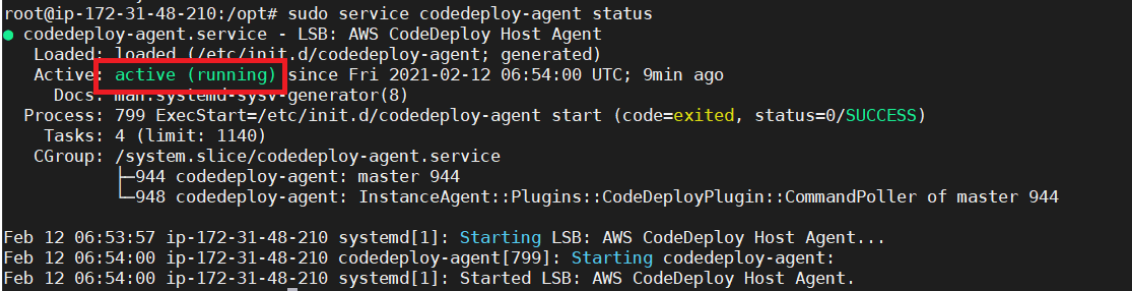
 sudo apt-get update

 sudo apt-get install ruby -y

 sudo apt-get install wget

 cd /home/ubuntu

 wget https://aws-codedeploy-us-east-1.s3.amazonaws.com/latest/install

[Note: In the above URL replace us-east-1 with your region].

 chmod +x ./install

 sudo ./install auto

 sudo service codedeploy-agent start

 sudo service codedeploy-agent status
The status of the Codedeploy-agent should be up and running as shown in the below screenshot.
- My Client’s Code base is in AWS CodeCommit which I have cloned inside the EC2 instance which I have launched in the directory path /var/www/html
- After cloning now Create a directory named scripts inside the directory /var/www/html using the below command
mkdir -r /var/www/html/scripts
- Create a bash script file named before_install.sh inside the directory /var/www/html/scripts with the following content which will remove the old modules packages and old build files.
#!/bin/bash
cd /var/www/html
rm -rf nodemodules
rm -rf dist
- Create another bash script file name after_install.sh inside the directory /var/www/html/scripts with the following content.
#!/bin/bash
cd /var/www/html
npm install
ng  build --prod
- Now we have created an appspec.yml inside the directory /var/www/html with the following content as shown below and the purpose of this appspec.yml is for pulling the changes in the repo to our running EC2 instance automatically whenever there is a change in the repo.
version: 0.0
os: linux
files:
  - source: /
    destination: /var/www/html
    overwrite: true
permissions:
  - object: /
    pattern: "**"
    owner: apache
    group: apache


hooks:
  BeforeInstall:
     location: scripts/before_install.sh
      timeout: 300

  AfterInstall:
    - location: scripts/after_install.sh
      timeout: 300
- Now you need to commit the changes in the directory /var/www/html and push the changes to the remote master repo
- Taken AMI of the EC2 instance after installation of Angular setup and cloning the codebase from AWS CodeCommit creation of those appspec.yml,before_install.sh and after_install.sh files.
Now, we have launched EC2 instance, installed angularjs on the instance that will be running the application. Setup codedeploy agent and configured it with angularjs build steps.
That’s it for Part 1. Please click on Building Multi Tenant SAAS application in AWS (Fully automated): Part2 for next steps.


