In this article, we are going to learn about how to create an instance using Instance templates in Google Compute Engine on Google Cloud Platform. It will be a step-up step process for creating an instance template.
Let’s get into this article and learn about the Creation of Instance templates. Stay tuned here, we will keep publishing a lot more articles on Google Cloud.
Before starting to learn this article I would recommend you to have a look at our previous blog on “How to create a Instance in Google Compute Engine?” to have a better understanding of VM creation.
What is an Instance Template?
Let’s say if you want to create an instance in Compute Engine. The first thing you will be creating an Instance is by selecting the Machine type, Region, Zone, Boot disk, Network, and enabling the Firewall.
To avoid the above steps and to create your instances even more easily you have to create an Instance Template. When you create an Instance Template, you can define the machine type, image, the labels, startup script, and a lot of other properties related to your virtual machine.
Thereafter, you can use this Instance Template to launch a virtual machine and also by using this instance template you can also launch a group of virtual machines known as Instance groups.
Once you create an Instance template, you cannot change it. Rather than you can make a copy of the existing template and by changing it you can create a new version of the instance template.
Steps for Creating an Instance Template
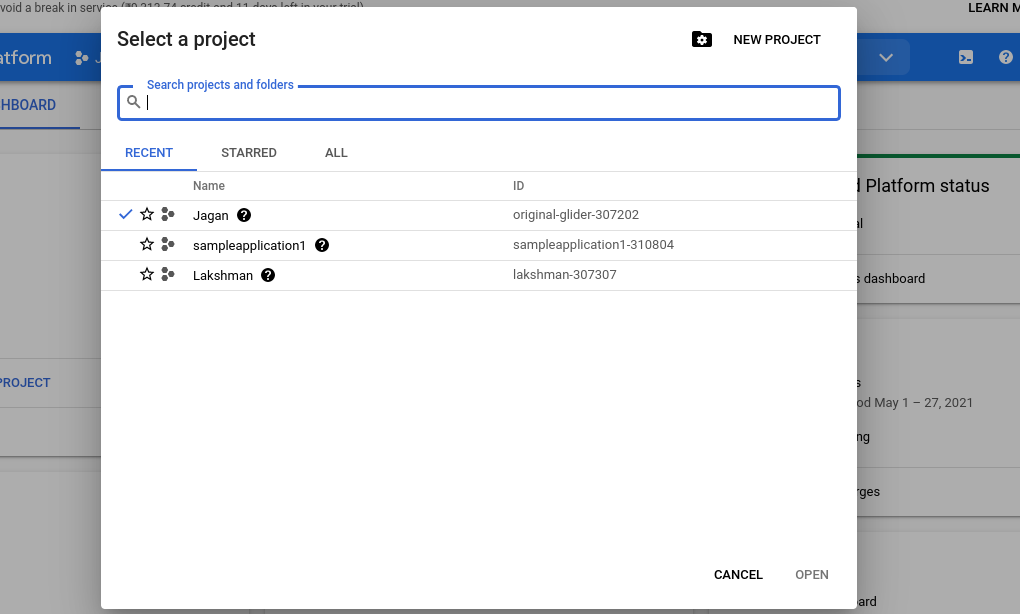
The first thing you have to do is login to the Google Cloud Console and create a new project for your testing purpose. In the below screen you need to click on the new project icon at the right.
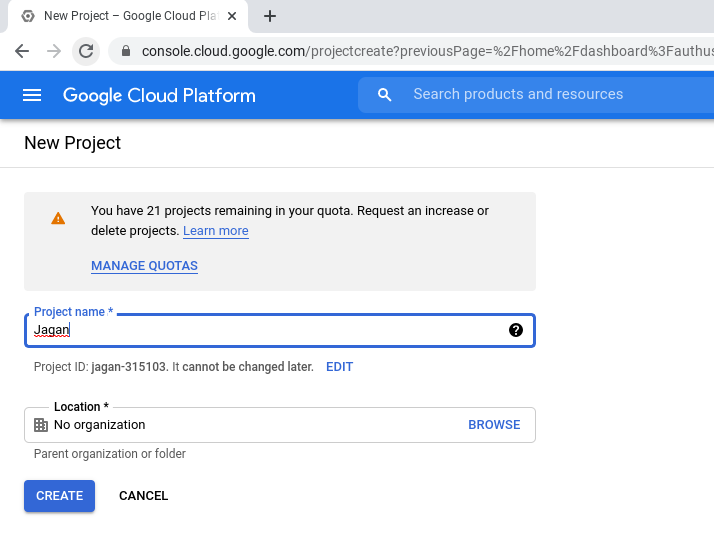
After clicking on the new project icon you will get the screen below. Here, you need to enter your project name and click on the create icon.
Selecting a instance templates
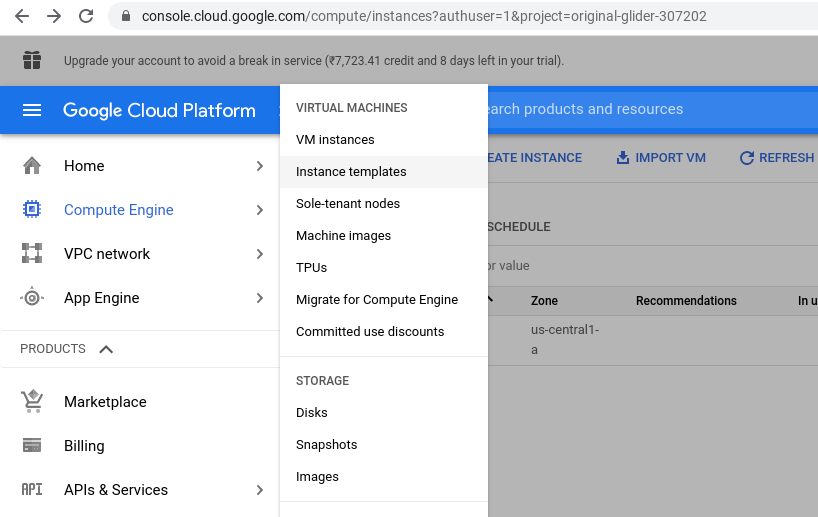
After the successful creation of the project, you need to click on the navigation menu and select the instance templates from the Compute Engine tab. In the below screen you can see how to select the instance template from Google Cloud Platform.
Creating a Instance Template
In the below screen you see the UI of Instance template and now you have to select the create an instance template icon to enter the details of your configuration.
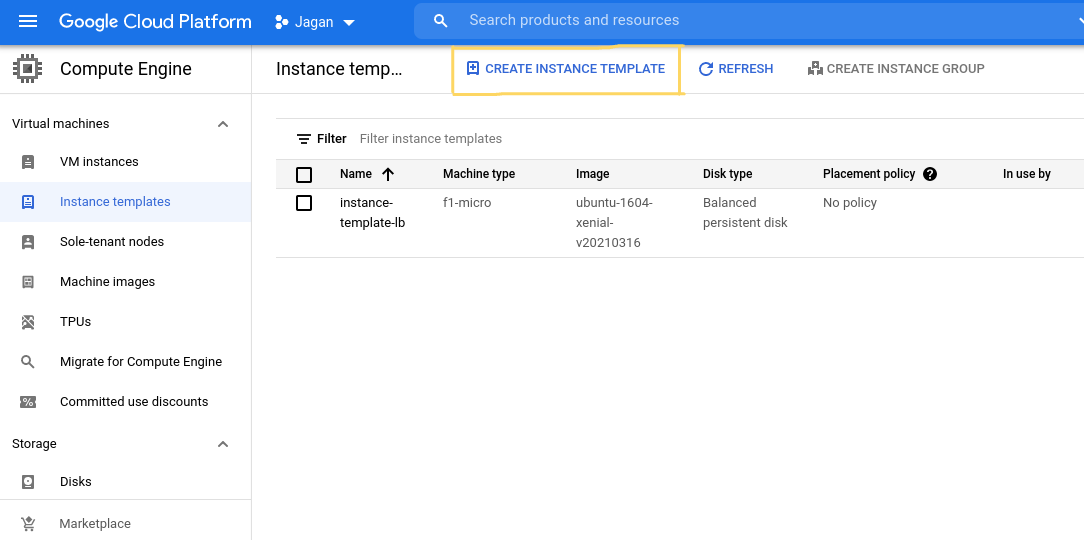
After clicking on that icon, you will get the screen below for entering the name of the instance template, Machine configuration specifically for machine family, series and machine type.
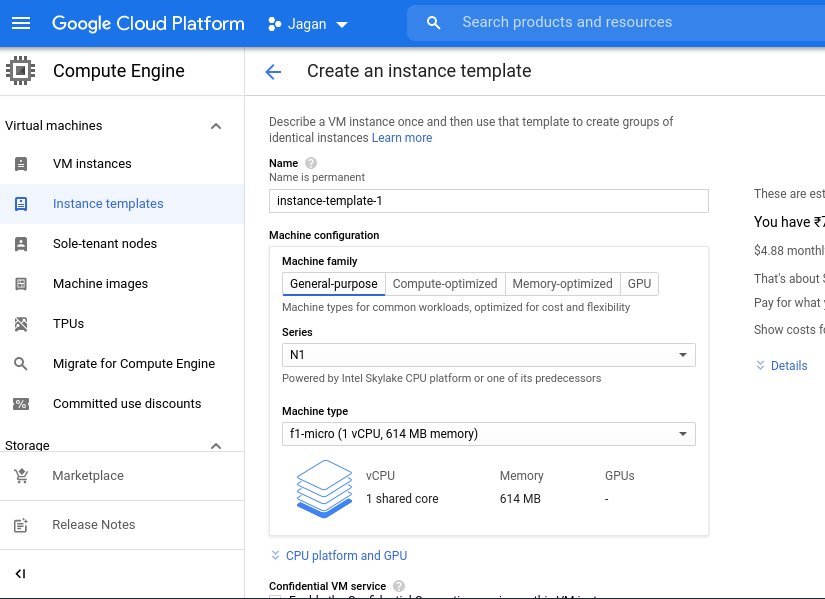
After selecting the Machine configuration you need to select the type of boot disk or an operating system which is convenient for your upcoming projects. And also you need to enable the firewall for that instance.
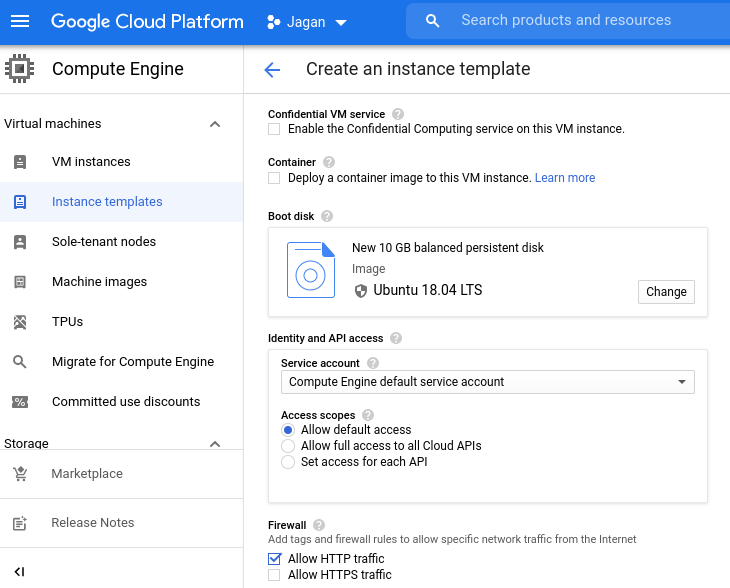
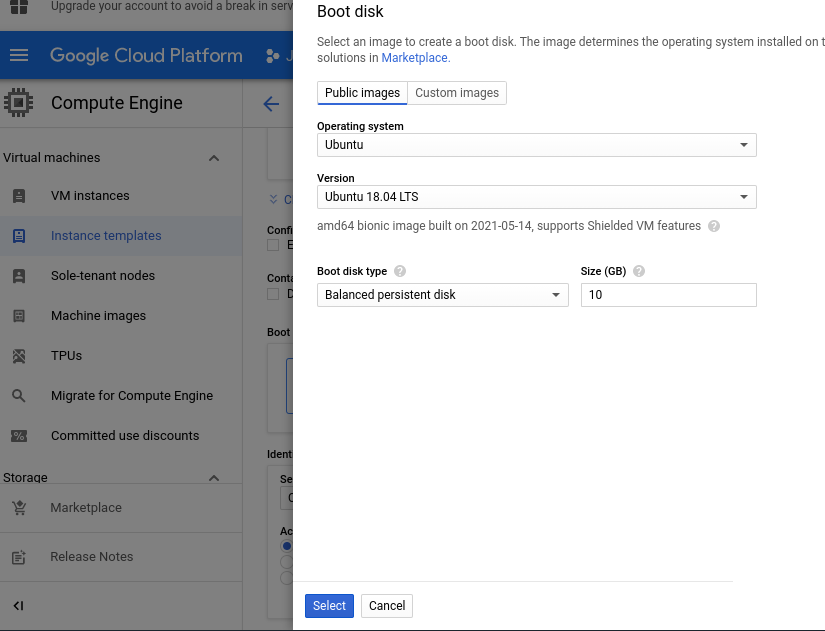
In the below screen you can see how to select the boot disk and the Operating System for your instance template. Then finally click on the select icon to select that particular disk.
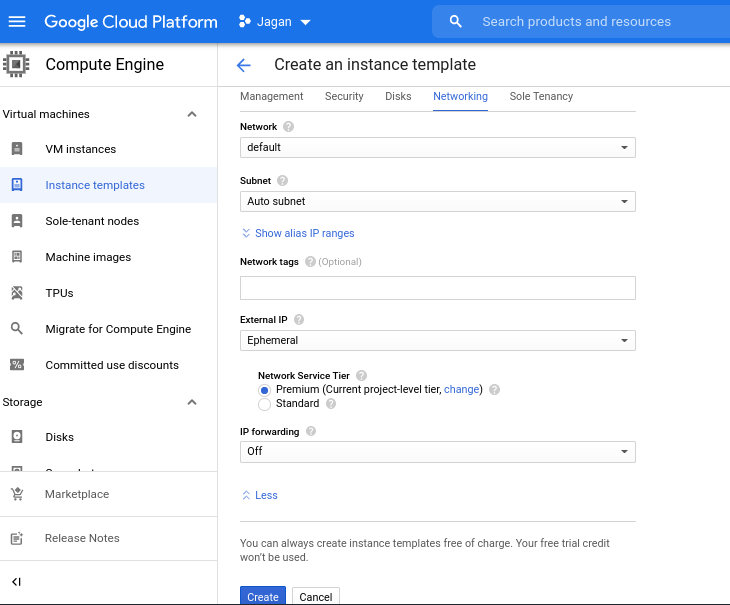
After selecting the boot disk you need to select the networking configuration by expanding the management and networking tab. Then finally click on the create button at the last to create an instance template.
Therefore, In the below screen you can see that the instance template has been successfully created. The main thing about this is there is no cost associated with this instance template. However, when you create instances using this instance template, then you need to pay for it.
Now, If you want to create an instance using this specific instance template. Simply, you need to click on the three dots at the right and then select Create VM tab to create a VM.
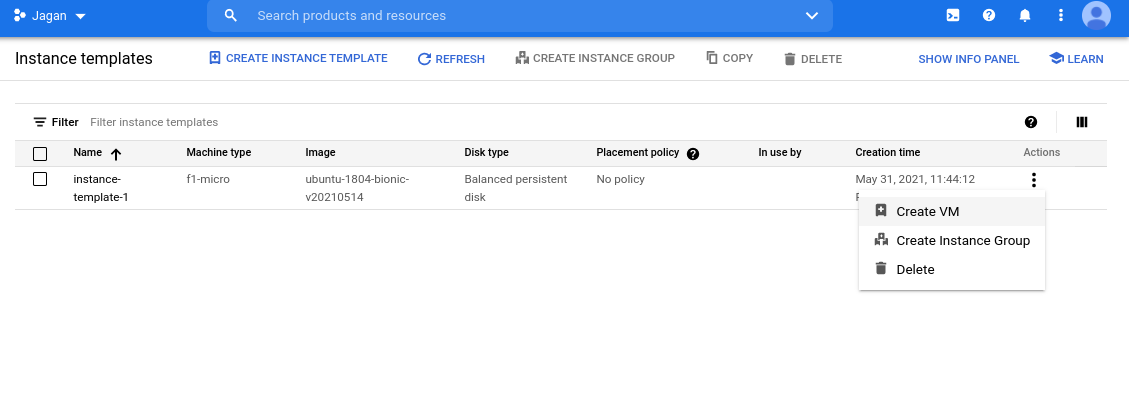
Creating a VM using the instance template
After clicking on the Create VM it will take you to the instance page where you can give your instance name and specify the Region, zone for the instances. After that click on the create button at the last to create an instance using the instance template.
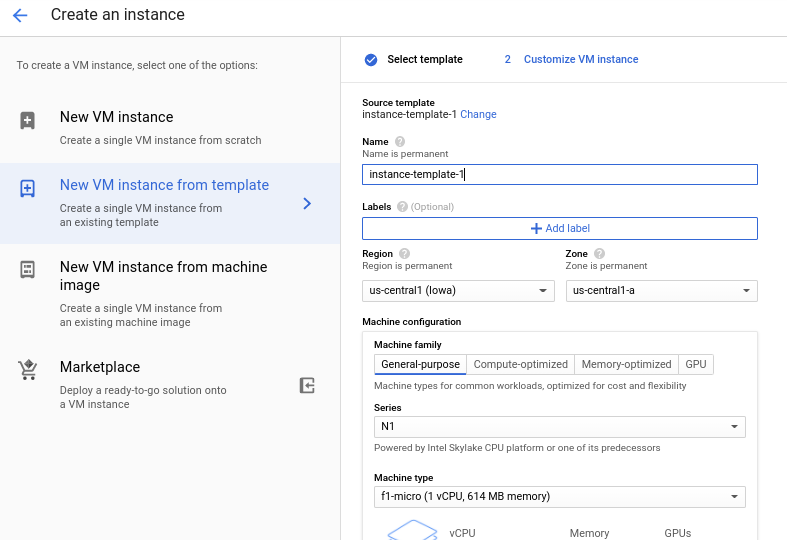
Instance Created successfully
After clicking on the create button in the instance template page. You can see that the instance has been created successfully.
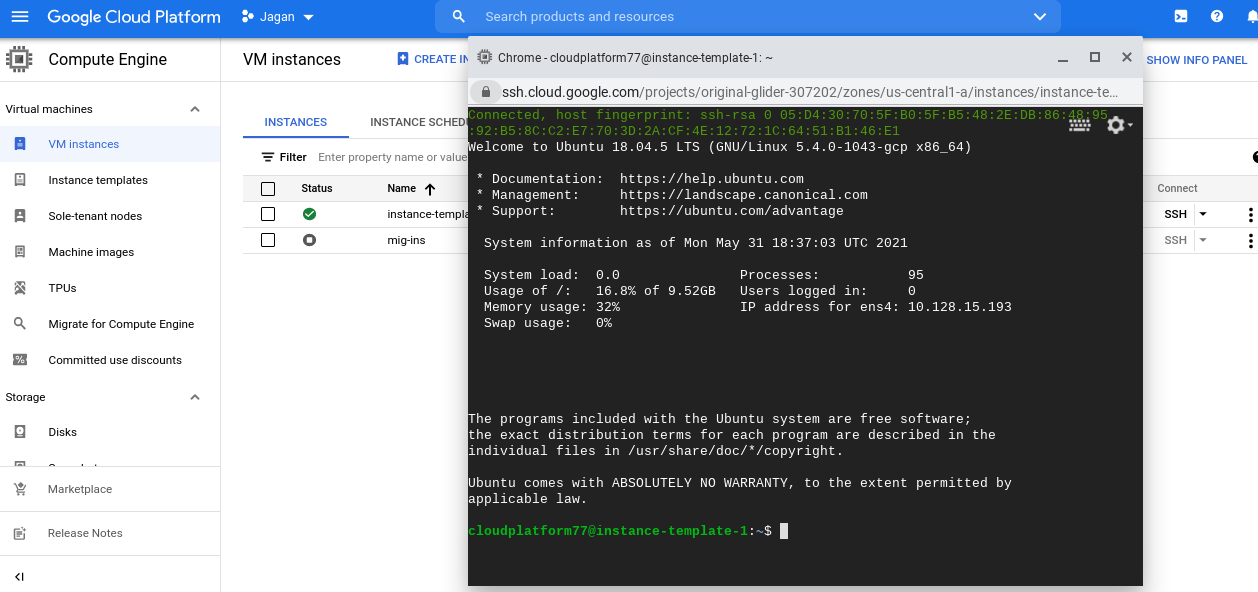
If you want to check that instance is working fine, then you can click on the SSH button at the right to log into your Operating system.

In the below screen you see that the ssh of the specific instance is working fine when you ssh into the instances.
Conclusion
Therefore, Instance template is the best way to save the VM configuration and also you can create a VM even more easily by using the instance template as well as it saves time. I hope this article will help you in getting started with creating a VM by using an instance template.
In the next blog, we are going to publish a few more Google Cloud articles in the coming week. Till that stay tuned with us!!
Happy Learning!!


